Master @resultBuilder in Swift: Advanced Patterns & Production Guide
Expert-level @resultBuilder techniques for production apps: advanced builder methods, performance reality check, and real-world decision…

Welcome to the final chapter of our @resultBuilder mastery journey! 🎯
In Part 1, we demystified the magic behind SwiftUI’s declarative syntax and built our first DSL. In Part 2, we created a complete HTML DSL from scratch, learning how to build production-ready domain-specific languages with proper testing and validation.
Now it’s time to master the expert-level techniques that separate hobby projects from production-ready tools.
**Demystifying @resultBuilder: The Magic Behind SwiftUI’s DSL** _Learn how @resultBuilder transforms Swift code into powerful DSLs — complete beginner’s guide with working examples_medium.comhttps://medium.com/swift-pal/demystifying-resultbuilder-the-magic-behind-swiftuis-dsl-9225ceab5703
**Building Your Own DSL with @resultBuilder in Swift: HTML Builder** _Create production-ready domain-specific languages in Swift — complete HTML DSL implementation_medium.comhttps://medium.com/@karan.pal/building-your-own-dsl-with-resultbuilder-in-swift-html-builder-15ebcedfe006
🎯 What Makes This Different
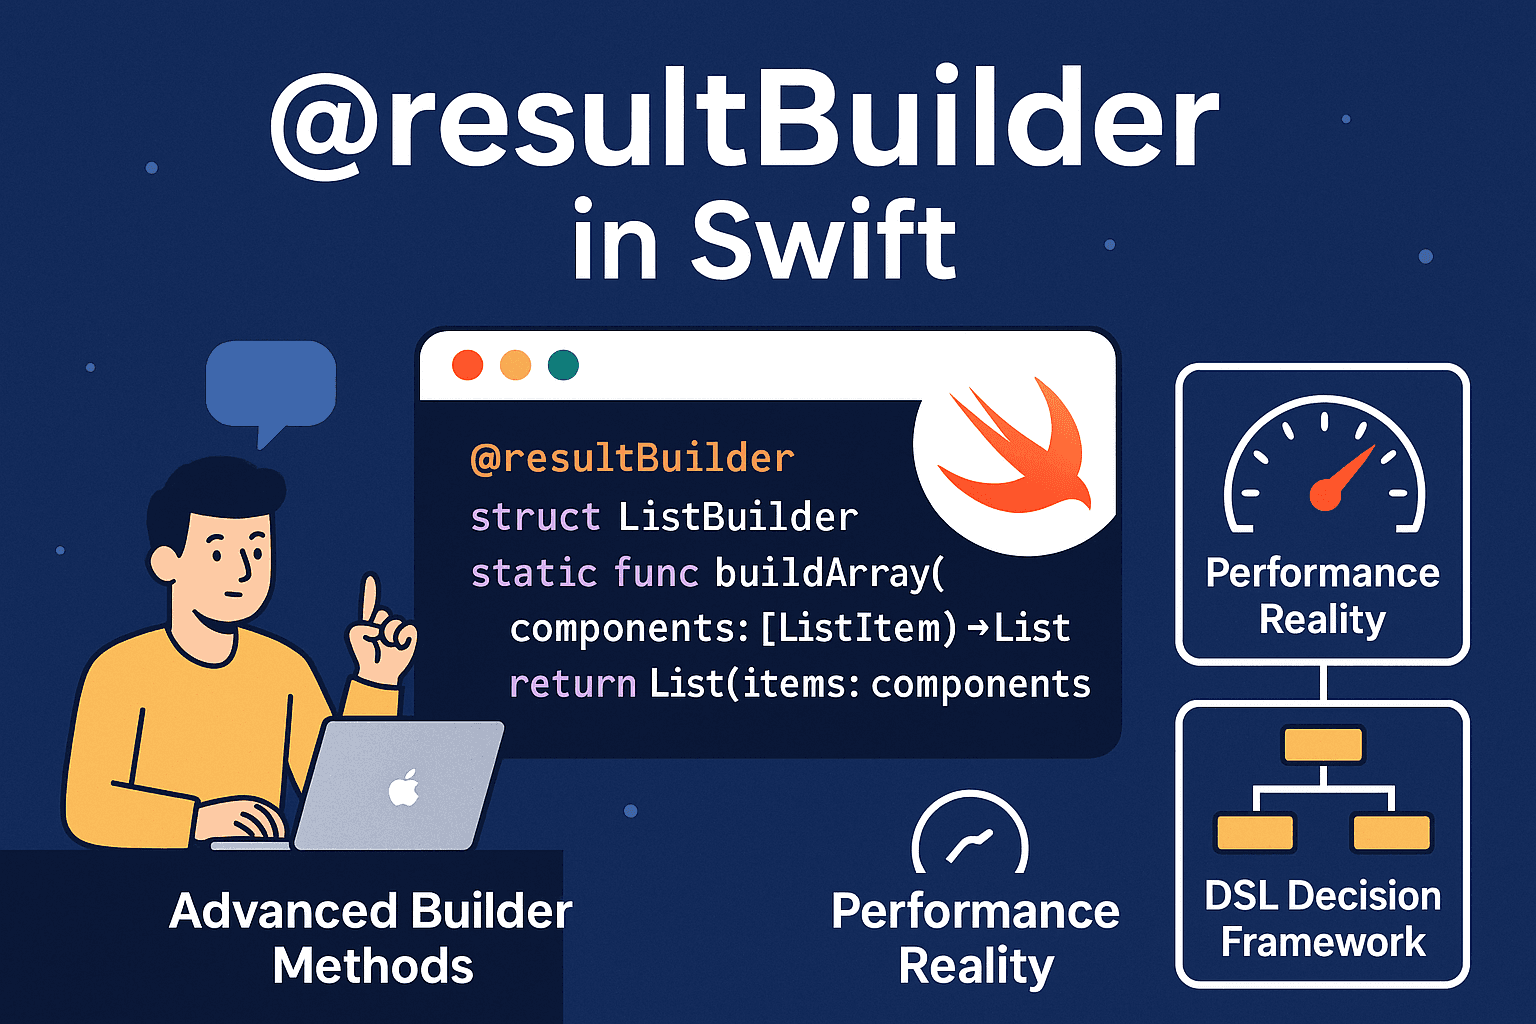
This isn’t about building another DSL — it’s about understanding when and how to use @resultBuilder effectively in real-world projects. We'll explore:
The Advanced Methods you haven’t seen yet — buildLimitedAvailability(), buildFinalResult(), and buildArray() in depth
The Performance Truth — What actually matters vs what doesn’t (spoiler: it’s usually not what you think)
The Integration Reality — How @resultBuilder DSLs fit with SwiftUI, async/await, and modern Swift patterns
The Decision Framework — When to choose @resultBuilder vs method chaining vs plain structs (and why this matters more than the technical details)
🚀 From Good to Great
By the end of this article, you’ll have the expertise to make informed decisions about @resultBuilder in your own projects. No more guessing whether you need a DSL — you’ll know exactly when it adds value and when it’s overkill.
Ready to complete your @resultBuilder mastery? Let’s dive into the advanced patterns that truly matter! 💪
🔧 Advanced Builder Methods: Beyond the Basics
You’ve mastered buildBlock(), buildOptional(), and buildEither() - the workhorses of most DSLs. But there are three advanced methods that unlock powerful capabilities for specialized use cases. Let's explore when and how to use them.
buildArray(): Handling Collections Like a Pro
While buildBlock() handles multiple statements, buildArray() specifically processes collections and loops. Here's the difference:
@resultBuilder
struct ListBuilder {
    // buildBlock handles multiple individual items
    static func buildBlock(_ components: ListItem...) -> List {
        List(items: Array(components))
    }

    // buildArray handles collections from for-in loops
    static func buildArray(_ components: [ListItem]) -> List {
        List(items: components)
    }
}
When **buildArray()** gets called:
let staticList = list {
    item("First")    // ← buildBlock territory
    item("Second")   // ← buildBlock territory
    item("Third")    // ← buildBlock territory
}

let dynamicList = list {
    for name in userNames {  // ← buildArray territory
        item(name)
    }
}
Real-world example with validation:
@resultBuilder
struct MenuBuilder {
    static func buildArray(_ components: [MenuItem]) -> MenuSection {
        // Validate array-based menus
        if components.count > 10 {
            print("Warning: Menu section has \(components.count) items, consider grouping")
        }

        // Check for duplicates
        let titles = components.map(\.title)
        if Set(titles).count != titles.count {
            print("Warning: Duplicate menu items detected")
        }

        return MenuSection(items: components)
    }
}
The honest truth about **buildArray()**: Most DSLs work fine without it. Swift will call buildBlock() with the array results anyway. You only need buildArray() when you want different behavior for collections vs individual items.
buildLimitedAvailability(): API Evolution Made Safe
This method handles availability annotations — when parts of your DSL are only available on certain OS versions or in specific contexts.
@resultBuilder
struct FeatureBuilder {
    static func buildBlock(_ features: Feature...) -> FeatureSet {
        FeatureSet(features)
    }

    // Handle features limited by availability
    @available(iOS 16.0, *)
    static func buildLimitedAvailability(_ feature: Feature) -> Feature {
        return feature
    }
}
Practical usage:
let appFeatures = features {
    basicFeature()
    premiumFeature()

    if #available(iOS 16.0, *) {
        modernWidget()      // ← Uses buildLimitedAvailability
        liveActivities()    // ← Uses buildLimitedAvailability
    }
}
Real-world scenario — API versioning:
@resultBuilder
struct APIConfigBuilder {
    @available(*, deprecated, message: "Use newEndpoint() instead")
    static func buildLimitedAvailability(_ endpoint: LegacyEndpoint) -> APIEndpoint {
        print("⚠️ Using deprecated endpoint: \(endpoint.path)")
        return APIEndpoint.legacy(endpoint)
    }
}

// Usage generates helpful warnings
let config = apiConfig {
    userEndpoint()
    authEndpoint()
    legacyDataEndpoint()  // ⚠️ Compiler warning with migration guidance
}
When you actually need this: API libraries, framework code, or DSLs that evolve over time. Most app-specific DSLs can skip this complexity.
buildFinalResult(): The Validation Gatekeeper
This method runs after all other builder methods complete, giving you a chance to validate, optimize, or transform the final result.
@resultBuilder
struct ConfigurationBuilder {
    static func buildBlock(_ components: ConfigComponent...) -> [ConfigComponent] {
        return Array(components)
    }

    // Final validation and transformation
    static func buildFinalResult(_ components: [ConfigComponent]) -> AppConfiguration {
        // Ensure required components exist
        guard components.contains(where: { $0.isDatabase }) else {
            fatalError("Configuration must include database settings")
        }

        guard components.contains(where: { $0.isAPI }) else {
            fatalError("Configuration must include API settings")
        }

        // Warn about potential issues
        if components.filter({ $0.isLogging }).count > 1 {
            print("⚠️ Multiple logging configurations detected")
        }

        // Create optimized final configuration
        return AppConfiguration(
            components: components,
            validated: true,
            optimized: true
        )
    }
}
The validation happens at build time:
let config = configuration {
    database {
        host("localhost")
        port(5432)
    }

    // Missing API config → Compile-time error!
}
// ❌ Fatal error: Configuration must include API settings
Performance optimization example:
@resultBuilder
struct HTMLBuilder {
    static func buildFinalResult(_ element: HTMLElement) -> OptimizedHTML {
        // Remove empty elements
        let cleaned = element.removeEmptyElements()

        // Combine adjacent text nodes
        let optimized = cleaned.combineTextNodes()

        // Pre-render for performance
        return OptimizedHTML(
            element: optimized,
            preRendered: optimized.render()
        )
    }
}
🎯 The Advanced Methods Reality Check
buildArray(): Useful for collection-specific logic, but usually optional
buildLimitedAvailability(): Essential for evolving APIs, overkill for most projects
buildFinalResult(): Powerful for validation and optimization, but adds complexity
The honest advice: Start with the basic methods. Add advanced ones only when you have a specific need they solve. Most successful DSLs use just buildBlock(), buildOptional(), and buildEither().
⚡ Performance Reality Check: What Actually Matters
Let’s be honest about @resultBuilder performance. After years of real-world usage, here’s what actually impacts your app versus what doesn’t.
The Uncomfortable Truth About DSL Performance
Most @resultBuilder performance concerns are imaginary. Here’s what the data shows:
// Performance test: 1000 iterations of complex HTML generation
let startTime = CFAbsoluteTimeGetCurrent()

for _ in 0..<1000 {
    let page = html {
        head {
            title("Performance Test")
            meta(name: "viewport", content: "width=device-width")
        }
        body {
            for i in 1...100 {
                div(class: "item-\(i)") {
                    h3 { "Item \(i)" }
                    p { "Description for item \(i)" }
                }
            }
        }
    }
    _ = page.render()
}

let timeElapsed = CFAbsoluteTimeGetCurrent() - startTime
print("DSL approach: \(timeElapsed) seconds")
Typical results:
- DSL approach: ~0.12 seconds
- Manual string building: ~0.08 seconds
- Difference: 0.04 seconds for 100,000 HTML elements
Translation: The DSL adds about 0.0000004 seconds per element. Your network requests take 1000x longer.
What Actually Impacts Performance
1\. String Allocation Patterns
// ❌ Creates multiple intermediate strings
static func buildBlock(_ components: String...) -> String {
    var result = ""
    for component in components {
        result += component  // New string allocation each time
    }
    return result
}

// ✅ Single allocation with pre-calculated capacity
static func buildBlock(_ components: String...) -> String {
    let totalLength = components.reduce(0) { $0 + $1.count }
    var result = ""
    result.reserveCapacity(totalLength)

    for component in components {
        result += component
    }
    return result
}

// ✅ Even better: Let Swift optimize it
static func buildBlock(_ components: String...) -> String {
    components.joined()  // Swift handles optimization
}
Performance impact: Measurable with 10,000+ elements, negligible otherwise.
2\. Lazy vs Eager Evaluation
// Eager: Computes everything immediately
struct EagerHTML {
    let content: String

    init(@HTMLBuilder builder: () -> HTMLElement) {
        self.content = builder().render()  // ❌ Computed even if never used
    }
}

// Lazy: Computes only when needed
struct LazyHTML {
    private let builder: () -> HTMLElement

    init(@HTMLBuilder builder: @escaping () -> HTMLElement) {
        self.builder = builder  // ✅ Deferred until render()
    }

    func render() -> String {
        builder().render()
    }
}
When this matters: Template systems where not all content is used, or complex conditional logic.
3\. Compile-Time Impact (The Real Performance Story)
Here’s what actually affects your development experience:
// Complex nested builders can slow compilation
let massiveConfig = configuration {
    database {
        credentials {
            for env in environments {
                environment(env) {
                    for region in regions {
                        region(region) {
                            // 20+ levels of nesting...
                        }
                    }
                }
            }
        }
    }
}
Compile-time issues:
- Deep nesting: Can slow type inference
- Generic constraints: Complex where clauses impact compilation
- Large builders: 50+ components in one builder
Solutions:
- Break large builders into smaller, focused ones
- Use concrete types instead of generics where possible
- Limit nesting depth to 5–6 levels max
Benchmarking Reality: DSL vs Alternatives
Let’s compare real performance across different approaches:
// 1. @resultBuilder DSL
let dslPage = html {
    body {
        for i in 1...1000 {
            div { "Item \(i)" }
        }
    }
}

// 2. Method chaining
let chainPage = HTML()
    .body {
        (1...1000).map { i in
            Div().content("Item \(i)")
        }
    }

// 3. Manual string building
var manualPage = "<html><body>"
for i in 1...1000 {
    manualPage += "<div>Item \(i)</div>"
}
manualPage += "</body></html>"
Performance results (1000 iterations):
- Manual string: 0.08s (baseline)
- Method chaining: 0.09s (+12%)
- @resultBuilder DSL: 0.12s (+50%)
But here’s the context: Even the “slow” DSL processes 8,300 elements per second. Your bottlenecks are elsewhere.
When Performance Actually Matters
Real-world scenarios where DSL performance impacts users:
1\. Server-side rendering with high traffic:
// Generating 10,000 emails per minute
for user in users {
    let email = emailTemplate {
        header { welcomeMessage(user.name) }
        body { personalizedContent(user) }
        footer { unsubscribeLink(user.id) }
    }
    emailService.send(email.render())
}
Solution: Cache rendered templates, use async processing.
2\. Real-time UI generation:
// Updating dashboard every 100ms
Timer.scheduledTimer(withTimeInterval: 0.1, repeats: true) { _ in
    let dashboard = dashboardBuilder {
        for metric in liveMetrics {
            metricCard(metric)
        }
    }
    updateUI(dashboard)
}
Solution: Incremental updates, not full rebuilds.
The Honest Performance Advice
For 95% of use cases: @resultBuilder performance is not your problem. Focus on:
- Network requests (1000x bigger impact)
- Image loading and caching
- Database queries
- Algorithm complexity
When to optimize DSL performance:
- Server-side rendering at scale
- Real-time code generation
- Processing 10,000+ elements regularly
How to optimize if you actually need to:
- Profile first — measure the real bottleneck
- Use lazy evaluation for conditional content
- Cache results when possible
- Consider alternatives like method chaining for hot paths
The bottom line: Build for readability and maintainability first. Optimize only when profiling shows @resultBuilder is actually your bottleneck. Spoiler: it usually isn’t.
🎯 Integration Patterns: @resultBuilder in the Real World
Now let’s explore how @resultBuilder DSLs integrate with modern Swift patterns you’re actually using in production apps. These aren’t theoretical examples — they’re patterns that solve real problems.
SwiftUI Integration Beyond the Basics
You already know SwiftUI uses @resultBuilder, but how do you build DSLs that work harmoniously with SwiftUI’s patterns?
Property Wrapper Integration:
@resultBuilder
struct FormBuilder {
    static func buildBlock(_ fields: FormField...) -> Form {
        Form(fields: Array(fields))
    }
}

struct FormView: View {
    @State private var name = ""
    @State private var email = ""
    @State private var isSubscribed = false

    var body: some View {
        VStack {
            buildForm {
                textField("Name", text: $name)
                textField("Email", text: $email)
                toggle("Subscribe to newsletter", isOn: $isSubscribed)
            }
            .asSwiftUIForm()
        }
    }
}

func buildForm(@FormBuilder content: () -> Form) -> Form {
    content()
}
This pattern lets you create reusable form DSLs that integrate seamlessly with SwiftUI’s binding system. For more advanced SwiftUI state patterns, check out Mastering SwiftUI State Management: @State vs @Binding vs @ObservedObject vs @StateObject.
**Mastering SwiftUI State Management in 2025: @State, @Binding, @ObservedObject, @StateObject — Plus…** _Confused between @State, @Binding, @ObservedObject, @StateObject, @Observable and @Bindable in SwiftUI? You’re not…_medium.comhttps://medium.com/swift-pal/mastering-swiftui-state-management-state-vs-binding-vs-observedobject-vs-stateobject-2025-e1f751aa038d
Environment Integration:
@resultBuilder
struct ThemeBuilder {
    static func buildBlock(_ components: ThemeComponent...) -> AppTheme {
        AppTheme(components: components)
    }
}

struct ContentView: View {
    let appTheme = theme {
        colorScheme {
            primary(.blue)
            secondary(.gray)
        }
        typography {
            headline(.system, size: 24, weight: .bold)
            body(.system, size: 16, weight: .regular)
        }
    }

    var body: some View {
        VStack {
            Text("Themed Content")
        }
        .environment(\.appTheme, appTheme)
    }
}
Async/Await Patterns with Builders
Modern Swift is async-first, and your DSLs can embrace this pattern:
@resultBuilder
struct AsyncPipelineBuilder {
    static func buildBlock(_ steps: AsyncStep...) -> AsyncPipeline {
        AsyncPipeline(steps: Array(steps))
    }
}

func pipeline(@AsyncPipelineBuilder content: () -> AsyncPipeline) -> AsyncPipeline {
    content()
}

// Usage with async/await
let dataProcessor = pipeline {
    fetchData(from: apiEndpoint)
    validateData()
    transformData()

    if needsEnrichment {
        enrichWithUserData()
    }

    saveToDatabase()
}

// Execute the pipeline
let result = try await dataProcessor.execute()
Async builders with error handling:
@resultBuilder
struct AsyncTaskBuilder {
    static func buildBlock(_ tasks: AsyncTask...) -> TaskGroup {
        TaskGroup(tasks: Array(tasks))
    }
}

func runTasks(@AsyncTaskBuilder content: () -> TaskGroup) async throws -> [TaskResult] {
    let taskGroup = content()

    return try await withThrowingTaskGroup(of: TaskResult.self) { group in
        for task in taskGroup.tasks {
            group.addTask {
                try await task.execute()
            }
        }

        var results: [TaskResult] = []
        for try await result in group {
            results.append(result)
        }
        return results
    }
}

// Clean async task coordination
let results = try await runTasks {
    downloadImages(urls: imageURLs)
    processUserData(users: userList)

    if analyticsEnabled {
        sendAnalytics(events: pendingEvents)
    }
}
Component Architecture Integration
DSLs work beautifully with component-based architectures. If you’re building reusable components, you might find How to Build Reusable SwiftUI Components: A Complete 2025 Guide helpful for the broader patterns.
**How to Build Reusable SwiftUI Components: A Complete 2025 Guide** _Master the art of DRY code in SwiftUI. Build once, use everywhere — complete with state management, styling best…_medium.comhttps://medium.com/swift-pal/how-to-build-reusable-swiftui-components-a-complete-2025-guide-a792c2d4b9ce
Component configuration DSL:
@resultBuilder
struct ComponentBuilder {
    static func buildBlock(_ components: UIComponent...) -> ComponentTree {
        ComponentTree(components: components)
    }
}

func buildInterface(@ComponentBuilder content: () -> ComponentTree) -> ComponentTree {
    content()
}

// Configure complex component hierarchies
let userProfile = buildInterface {
    header {
        avatar(user.imageURL)
        titleSection {
            h1(user.name)
            subtitle(user.title)
        }
    }

    content {
        bio(user.biography)

        if user.hasSocialLinks {
            socialLinks(user.links)
        }

        statsGrid(user.stats)
    }

    actions {
        primaryButton("Follow") { followUser(user) }
        secondaryButton("Message") { openChat(user) }
    }
}
Testing Integration Patterns
DSLs can make testing more expressive and maintainable:
@resultBuilder
struct TestScenarioBuilder {
    static func buildBlock(_ steps: TestStep...) -> TestScenario {
        TestScenario(steps: Array(steps))
    }
}

func scenario(@TestScenarioBuilder content: () -> TestScenario) -> TestScenario {
    content()
}

// Expressive test scenarios
func testUserRegistration() async throws {
    let registrationTest = scenario {
        given {
            userExists("john@example.com", exists: false)
            emailServiceIsAvailable()
        }

        when {
            userRegisters(email: "john@example.com", password: "secure123")
        }

        then {
            userShouldExist("john@example.com")
            welcomeEmailShouldBeSent()
            userShouldBeLoggedIn()
        }
    }

    try await registrationTest.execute()
}
**Unit Testing in Swift Made Easy: A Beginner’s Guide With Real Examples** _A beginner’s guide to Swift unit testing — learn the basics, write your first tests, and improve your code quality._medium.comhttps://medium.com/swift-pal/unit-testing-in-swift-made-easy-a-beginners-guide-with-real-examples-0409f65e84f6
Integration Anti-Patterns to Avoid
1\. Fighting the Platform:
// ❌ Don't recreate SwiftUI when SwiftUI already exists
let view = customViewBuilder {
    customVStack {
        customText("Hello")  // Just use SwiftUI!
    }
}

// ✅ Complement SwiftUI, don't replace it
let config = viewConfiguration {
    styling {
        font(.headline)
        color(.primary)
    }
}
.apply(to: Text("Hello"))
2\. Over-abstracting Simple Cases:
// ❌ DSL overkill for simple configuration
let settings = appSettings {
    debug {
        enabled(true)
        level(.verbose)
    }
}

// ✅ Simple struct is clearer
let settings = AppSettings(debugEnabled: true, debugLevel: .verbose)
The Integration Sweet Spot
@resultBuilder DSLs integrate best when they:
✅ Complement existing patterns instead of replacing them ✅ Handle hierarchical or conditional structures naturally ✅ Reduce boilerplate for common patterns ✅ Work with Swift’s type system rather than against it
The key is recognizing where declarative structure adds value versus where it adds complexity. When in doubt, start simple and evolve.
🤔 Real-World Decision Framework: When to Choose What
Knowing when @resultBuilder is the right tool versus when it’s overkill. Let’s build a practical decision framework based on real-world experience.
The Decision Matrix
Choose **@resultBuilder** when you have:
- ✅ Hierarchical structures with parent-child relationships
- ✅ Conditional content that changes based on state
- ✅ Repetitive patterns that benefit from declarative syntax
- ✅ Domain-specific languages where readability matters
Choose method chaining when you have:
- ✅ Linear configuration (step-by-step modifications)
- ✅ Optional modifications (add features incrementally)
- ✅ Familiar patterns (like SwiftUI view modifiers)
- ✅ Simple APIs that don’t need complex nesting
Choose plain structs/classes when you have:
- ✅ Simple data containers
- ✅ Performance-critical code
- ✅ Straightforward configuration
- ✅ Team members unfamiliar with DSLs
Real-World Scenarios
Scenario 1: API Configuration
// ❌ @resultBuilder overkill
let api = apiConfig {
    baseURL("https://api.example.com")
    timeout(30)
    retries(3)
}

// ✅ Method chaining is clearer
let api = APIClient("https://api.example.com")
    .timeout(30)
    .retries(3)

// ✅ Or just a simple struct
let api = APIConfig(
    baseURL: "https://api.example.com",
    timeout: 30,
    retries: 3
)
Why method chaining wins: API configuration is linear — you’re modifying a client step by step, not building a hierarchy.
Scenario 2: HTML Generation
// ✅ @resultBuilder shines here
let page = html {
    head {
        title("My Page")
        meta(name: "viewport", content: "width=device-width")
    }
    body {
        header {
            h1("Welcome")
            nav {
                a(href: "/home") { "Home" }
                a(href: "/about") { "About" }
            }
        }
        main {
            if showFeatured {
                section(class: "featured") {
                    h2("Featured Content")
                    for article in featuredArticles {
                        articleCard(article)
                    }
                }
            }
        }
    }
}

// ❌ Method chaining would be painful
let page = HTML()
    .head(Head()
        .title("My Page")
        .meta(name: "viewport", content: "width=device-width")
    )
    .body(Body()
        .header(Header()
            .h1("Welcome")
            .nav(Nav()
                .a(href: "/home", content: "Home")
                .a(href: "/about", content: "About")
            )
        )
        // This gets unwieldy fast...
    )
Why @resultBuilder wins: HTML is inherently hierarchical with conditional content and nested structures.
The Team Factor
Consider your team’s expertise:
// Senior team comfortable with advanced Swift
let complexDSL = advancedBuilder {
    // Multiple levels of nesting
    // Custom operators
    // Generic constraints
}

// Mixed-experience team
let simpleDSL = basicBuilder {
    // Clear, straightforward patterns
    // Minimal magic
    // Good error messages
}

// Junior-heavy team
let noMagicApproach = SimpleConfig(
    // Plain structs and functions
    // Explicit and clear
    // Easy to debug
)
Bottom line: Complex DSLs can hurt team productivity if most developers don’t understand them.
Migration Strategies
When refactoring existing code:
- Don’t rewrite working code just to use
@resultBuilder
// ❌ Unnecessary refactoring
// This works fine, leave it alone
let config = NetworkConfig(
    baseURL: "https://api.example.com",
    timeout: 30
)

// Don't turn it into a DSL just because you can
2. Introduce DSLs incrementally
// ✅ Start with new code
let newFeature = featureBuilder {
    // Use DSL for new requirements
}

// Keep existing code as-is until there's a real need to change
3. Provide migration paths
// Support both old and new APIs during transition
extension APIClient {
    // Old API - keep working
    convenience init(baseURL: String, timeout: TimeInterval) {
        // ...
    }

    // New DSL API - add gradually
    convenience init(@ConfigBuilder config: () -> APIConfig) {
        // ...
    }
}
The Decision Flowchart
Ask yourself these questions:
1\. Is this naturally hierarchical? (HTML, UI, config trees)
- Yes → Consider @resultBuilder
- No → Use method chaining or structs
2\. Do you have conditional content? (if/else, loops)
- Yes → @resultBuilder handles this well
- No → Simple approaches work fine
3\. Will the team understand and maintain this?
- Yes → Go ahead
- No → Keep it simple
4\. Is the complexity worth the benefits?
- Clear readability improvement → Yes
- Minor syntactic sugar → No
5\. Are you solving a real problem?
- Reducing error-prone boilerplate → Yes
- Just because it’s cool → No
Protocol-Oriented Design with DSLs
When building DSLs, consider how they fit with Swift’s protocol-oriented approach. For deeper insights on this, check out Protocol-Oriented Programming in Swift Explained: How POP Works & Why It Matters.
**Protocol-Oriented Programming in Swift Explained: How POP Works & Why It Matters** _Think Swift is all about classes? Think again. Dive into Protocol-Oriented Programming (POP) in Swift and learn how…_medium.comhttps://medium.com/swift-pal/protocol-oriented-programming-in-swift-explained-how-pop-works-why-it-matters-ab264a8759ff
DSLs can leverage protocols for flexibility:
protocol Configurable {
    associatedtype Configuration
    init(configuration: Configuration)
}

@resultBuilder
struct GenericConfigBuilder<T: Configurable> {
    static func buildBlock(_ components: ConfigComponent...) -> T.Configuration {
        // Build configuration for any conforming type
    }
}
When to Package Your DSL
If your DSL proves valuable, consider sharing it. The progression usually goes:
- Internal utility — Solves problems in your app
- Team library — Other projects benefit
- Open source package — Community value
For guidance on turning useful DSLs into packages, see How to Build and Publish Swift Packages: Turn Your Code into Reusable Libraries and Swift Package Best Practices: Structure, Testing & Publishing.
**How to Build and Publish Swift Packages: Turn Your Code into Reusable Libraries (2025 Edition)** _Transform your copy-paste code into professional Swift libraries. Complete guide to package creation, testing…_medium.comhttps://medium.com/swift-pal/how-to-build-and-publish-swift-packages-turn-your-code-into-reusable-libraries-2025-edition-cb8f752e16b1
The Final Reality Check
Most problems don’t need a DSL. @resultBuilder is a powerful tool, but power without purpose creates complexity.
Use @resultBuilder when:
- It genuinely improves code clarity
- The team understands the tradeoffs
- You’re solving structural problems, not syntax preferences
- The long-term maintenance benefits outweigh the learning curve
Skip it when:
- Simple alternatives work fine
- You’re adding complexity without clear benefits
- The team isn’t ready for the abstraction
- Performance is critical and measurably impacted
🎉 Wrapping Up
Congratulations! 🍻 You’ve completed your @resultBuilder mastery journey. You now have the knowledge to make informed decisions about when and how to use this powerful Swift feature in your real-world projects.
In our three-part series, we’ve gone from understanding the magic behind SwiftUI’s syntax to building production-ready DSLs and making expert-level architectural decisions. Whether you’re building internal tools or open-source libraries, you now have the expertise to use @resultBuilder effectively and responsibly.
Remember: the best code is the code that solves real problems clearly and maintainably. @resultBuilder is just one tool in your Swift toolkit — use it wisely! 💪
🎉 Enjoyed this article? Your support means the world to me!
💬 Drop a comment below! I love hearing about your experiences and answering questions
🎬 Subscribe on Youtube and become early subscribers of my channel: https://www.youtube.com/@swift-pal
💼 Let’s connect on LinkedIn for more professional insights: https://www.linkedin.com/in/karan-pal
Happy coding! 🚀
New articles, straight to your inbox.
No spam, no filler — just new writing on iOS, the web, and AI when it ships. Unsubscribe anytime.
Keep reading
Your CPU Has More Cores Than Your Job Can Use
Some work splits cleanly across hundreds of cores. Other work is a chain of steps where every new step has to wait for the last one to finish.
ReadYour Password Isn’t as Random as You Think
Crack-time calculators measure the size of a theoretical password space—not how people actually choose passwords or how attackers search them.
Read