MVVM in SwiftUI Explained: Build Scalable & Testable Apps with Clean Architecture
Let’s unravel the mystery of MVVM and learn how to structure your SwiftUI apps with clean, testable architecture. Whether you’re prepping…
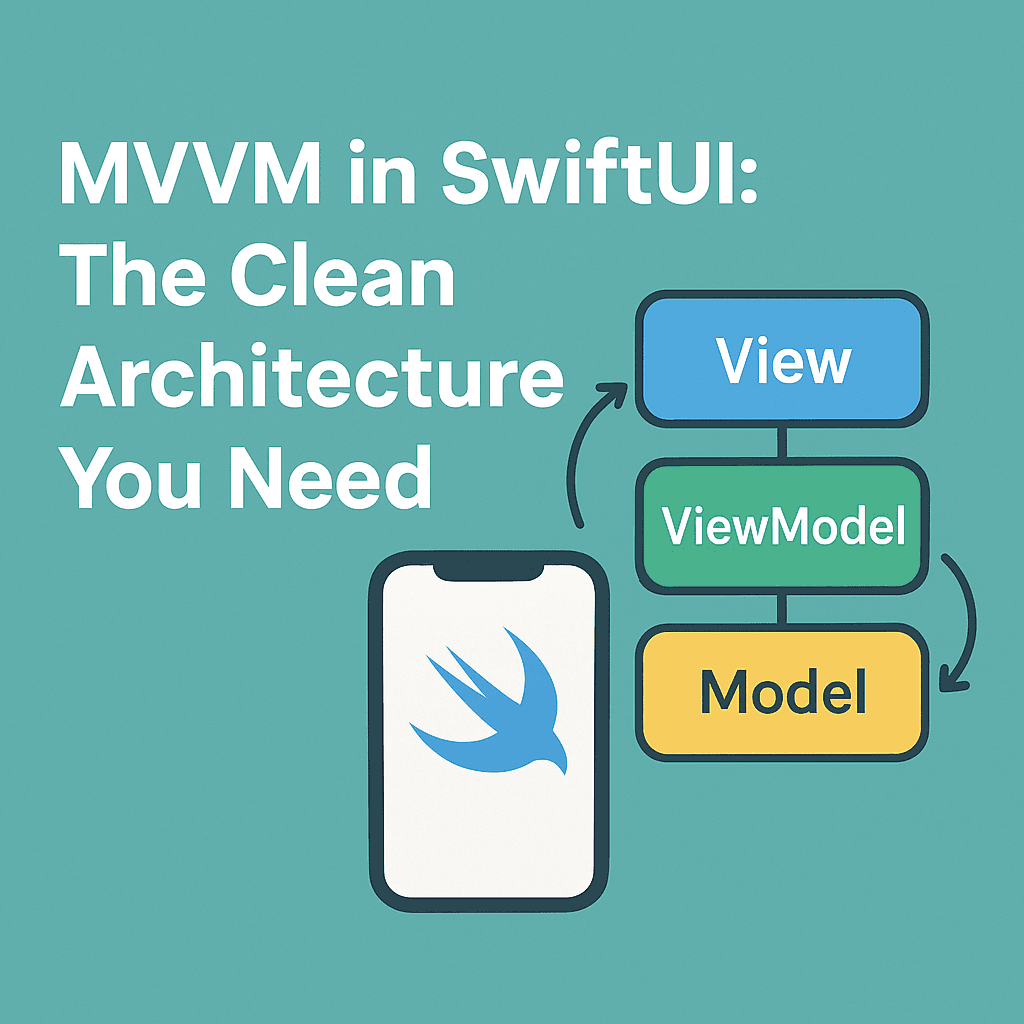

🖐️ Introduction: Why You Need MVVM in SwiftUI (Even If You Think You Don’t)
If you’ve ever started a SwiftUI project thinking “I’ll just keep it simple” and ended up with a tangled mess of state variables, duplicated logic, and views that feel like they’re carrying the weight of the entire app on their tiny shoulders… then welcome, friend — you’re in the right place. 😅
SwiftUI makes building interfaces deceptively easy. Add a @State here, bind it to a TextField there, sprinkle in some conditionals and voilà — you have a working app. But as your app grows? That cute little view turns into the Wild West. 🔫
This is where MVVM (Model-View-ViewModel) steps in like a calm, well-architected sheriff.
MVVM isn’t some fancy acronym only meant for senior developers or enterprise apps. It’s a guiding structure that helps you separate your concerns, write testable code, and build apps that don’t break every time a new feature is added. It also aligns perfectly with SwiftUI’s reactive nature — it almost feels like MVVM was designed with SwiftUI in mind (spoiler: it kinda was).
In this article, we’ll break down:
- What MVVM actually is (without the fluff)
- How to apply it to SwiftUI in a way that doesn’t feel like overengineering
- How to make your code more modular, scalable, and test-friendly
- And yes — we’ll build a real-world-ish mini example to drive it home
So if you’re looking to level up your architecture game (or clean up the spaghetti code you may or may not have written yesterday), you’re in for a treat 🍝✨
Let’s get to it.
🧱 What is MVVM? (And Why SwiftUI Devs Should Care)
Let’s decode the acronym first: MVVM stands for Model — View — ViewModel. It sounds like a corporate sandwich, but it’s really just about organizing your code so each part of your app has a clear job.
Here’s a simple breakdown — imagine you’re building a coffee-ordering app ☕:
- Model → The data. Think: your
CoffeeOrderstruct with a name, size, and milk preference. - View → The UI. Your
CoffeeOrderViewthat shows a bunch ofTextFields,Pickers, and a “Place Order” button. - ViewModel → The middle-person. It takes user input from the view, formats or validates it, and updates the model. It also fetches and sends data, handles logic, and talks to services or APIs.
So in short:
🧠 Model = What you know 👁️ View = What you show 🔧 ViewModel = What you do
🤔 Why Not Just Use Views + @State?
That works… until it doesn’t. For small views, @State and @Binding feel like magic. But as soon as your logic gets even slightly complicated — say, fetching from a network, handling errors, or validating multiple fields — your View becomes a Frankenstein of business logic and UI.
SwiftUI encourages a declarative approach: “describe what the UI should look like for a given state.” But what happens when the state gets messy? Enter: ViewModel — your loyal sidekick for keeping the mess out of your views.
👨💻 MVVM vs MVC in iOS
In the UIKit world, MVC often ends up meaning “Massive ViewController.” MVVM solves that by moving business logic out of the view/controller layer.
And here’s the best part: SwiftUI’s reactive nature (thanks to Combine and property wrappers) makes MVVM feel like a native fit. Views observe ViewModels with @ObservedObject, and everything updates automatically. It’s like MVC but on oat milk and protein powder 🥛💪
**MVC vs MVVM vs VIPER in iOS: Which Architecture Should You Choose in 2025?** _In this no-fluff breakdown, we’ll compare the good, the bad, and the “wait… why is this so complex?” of each…_medium.comhttps://medium.com/swift-pal/mvc-vs-mvvm-vs-viper-in-ios-which-architecture-should-you-choose-in-2025-38386312e0c1
Ready to dive deeper into what a ViewModel actually does, and how to build one that doesn’t feel like a second ViewController? Let’s move on. 👇
🧑🍳 The Role of ViewModel in SwiftUI (And Why It’s Your App’s Sous-Chef)
If the View is the pretty face and the Model is the raw data, then the ViewModel is the brain behind the operation — quietly doing the heavy lifting so your UI can shine ✨
💼 What Should a ViewModel Actually Do?
In SwiftUI, your ViewModel should handle:
- Business logic (e.g., form validation, button enable/disable)
- Data fetching and transformation
- Preparing data for the View (e.g., formatting dates, calculating totals)
- Managing UI state (e.g., loading spinners, error messages)
Let’s say you’re building a login screen. You don’t want your LoginView to contain logic like:
if email.contains("@") && password.count > 6 { ... }That belongs in the ViewModel, which could expose something cleaner:
@Published var isLoginEnabled: Bool🧪 Observable by Nature
SwiftUI makes this even smoother with property wrappers like @Published, @ObservedObject, and @StateObject. Here’s how they typically play together:
@Publishedlives inside the ViewModel and notifies of changes.@ObservedObjectis used by the View to react to those changes.@StateObjectis used when the View owns the ViewModel (more on this in the bonus section).
So your ViewModel becomes this reactive unit that keeps your UI in sync with your logic, like magic — but without the runtime crashes 🪄
Learn more about State Management in SwiftUI
**Mastering SwiftUI State Management: @State vs @Binding vs @ObservedObject vs @StateObject (2025…** _Confused between @State, @Binding, @ObservedObject, and @StateObject in SwiftUI? You’re not alone. This 2025 guide…_medium.comhttps://medium.com/swift-pal/mastering-swiftui-state-management-state-vs-binding-vs-observedobject-vs-stateobject-2025-e1f751aa038d
🔄 One ViewModel per View?
Not always, but it’s a good starting point.
As your app scales, you can extract shared logic into smaller service classes (e.g., AuthService, UserService) and inject them into multiple ViewModels — a concept we’ll touch on in the next section. In large apps, ViewModels should stay lightweight and composable.
By keeping the ViewModel responsible for everything the View shouldn’t worry about, your code stays readable, testable, and way less shouty. 🧘♂️
Up next: Let’s build a mini MVVM example in SwiftUI so you can see this structure come to life — minus the tutorial bloat.
🛠️ A Mini MVVM Example in SwiftUI: Let’s Build a Login Screen
To keep things simple but useful, we’ll build a Login screen using MVVM — a classic use case where business logic (like validating input, managing loading states, and toggling button states) doesn’t belong in the view.
🧩 Project Structure
Here’s a clean folder structure you can follow:
Model/→User.swiftView/→LoginView.swiftViewModel/→LoginViewModel.swift
No exotic folder gymnastics — just separation by role.
👤 Model: User.swift
struct User {
    let email: String
    let password: String
}
🧠 ViewModel: LoginViewModel.swift
import Foundation
import Combine

final class LoginViewModel: ObservableObject {
    @Published var email: String = ""
    @Published var password: String = ""
    @Published var isLoading: Bool = false
    @Published var loginError: String?

    var isLoginButtonEnabled: Bool {
        !email.isEmpty && password.count >= 6
    }

    func login() {
        isLoading = true
        loginError = nil

        // Simulate network delay
        DispatchQueue.main.asyncAfter(deadline: .now() + 2) {
            self.isLoading = false
            if self.email == "karan@swiftpal.dev" && self.password == "password123" {
                print("Login successful 🎉")
            } else {
                self.loginError = "Invalid credentials"
            }
        }
    }
}
🖼️ View: LoginView.swift
import SwiftUI

struct LoginView: View {
    @StateObject private var viewModel = LoginViewModel()

    var body: some View {
        VStack(spacing: 16) {
            TextField("Email", text: $viewModel.email)
                .textFieldStyle(RoundedBorderTextFieldStyle())
                .autocapitalization(.none)

            SecureField("Password", text: $viewModel.password)
                .textFieldStyle(RoundedBorderTextFieldStyle())

            if viewModel.isLoading {
                ProgressView()
            }

            Button("Login") {
                viewModel.login()
            }
            .disabled(!viewModel.isLoginButtonEnabled)

            if let error = viewModel.loginError {
                Text(error)
                    .foregroundColor(.red)
            }
        }
        .padding()
    }
}
🎯 What You Just Built
✅ The View is dumb — it only describes the UI ✅ The ViewModel holds and manages the state, handles logic, and notifies the View ✅ The Model is simple and domain-focused ✅ And the code is now way more testable and scalable
🔁 Dependency Injection: The Secret Sauce for Testable ViewModels
Imagine this: you’re writing tests for your LoginViewModel, but instead of faking a 2-second delay with DispatchQueue.main.asyncAfter, you want to test instantly and deterministically.
That’s where Dependency Injection (DI) shines. Instead of hardcoding your login logic inside the ViewModel, you inject a service that does the login for you. This makes your code more modular, testable, and flexible — no hacks required.
🤝 Define a Protocol First
Create an abstraction for your login logic:
protocol AuthService {
    func login(email: String, password: String, completion: @escaping (Result<User, Error>) -> Void)
}
🧪 Implement a Real Service
final class RealAuthService: AuthService {
    func login(email: String, password: String, completion: @escaping (Result<User, Error>) -> Void) {
        DispatchQueue.main.asyncAfter(deadline: .now() + 2) {
            if email == "karan@swiftpal.dev" && password == "password123" {
                completion(.success(User(email: email, password: password)))
            } else {
                completion(.failure(NSError(domain: "InvalidCredentials", code: 401)))
            }
        }
    }
}
🧠 Refactor the ViewModel
Inject the dependency instead of hardcoding it:
final class LoginViewModel: ObservableObject {
    private let authService: AuthService

    @Published var email: String = ""
    @Published var password: String = ""
    @Published var isLoading: Bool = false
    @Published var loginError: String?

    var isLoginButtonEnabled: Bool {
        !email.isEmpty && password.count >= 6
    }

    init(authService: AuthService = RealAuthService()) {
        self.authService = authService
    }

    func login() {
        isLoading = true
        loginError = nil

        authService.login(email: email, password: password) { [weak self] result in
            DispatchQueue.main.async {
                self?.isLoading = false
                switch result {
                case .success:
                    print("Login successful 🎉")
                case .failure:
                    self?.loginError = "Invalid credentials"
                }
            }
        }
    }
}
🧪 Why This Rocks
- You can now inject a mock service in tests to simulate success/failure instantly
- You’ve separated concerns:
LoginViewModeldoesn’t care how login happens, just that it does - This lays the foundation for test-driven development (👀 relevant link: TDD in iOS)
👉 For a deeper dive into DI, check out Dependency Injection in Swift — A Beginner to Advanced Guide. It’ll show you everything from constructor injection to service locators (but fear not — we won’t go full Dagger on you 😅).
**Test-Driven Development in iOS: Benefits, Challenges, and Is It Worth It?** _Want to write better, safer iOS code with fewer bugs? Test-Driven Development (TDD) might be the secret sauce 🍝. In…_medium.comhttps://medium.com/swift-pal/test-driven-development-in-ios-benefits-challenges-and-is-it-worth-it-a646b01f07b3
**Dependency Injection in Swift: A Beginner-to-Advanced Guide** _🧪 Feeling tangled in singletons and tightly-coupled code? Learn how Dependency Injection in Swift can help you write…_medium.comhttps://medium.com/swift-pal/dependency-injection-in-swift-a-beginner-to-advanced-guide-b85378c6f8d2
🧪 Testing Your ViewModel: Because “It Works on My Machine” Isn’t Enough
One of the best parts about MVVM is that your ViewModel becomes a beautifully testable unit. No need to spin up a UI or run the entire app — you can write fast, focused tests that validate your business logic in isolation.
✅ What We’ll Test:
- The login button is enabled only when input is valid
- Login success returns a user
- Login failure shows an error message
- Loading state toggles correctly
🧪 Mock the AuthService
Start by creating a fake login service for testing:
final class MockAuthService: AuthService {
    var shouldSucceed = true

    func login(email: String, password: String, completion: @escaping (Result<User, Error>) -> Void) {
        if shouldSucceed {
            completion(.success(User(email: email, password: password)))
        } else {
            completion(.failure(NSError(domain: "TestError", code: 0)))
        }
    }
}
🧪 Write the Tests
Using XCTest:
import XCTest
@testable import YourApp

final class LoginViewModelTests: XCTestCase {
    func testLoginButtonEnabledOnlyWhenInputIsValid() {
        let vm = LoginViewModel(authService: MockAuthService())
        vm.email = "karan@swiftpal.dev"
        vm.password = "123456"
        XCTAssertTrue(vm.isLoginButtonEnabled)

        vm.password = "123"
        XCTAssertFalse(vm.isLoginButtonEnabled)
    }

    func testLoginSuccessUpdatesState() {
        let mockService = MockAuthService()
        mockService.shouldSucceed = true
        let vm = LoginViewModel(authService: mockService)
        let exp = expectation(description: "Login should succeed")

        vm.email = "karan@swiftpal.dev"
        vm.password = "password123"
        vm.login()

        DispatchQueue.main.asyncAfter(deadline: .now() + 0.1) {
            XCTAssertNil(vm.loginError)
            XCTAssertFalse(vm.isLoading)
            exp.fulfill()
        }

        wait(for: [exp], timeout: 1)
    }

    func testLoginFailureShowsError() {
        let mockService = MockAuthService()
        mockService.shouldSucceed = false
        let vm = LoginViewModel(authService: mockService)
        let exp = expectation(description: "Login should fail")

        vm.email = "wrong@user.com"
        vm.password = "wrongpass"
        vm.login()

        DispatchQueue.main.asyncAfter(deadline: .now() + 0.1) {
            XCTAssertEqual(vm.loginError, "Invalid credentials")
            XCTAssertFalse(vm.isLoading)
            exp.fulfill()
        }

        wait(for: [exp], timeout: 1)
    }
}
🎯 Clean, Confident Tests (without touching the UI)
By using MVVM and dependency injection, we:
- Removed reliance on
Viewstate - Avoided unnecessary UI tests
- Tested logic in milliseconds, not minutes
Want to go deeper? You can even explore snapshot testing for Views, or full integration tests later — but for now, this is all you need to sleep better at night 😌
🧠 Want a complete Swift testing crash course? Check out: 👉 Unit Testing in Swift Made Easy
**Unit Testing in Swift Made Easy: A Beginner’s Guide With Real Examples** _A beginner’s guide to Swift unit testing — learn the basics, write your first tests, and improve your code quality._medium.comhttps://medium.com/swift-pal/unit-testing-in-swift-made-easy-a-beginners-guide-with-real-examples-0409f65e84f6
🧼 MVVM + Clean Architecture: A Match Made in Scalable App Heaven
So far, MVVM has helped us separate UI from logic. But what happens when your app grows to include payment flows, user profiles, offline sync, cat GIFs, and a crypto wallet? 😅 MVVM alone can start to feel stretched — especially if your ViewModels start doing too much.
This is where Clean Architecture enters the chat.
🏗️ What is Clean Architecture (in 1 Tweet or Less)?
It’s about structuring your app into layers — where each layer has one job, and dependencies only point inward.
Imagine your app like an onion 🧅:
- UI Layer → SwiftUI Views
- Presentation Layer → ViewModels (MVVM!)
- Domain Layer → Business logic (Use Cases)
- Data Layer → Services (APIs, databases)
Your ViewModel talks to a LoginUseCase instead of directly calling AuthService. That LoginUseCase may call AuthRepository, which talks to the network. Clean, testable, and way easier to reason about.
🧠 Why Combine MVVM with Clean Architecture?
Because together, they:
- Prevent massive ViewModels (aka MVVM’s secret weakness)
- Make business logic reusable across platforms (think iOS + visionOS)
- Let you test logic without worrying about UI or API details
- Fit naturally with dependency injection, which you’ve already seen
🔧 Quick Example: Login Flow with Clean Architecture
Let’s say your LoginViewModel looks like this:
final class LoginViewModel: ObservableObject {
    private let loginUseCase: LoginUseCaseProtocol
    // ...

    init(loginUseCase: LoginUseCaseProtocol) {
        self.loginUseCase = loginUseCase
    }

    func login() {
        isLoading = true
        loginError = nil

        loginUseCase.execute(email: email, password: password) { [weak self] result in
            DispatchQueue.main.async {
                self?.isLoading = false
                // Handle result
            }
        }
    }
}
You’ve now pushed your login logic into a dedicated use case, separating “what the user does” from “how we handle it.” And guess what? Your ViewModel stays lean and laser-focused on UI state.
📚 Want to Dive Deeper?
Check out this full walkthrough on Clean Architecture in iOS 👇 👉 Understanding Clean Architecture in iOS — Beginner to Advanced Guide
**Understanding Clean Architecture in iOS: A Beginner’s Guide** _Tired of Spaghetti Code? 🍝 Let’s Clean Things Up in iOS!_medium.comhttps://medium.com/swift-pal/understanding-clean-architecture-in-ios-a-beginners-guide-69d09b4883c4
💡 Common Mistakes When Using MVVM in SwiftUI (And How to Dodge Them)
So you’ve decided to go all-in on MVVM. Nice. But before you slap @ObservedObject on everything and call it a day, here are a few classic MVVM slip-ups that can make your clean setup feel messier than your Xcode DerivedData folder 😬
🚫 1. Putting Too Much in the View
❌ “It’s just one if-statement… okay, maybe five…” Before you know it, your LoginView has:
- Validation logic
- Conditional formatting
- API error parsing
- Loading indicators…
✅ Fix: Keep views as “dumb” as possible. Your job is to describe what to show, not how to compute it. Delegate that to the ViewModel. Remember: Views are for UI, not logic.
🚫 2. Making ViewModel the New God Object
❌ “Everything goes in the ViewModel, right?” Nope! MVVM isn’t about dumping all logic into a ViewModel. If your ViewModel handles navigation, networking, business rules, AND pizza orders, it’s doing too much.
✅ Fix: As your app grows, extract logic into:
- Use Cases (for business logic)
- Services/Repositories (for data access)
- Coordinators (for navigation)
You’ll thank yourself later (and so will your future teammates).
🚫 3. Skipping Dependency Injection
❌ Directly creating service classes inside the ViewModel (let service = AuthService()) This makes testing painful and tightens coupling.
✅ Fix: Inject services through the initializer. You can pass real implementations in the app and mocks in tests. (Psst 👉 You’ve already nailed this one if you followed the last few sections.)
🚫 4. Overusing @State in Complex Views
❌ Using @State everywhere because it "just works" @State is only meant for simple local state. When that state starts affecting other views or needs to be shared — you’re in ViewModel territory now.
✅ Fix: Use @ObservedObject or @StateObject to observe a dedicated ViewModel for anything more than 1-view scope. We'll drop a bonus explanation of these wrappers soon if you're unsure which one to pick.
🚫 5. Naming Everything ViewModel
❌ LoginViewModel, LoginPageViewModel, LoginFormViewModel, LoginLoginViewModel Let’s not go down this path. 🥲
✅ Fix: Be descriptive but concise. If your ViewModel handles login, call it LoginViewModel. If it’s just a form inside a bigger screen, maybe LoginFormModel is better.
Fixing these five alone will clean up most of the MVVM chaos people complain about.
Next up — let’s talk when NOT to use MVVM, and when it’s totally okay to skip structure and just build fast.
🎁 When MVVM Might Be Overkill (Yes, We Said It)
Here’s the deal: not every SwiftUI view needs a ViewModel.
Gasp 😱
Yes, MVVM is powerful. Yes, it brings structure, testability, and sanity. But sometimes… it just gets in the way. Especially when you’re trying to build fast, explore ideas, or prototype over coffee ☕.
🧪 When You Can Skip MVVM
- 🧱 Tiny, self-contained views A single
Togglethat updates a boolean? You don’t need a ViewModel for that. - ⚙️ Preview-driven UIs If you’re rapidly prototyping a design in Xcode Previews and the logic is minimal, don’t worry about the architecture. Just build.
- 🧪 Playgrounds & POCs You’re just testing a
ForEachwith anonDelete? No need to go full Uncle Bob on it. - 🛠️ Feature experiments When trying a new animation or a system API like
ShareLink, keeping things inside the View is fine — until it grows.
🧼 When MVVM Definitely Helps
- 🧑💼 Multiple views that rely on shared logic or data
- 🧪 You want to write tests
- 🔄 API calls, validation, or state juggling
- 📱 Apps with multiple screens, login/signup flows, or dynamic content
- 💼 You’re building something that someone else will maintain (even if that’s “Future You”)
⚖️ Rule of Thumb
🤔 “If my View is starting to do too many things… it’s time to extract a ViewModel.”
Start small. Don’t “MVVM all the things” just for the buzzword. Architecture should serve the developer, not the other way around.
🧠 Want to learn how to keep these clean lines across your whole app? Check out this piece: 👉 How to Structure a Scalable iOS App with Modular Architecture
**How to Structure a Scalable iOS App with Modular Architecture** _Struggling with messy codebases and slow builds? Learn how modular architecture can make your iOS app scalable…_medium.comhttps://medium.com/swift-pal/how-to-structure-a-scalable-ios-app-with-modular-architecture-b0130da83bca
🧭 Wrapping Up: MVVM in SwiftUI, Done Right
Whew! You just made it through a full MVVM walkthrough in SwiftUI — and without falling asleep or rage-closing Xcode. That’s a win right there. 🥳
Let’s recap what you now know (and secretly mastered):
✅ What MVVM is and why it fits naturally in SwiftUI ✅ How to structure your app with clean separation between Model, View, and ViewModel ✅ How to make ViewModels testable using dependency injection ✅ Why Clean Architecture pairs so well with MVVM ✅ The common mistakes to avoid (looking at you, 300-line ViewModel) ✅ When it’s totally okay to not use MVVM — no guilt trips included
🚀 What to Do Next?
- Try converting an existing SwiftUI screen into MVVM — just one!
- Write a ViewModel for a screen that has validation, loading states, or API calls
- Create a simple use case class if your ViewModel is growing too much
- Add unit tests — even just one test can show the value of structure
- Bookmark this guide (and maybe read it again next week over chai ☕)
Read next article in Series:
**Building Forms and Inputs in SwiftUI: TextFields, Pickers, Toggles & More** _Learn how to build beautiful and functional forms in SwiftUI using TextFields, Pickers, Toggles, and more. From simple…_medium.comhttps://medium.com/swift-pal/building-forms-and-inputs-in-swiftui-textfields-pickers-toggles-more-14d1aafcffe9
🎉 Enjoyed this article? Your support means the world to me!
💬 Drop a comment below! I love hearing about your experiences and answering questions
🎬 Subscribe on Youtube and become early subscribers of my channel: https://www.youtube.com/@swift-pal
💼 Let’s connect on LinkedIn for more professional insights: https://www.linkedin.com/in/karan-pal
Happy coding! 🚀
New articles, straight to your inbox.
No spam, no filler — just new writing on iOS, the web, and AI when it ships. Unsubscribe anytime.
Keep reading
Your CPU Has More Cores Than Your Job Can Use
Some work splits cleanly across hundreds of cores. Other work is a chain of steps where every new step has to wait for the last one to finish.
ReadYour Password Isn’t as Random as You Think
Crack-time calculators measure the size of a theoretical password space—not how people actually choose passwords or how attackers search them.
Read