SwiftUI State Machines Explained: Manage Complex UI States the Right Way
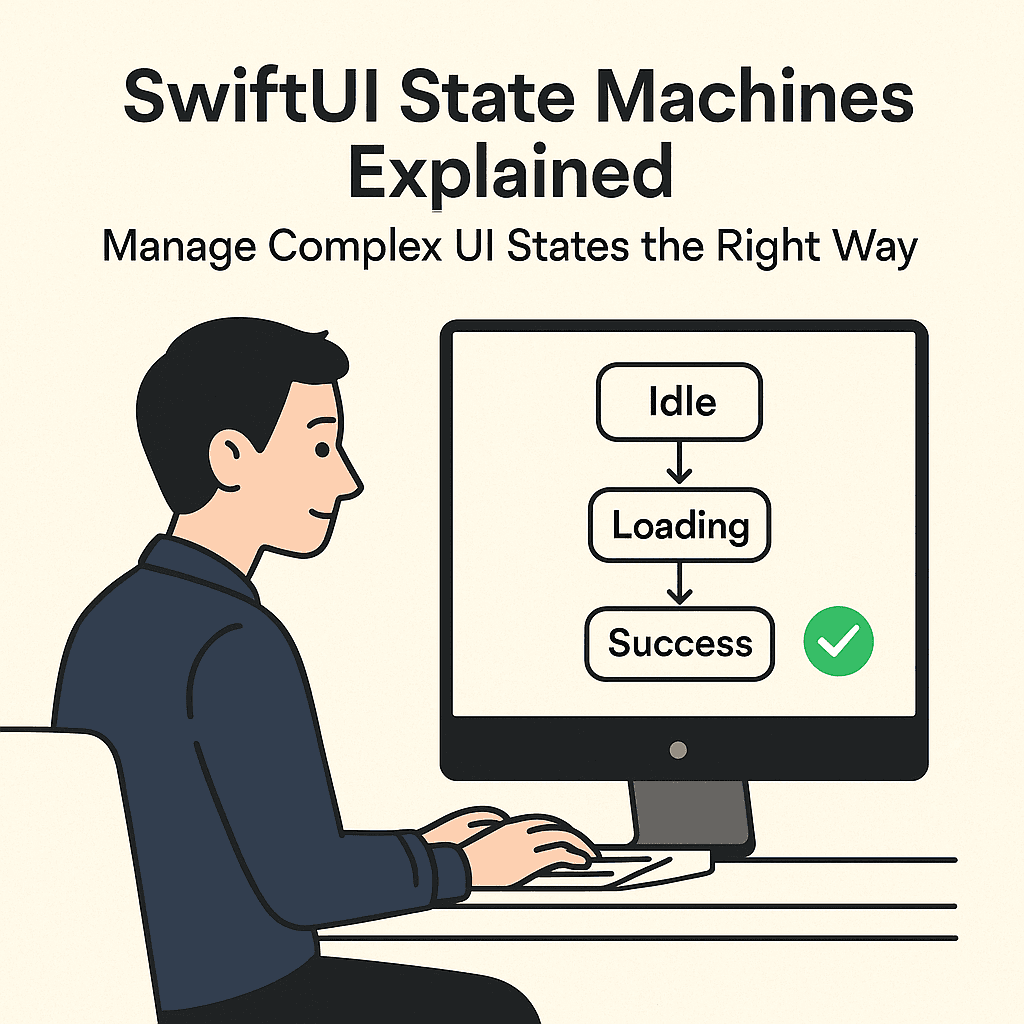
Learn how to model real-world UI flows in SwiftUI using state machines — cleaner logic, predictable transitions, and fewer bugs

😖 Midnight Madness
It’s midnight, you’re squinting at your SwiftUI code, and you’ve got a login screen that’s doing… well, everything at once. Your spinner is spinning while your error message is showing, your success state is somehow active alongside your loading state, and you’re pretty sure your validation logic just gave up and went home.
Sound familiar? Yeah, me too.
Here’s what that nightmare usually looks like:
struct LoginView: View {
    @State private var isLoading = false
    @State private var showError = false
    @State private var isLoggedIn = false
    @State private var hasValidInput = false
    @State private var showSuccess = false
    @State private var errorMessage = ""

    var body: some View {
        VStack {
            // Your UI code here
            if isLoading {
                ProgressView()
            }
            if showError {
                Text(errorMessage)
                    .foregroundColor(.red)
            }
            if showSuccess {
                Text("Success!")
                    .foregroundColor(.green)
            }
            // Wait... can we show loading AND error at the same time? 🤔
        }
    }
}
Look, I get it. We’ve all been there. You start with one boolean, then add another, then another… Before you know it, you’re playing whack-a-mole with state combinations that shouldn’t even be possible.
The worst part? You end up with these impossible states. Like, how exactly is something both loading AND showing an error? Or better yet — successfully logged in but still validating input? It’s like your app is having an existential crisis.
I remember debugging a checkout flow last year where I had seven — SEVEN — different boolean flags. The QA team found a state where the “payment successful” message was showing while the “invalid card” error was also visible. Classic.
Here’s the thing though — this isn’t really a SwiftUI problem. It’s a state modeling problem. We’re trying to represent complex state with a bunch of simple flags, and that’s like trying to describe a symphony with a kazoo.
What if I told you there’s a better way? A way where impossible states are actually… impossible?
Enter state machines.
🤖 What Actually Are State Machines?
Okay, before you roll your eyes and think “great, another CS theory lecture” — stick with me here. State machines aren’t some abstract academic concept. They’re actually everywhere in your daily life.
Think about your iPhone’s lock screen. It can be:
- Locked
- Face ID scanning
- Unlocked
- Failed authentication
That’s it. Four states. Your phone can’t be “locked but also unlocked” or “scanning Face ID while showing a failure message.” Each state is distinct, and there are clear rules about how to move between them.
That’s a state machine in action.
Now, here’s where it gets interesting for us SwiftUI folks. Instead of juggling a bunch of booleans that can create impossible combinations, we define our UI states explicitly. One enum. Clear transitions. No more guessing games.
Let me show you what our messy login example looks like when we think in states instead of flags:
enum LoginState {
    case idle
    case validating
    case loading
    case success
    case error(String)
}
Boom. Five possible states. That’s it. Your login screen can only ever be in ONE of these states at any given time. No more “loading while showing an error while validating input” nonsense.
But here’s what I love most about this approach — it forces you to think through your actual user flows. Like, what happens after a user fixes an error? Do they go back to idle or straight to validating? These aren't just implementation details anymore; they're deliberate design decisions.
I had this lightbulb moment a few years ago when I was working on a file upload feature. Instead of tracking isUploading, uploadProgress, hasError, isComplete, and canRetry separately, I modeled it as:
enum UploadState {
    case ready
    case uploading(progress: Double)
    case completed
    case failed(error: String, canRetry: Bool)
}
Suddenly, the logic became crystal clear. The UI became predictable. And most importantly — my QA team stopped finding those weird edge cases where multiple states were active simultaneously.
Actually, let me rephrase that… they still found bugs, but at least they were logical bugs! 😅
The beauty of state machines isn’t just clean code (though that’s nice). It’s that they make your app behave the way humans expect. When something is loading, it’s just loading. When there’s an error, it’s just an error. No mixed messages, no confusion.
Ready to see how this actually works in SwiftUI? Let’s build one.
⚙️ Building Your First SwiftUI State Machine
Alright, let’s get our hands dirty. I’m going to take that messy login view from earlier and transform it into something you’d actually want to maintain. And trust me, your future self will thank you.
First, let’s define our state machine properly:
enum LoginState: Equatable {
    case idle
    case validating
    case authenticating
    case success
    case error(String)
}
Now here’s where SwiftUI gets really nice with state machines. Instead of managing a bunch of separate @State variables, we just have one:
struct LoginView: View {
    @State private var loginState: LoginState = .idle
    @State private var email = ""
    @State private var password = ""

    var body: some View {
        VStack(spacing: 20) {
            TextField("Email", text: $email)
                .textFieldStyle(.roundedBorder)
                .onChange(of: email) { _, _ in
                    if case .error = loginState {
                        loginState = .idle
                    }
                }

            SecureField("Password", text: $password)
                .textFieldStyle(.roundedBorder)
                .onChange(of: password) { _, _ in
                    if case .error = loginState {
                        loginState = .idle
                    }
                }

            loginButton
            statusView
        }
        .padding()
    }
}
Now here’s where it gets satisfying. Look how clean our UI logic becomes:
private var loginButton: some View {
    Button("Login") {
        handleLogin()
    }
    .disabled(!canLogin)
    .opacity(canLogin ? 1.0 : 0.6)
}

private var canLogin: Bool {
    switch loginState {
    case .idle:
        return !email.isEmpty && !password.isEmpty
    case .validating, .authenticating:
        return false
    case .success, .error:
        return !email.isEmpty && !password.isEmpty
    }
}

private var statusView: some View {
    Group {
        switch loginState {
        case .idle:
            EmptyView()
        case .validating:
            HStack {
                ProgressView()
                    .scaleEffect(0.8)
                Text("Validating...")
            }
        case .authenticating:
            HStack {
                ProgressView()
                    .scaleEffect(0.8)
                Text("Signing in...")
            }
        case .success:
            Label("Welcome back!", systemImage: "checkmark.circle.fill")
                .foregroundColor(.green)
        case .error(let message):
            Label(message, systemImage: "exclamationmark.triangle.fill")
                .foregroundColor(.red)
        }
    }
    .animation(.easeInOut(duration: 0.3), value: loginState)
}
See what happened there? Every possible UI state is explicitly handled. No guesswork. No “what if we’re in this state but also that state?” nonsense.
But here’s the real magic — the state transitions:
private func handleLogin() {
    guard case .idle = loginState else { return }

    loginState = .validating

    // Simulate validation
    DispatchQueue.main.asyncAfter(deadline: .now() + 0.5) {
        if isValidInput() {
            loginState = .authenticating
            performAuthentication()
        } else {
            loginState = .error("Please check your email and password")
        }
    }
}

private func performAuthentication() {
    // Simulate network call
    DispatchQueue.main.asyncAfter(deadline: .now() + 1.5) {
        if Bool.random() { // Simulate success/failure
            loginState = .success
        } else {
            loginState = .error("Invalid credentials. Please try again.")
        }
    }
}

private func isValidInput() -> Bool {
    email.contains("@") && password.count >= 6
}
Now here’s what I love about this approach. Look at that guard case .idle = loginState else { return } line. That's us saying "we can only start login from the idle state." No more accidental double-taps triggering multiple network requests. No more weird race conditions.
Actually, let me be honest here — I still forget to add those guards sometimes, and then I wonder why my app is making three API calls at once. But at least now when I debug, I can see exactly what state triggered what action. It’s like having a paper trail for your UI logic.
The best part? This scales beautifully. Need to add a “forgot password” flow? Just add a new state. Want to handle network timeouts? Add a timeout state. The pattern stays the same.
Ready to see some real-world patterns where this really shines?
🌍 Real-World Patterns That Actually Matter
Okay, so login forms are nice and all, but let’s talk about the stuff that actually keeps you up at night. The complex flows that make you question your life choices.
The Data Loading Dance
You know this one. You’ve got a list view that needs to fetch data, handle pull-to-refresh, show empty states, deal with network errors, and somehow not drive your users insane in the process.
Here’s how I used to handle it (and maybe you do too):
// The old way - don't do this
@State private var isLoading = false
@State private var isRefreshing = false
@State private var hasError = false
@State private var isEmpty = false
@State private var data: [Item] = []
Five booleans. FIVE. And somehow I still ended up with states like “empty but also loading but also has an error.” My testers probably thought my app was having a breakdown.
Now? One enum rules them all:
enum DataState<T> {
    case idle
    case loading
    case refreshing(T)  // Refreshing with existing data
    case loaded(T)
    case empty
    case error(String, retryAction: (() -> Void)?)
}
Look at that refreshing(T) case. That's the magic right there. We can show existing data while refreshing in the background. No more blank screens during pull-to-refresh.
Here’s how it looks in practice:
struct ItemListView: View {
    @State private var dataState: DataState<[Item]> = .idle

    var body: some View {
        NavigationView {
            Group {
                switch dataState { // Sets the right UI based on State
                case .idle:
                    Text("Pull down to refresh")
                        .foregroundColor(.secondary)

                case .loading:
                    ProgressView("Loading items...")

                case .loaded(let items), .refreshing(let items):
                    List(items) { item in
                        ItemRow(item: item)
                    }
                    .refreshable {
                        await refreshData()
                    }
                    .overlay(alignment: .top) {
                        if case .refreshing = dataState {
                            ProgressView()
                                .padding(.top, 8)
                        }
                    }

                case .empty:
                    ContentUnavailableView(
                        "No items found",
                        systemImage: "tray",
                        description: Text("Try adding some items or pull to refresh")
                    )

                case .error(let message, let retryAction):
                    ContentUnavailableView(
                        "Something went wrong",
                        systemImage: "exclamationmark.triangle",
                        description: Text(message)
                    ) {
                        if let retry = retryAction {
                            Button("Try Again", action: retry)
                        }
                    }
                }
            }
            .navigationTitle("Items")
            .task {
                if case .idle = dataState {
                    await loadData()
                }
            }
        }
    }
}
The Form Validation Nightmare
Oh boy, forms. The classic developer headache. You’ve got field validation, submission states, server errors, and dependencies between fields.
Take a typical user profile form — multiple fields, some required, some with complex validation rules, maybe a photo upload that needs special handling.
The boolean flag approach looks something like:
// Please don't do this to yourself
@State private var isValidatingEmail = false
@State private var isValidatingPhone = false
@State private var isSubmitting = false
@State private var hasEmailError = false
@State private var hasPhoneError = false
@State private var canSubmit = false
@State private var showSubmissionError = false
The state machine approach? Much cleaner:
enum FormState {
    case editing
    case validating(field: FormField)
    case valid
    case invalid([FormField: String])  // Field to error message
    case submitting
    case submitted
    case submissionError(String)
}

enum FormField: CaseIterable {
    case email, phone, name, bio
}
The beauty here is that validation becomes explicit. When a user taps out of the email field, we go to .validating(field: .email). When validation completes, we either go to .valid or .invalid with specific field errors.
The Shopping Cart State Machine
This one’s interesting because it seems simple but gets complex fast. You’ve got items in the cart, quantity changes, price calculations, checkout flow, payment processing… it’s a state management puzzle.
enum CartState {
    case empty
    case hasItems([CartItem], total: Decimal)
    case updating(CartItem)  // Updating specific item quantity
    case checkout(CheckoutState)
    case processingPayment
    case paymentComplete
    case paymentFailed(String)
}

enum CheckoutState {
    case enteringDetails
    case validatingAddress
    case selectingPayment
    case reviewingOrder
}
See how checkout is nested? That’s because checkout itself is a complex flow, but it’s contained within the broader cart context. It’s like Russian dolls, but for app states.
Here’s the thing though — you don’t need to get this perfect on the first try. Start simple, then refactor as you discover the actual complexity. Sometimes you’ll realize you need nested state machines, and that’s totally fine.
The key insight is that state machines should model your actual user workflows, not your technical implementation. Think about what your user is doing, not what your code is doing.
Ready to level up even more? Let’s talk about composition and testing.
🚀 Level Up Your Game (Advanced Patterns)
Alright, so you’ve got the basics down. Your single-screen state machines are clean, your impossible states are actually impossible, and you’re feeling pretty good about yourself. But what happens when your app grows? When you need state machines talking to each other? When your QA team asks “how do we even test this?”
Let’s dive into the deep end.
State Machine Composition
Here’s where things get spicy. Sometimes you need multiple state machines working together, and the naive approach is to just… have multiple state machines. Which works until it doesn’t.
Take a typical app with authentication and data loading. You might think “okay, I’ll have an AuthState and a DataState" — but then what happens when the user's session expires while they're in the middle of uploading something?
// This gets messy fast
@State private var authState: AuthState = .loggedOut
@State private var dataState: DataState<[Item]> = .idle
@State private var uploadState: UploadState = .idle
Now you’re back to the boolean problem, just with enums. “What if we’re authenticated but the data is in error state but upload is in progress?” Ugh.
Better approach? Compose them properly:
enum AppState {
    case unauthenticated(AuthState)
    case authenticated(user: User, content: ContentState)
    case sessionExpired(retainedContent: ContentState?)
}

enum AuthState {
    case idle
    case loggingIn
    case error(String)
}

enum ContentState {
    case loading
    case loaded([Item])
    case uploading(items: [Item], progress: Double)
    case error(String)
}
Now your app can only be in one top-level state at a time. If the session expires during upload, you transition to .sessionExpired(retainedContent: .uploading(...)) and can resume after re-authentication.
The State Machine Manager Pattern
For complex apps, I like wrapping state machines in observable objects. Makes testing easier and keeps your views clean:
@MainActor
class DataManager: ObservableObject {
    @Published private(set) var state: DataState<[Item]> = .idle

    private let apiService: APIService

    init(apiService: APIService = .shared) {
        self.apiService = apiService
    }

    func loadData() async {
        guard case .idle = state else { return }

        state = .loading

        do {
            let items = try await apiService.fetchItems()
            state = items.isEmpty ? .empty : .loaded(items)
        } catch {
            state = .error(error.localizedDescription) { [weak self] in
                Task { await self?.loadData() }
            }
        }
    }

    func refresh() async {
        guard case .loaded(let items) = state else { return }

        state = .refreshing(items)
        // ... refresh logic
    }
}
Your view becomes dead simple:
struct ItemListView: View {
    @StateObject private var dataManager = DataManager()

    var body: some View {
        NavigationView {
            DataStateView(state: dataManager.state)
                .task { await dataManager.loadData() }
        }
    }
}
Testing State Machines (Finally!)
Here’s what nobody talks about — testing state machines is actually pretty straightforward. You’re testing state transitions, not complex UI interactions.
final class DataManagerTests: XCTestCase {

    func testLoadingTransition() async {
        let mockAPI = MockAPIService()
        let manager = DataManager(apiService: mockAPI)

        // Initial state
        XCTAssertEqual(manager.state, .idle)

        // Start loading
        let loadTask = Task { await manager.loadData() }

        // Should transition to loading
        await Task.yield() // Let the state change
        XCTAssertEqual(manager.state, .loading)

        // Complete loading
        await loadTask.value

        // Should be loaded with data
        if case .loaded(let items) = manager.state {
            XCTAssertEqual(items.count, mockAPI.mockItems.count)
        } else {
            XCTFail("Expected loaded state")
        }
    }

    func testErrorRecovery() async {
        let mockAPI = MockAPIService()
        mockAPI.shouldFail = true

        let manager = DataManager(apiService: mockAPI)

        await manager.loadData()

        // Should be in error state
        if case .error(_, let retryAction) = manager.state {
            XCTAssertNotNil(retryAction)

            // Fix the API and retry
            mockAPI.shouldFail = false
            retryAction?()

            // Should eventually succeed
            try? await Task.sleep(nanoseconds: 100_000_000) // Small delay
            XCTAssertEqual(manager.state, .loaded(mockAPI.mockItems))
        } else {
            XCTFail("Expected error state")
        }
    }
}
The beauty of testing state machines is that you’re testing the logic, not the UI. State goes in, state comes out. Much more predictable than “tap this button, wait for animation, check if this view exists.”
Performance Considerations
Quick reality check — state machines don’t magically make your app faster. But they do make performance problems easier to spot and fix.
When your view redraws, you know exactly why: the state changed. When your app feels sluggish, you can trace exactly which state transitions are expensive. No more “something somewhere is causing this weird lag.”
// Easy to spot expensive operations
enum DataState<T> {
    case loading
    case processing(T, operation: String) // "Filtering 10,000 items"
    case loaded(T)
}
When NOT to Use State Machines
Look, I’m not going to pretend state machines solve everything. Sometimes a simple @State var isLoading = false is exactly what you need. Don't turn a two-line solution into a 50-line state machine just because you can.
Good candidates for state machines:
- Multi-step flows (onboarding, checkout, forms)
- Network request management
- Complex UI states with dependencies
Not great candidates:
- Simple toggles (show/hide modals)
- Basic form field validation
- Anything where the “state machine” would just be two states
The goal isn’t to use state machines everywhere. The goal is to use them where they make your code clearer and your bugs fewer.
🚀 Wrapping Up
And there you have it — state machines in SwiftUI, from the basic “why do I have six boolean flags” problem to composing complex app-wide state management. Your future debugging sessions will thank you.
The key takeaway? Start simple, model your user flows, and don’t be afraid to refactor as you learn more about your problem domain. State machines aren’t magic, but they’re pretty close when it comes to taming complex UI state.
Speaking of SwiftUI magic — if you’re curious about how SwiftUI’s declarative syntax actually works under the hood, check out my deep dive into **@resultBuilder: The Magic Behind SwiftUI’s DSL**. It explains how Swift transforms that clean VStack syntax into working code!
**Demystifying @resultBuilder: The Magic Behind SwiftUI’s DSL** _Learn how @resultBuilder transforms Swift code into powerful DSLs — complete beginner’s guide with working examples_medium.comhttps://medium.com/swift-pal/demystifying-resultbuilder-the-magic-behind-swiftuis-dsl-9225ceab5703
🎉 Enjoyed this article? Your support means the world to me!
💬 Drop a comment below! I love hearing about your experiences and answering questions
🎬 Subscribe on Youtube and become early subscribers of my channel: https://www.youtube.com/@swift-pal
💼 Let’s connect on LinkedIn for more professional insights: https://www.linkedin.com/in/karan-pal
Happy coding! 🚀
New articles, straight to your inbox.
No spam, no filler — just new writing on iOS, the web, and AI when it ships. Unsubscribe anytime.
Keep reading
Your CPU Has More Cores Than Your Job Can Use
Some work splits cleanly across hundreds of cores. Other work is a chain of steps where every new step has to wait for the last one to finish.
ReadYour Password Isn’t as Random as You Think
Crack-time calculators measure the size of a theoretical password space—not how people actually choose passwords or how attackers search them.
Read