How to Build Your First iOS Widget with SwiftUI: FocusFlow Part 1
Building widget fundamentals with timeline providers, App Groups, and responsive layouts
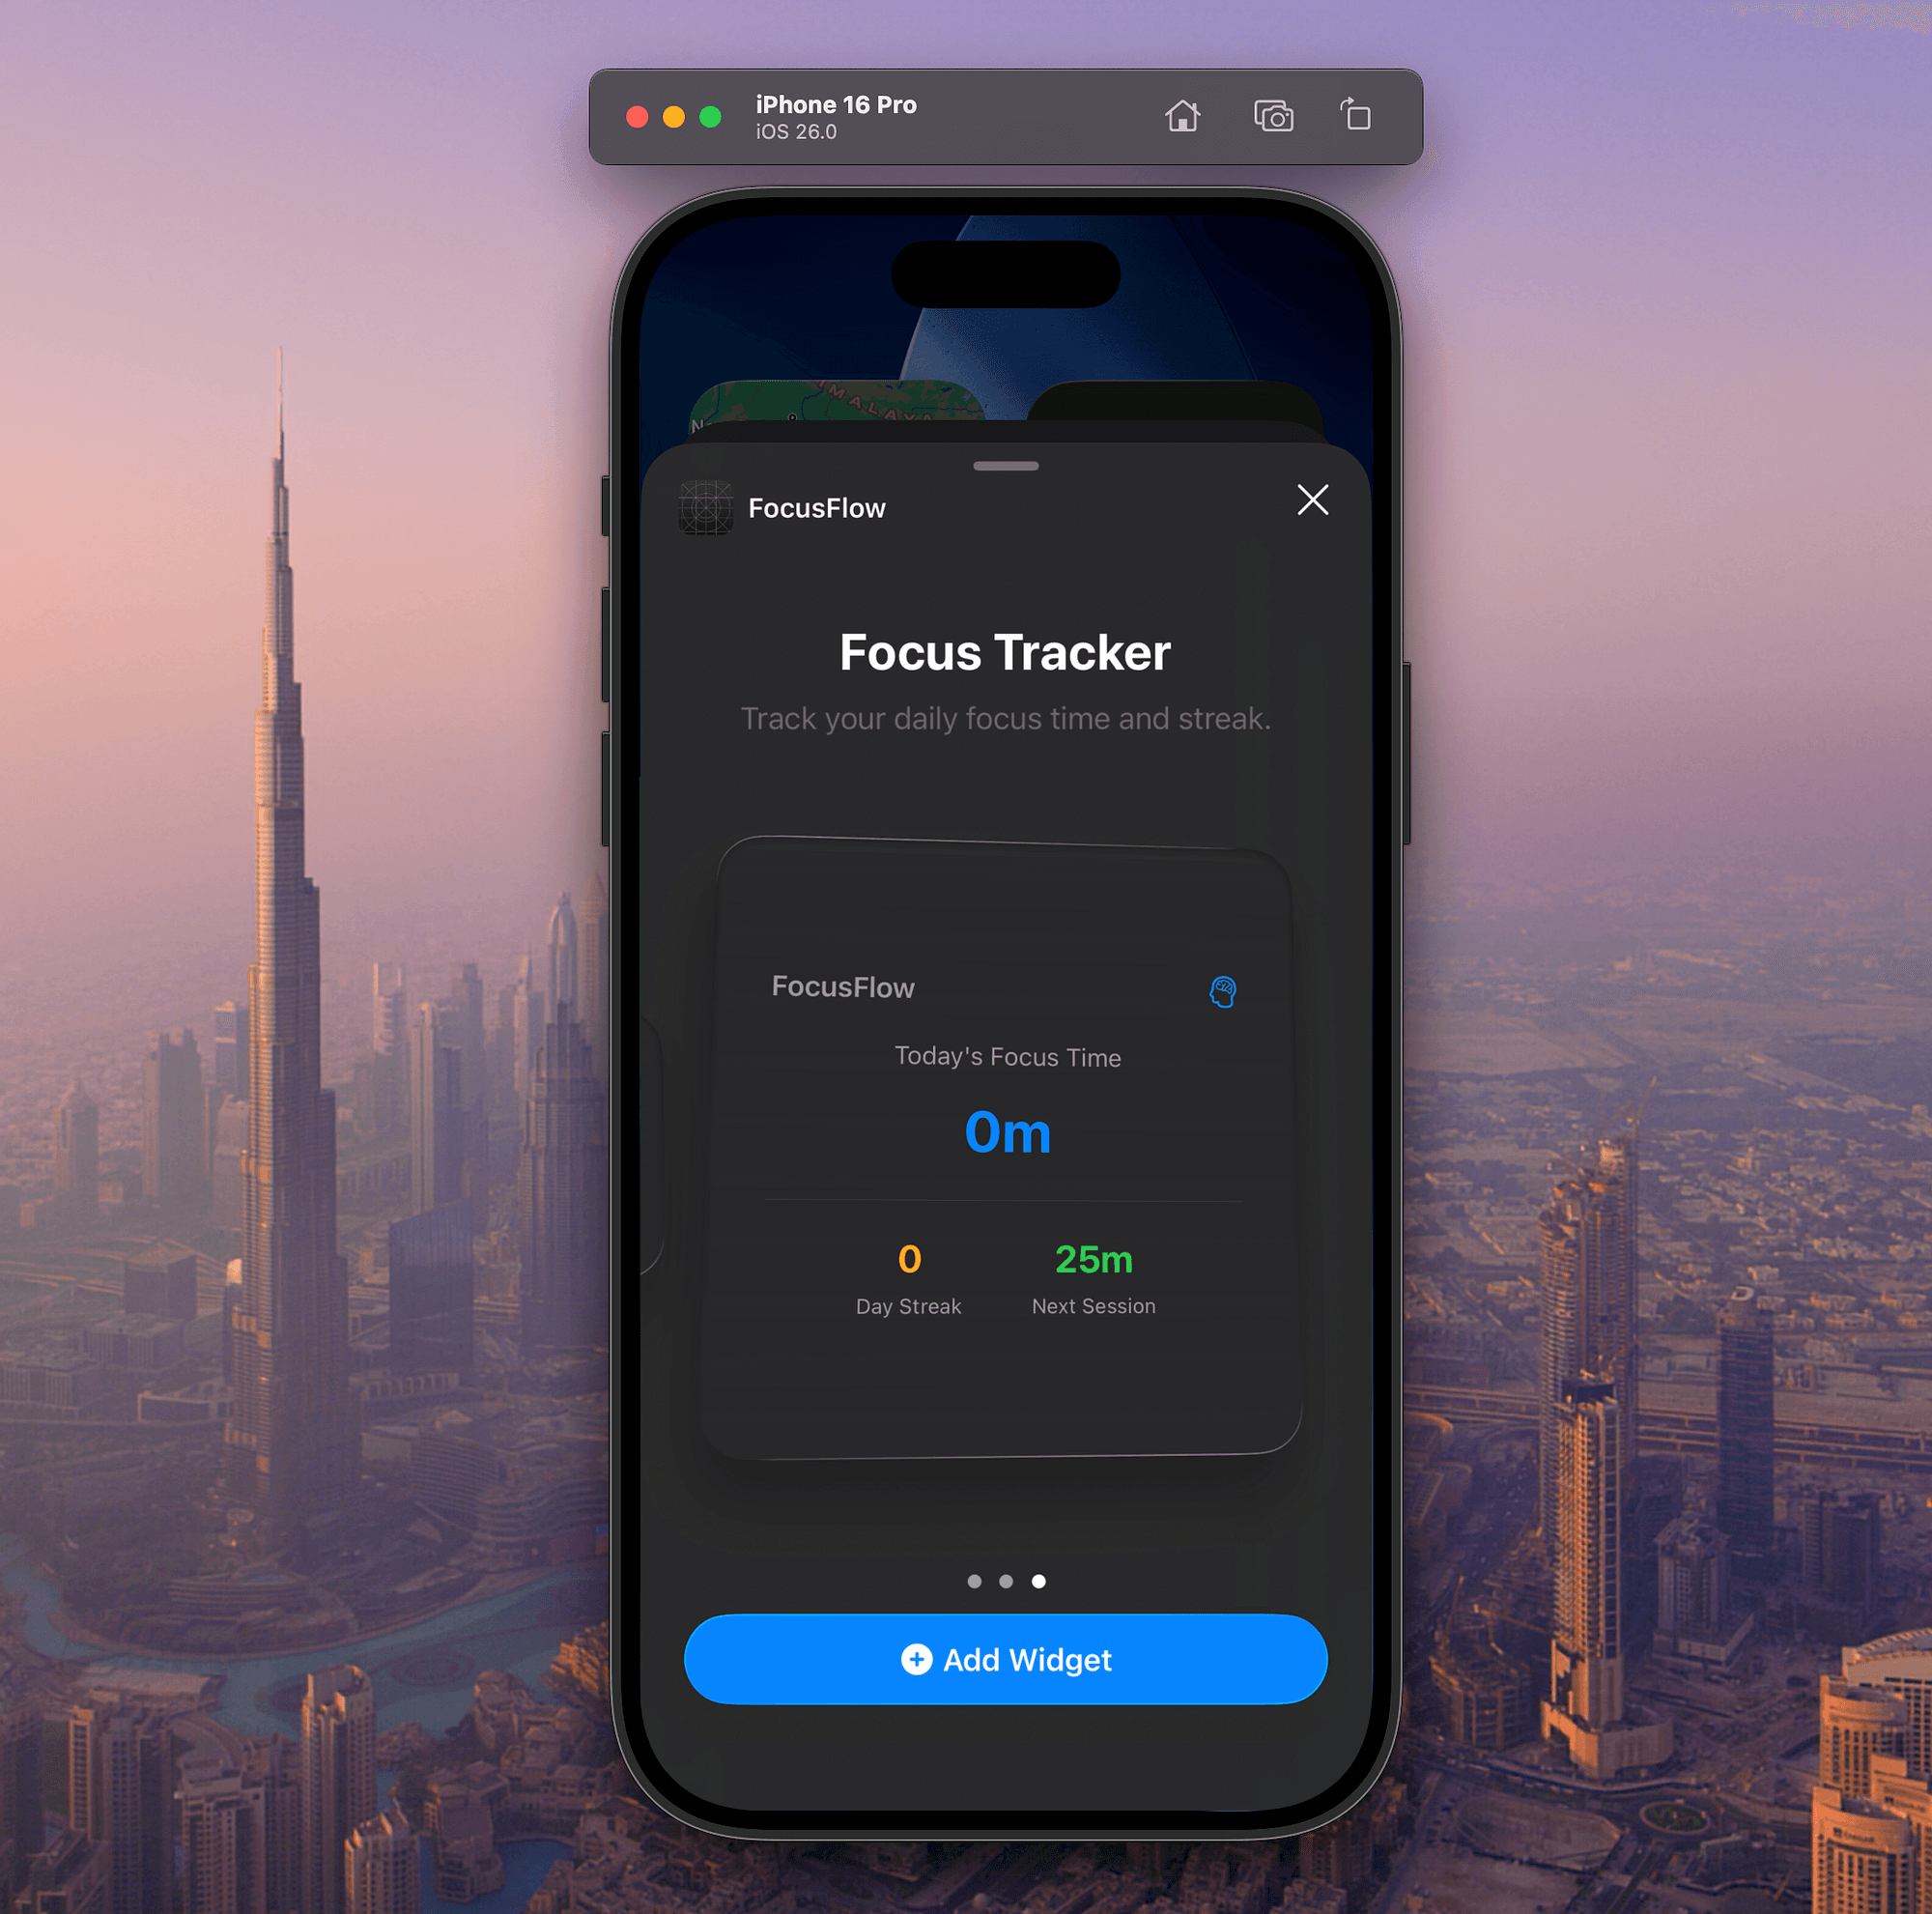

So you read through the iOS Widget Guide and now you’re ready to actually build something? Good. Let’s get our hands dirty.
We’re building FocusFlow — a complete productivity app that tracks focus sessions. This isn’t just another throwaway tutorial project. By the end of this two-part series, you’ll have a production-ready app with widgets, Live Activities, and robust session management.
📺 Following along? The complete video walkthrough will be available on Swift Pal: https://youtube.com/@swift-pal
**Swift Pal** _👨💻 Welcome to Swift Pal - Your iOS Dev Companion! Whether you're just starting your journey with Swift and SwiftUI…_youtube.comhttps://youtube.com/@swift-pal
🎯 What We’re Building (Series Overview)
FocusFlow — A complete focus session tracker built across two comprehensive articles:
Part 1 (This Article): Widget fundamentals
- Daily focus time display
- Current focus streak
- Timeline that resets at midnight
- Foundation architecture
Part 2: Live Activities for active sessions
- Real-time session tracking in Dynamic Island
- Lock Screen Live Activities
- Advanced session state management
- Complete production-ready app
🚀 Article 1: Widget Fundamentals
In this first article, we’ll build the foundation: a widget that shows today’s total focus time and your current streak. We’ll create the complete data architecture and timeline management that powers the Live Activities system we’ll add in Part 2.
🚀 Setting Up the Project
Open Xcode and create a new iOS app. Call it FocusFlow and make sure you're using SwiftUI. Once your project is created, we need to add the widget extension.
Adding the Widget Extension:
- File → New → Target
- Choose “Widget Extension”
- Name it
FocusFlowWidget - Important: Uncheck “Include Configuration Intent” for now — we’ll add this in Part 4
- Don’t activate the scheme when prompted
Xcode just created a bunch of files for you. Let’s understand what each one does:
FocusFlowWidget.swift— Your main widget view (contains the Provider struct too)FocusFlowWidgetBundle.swift— Groups multiple widgets togetherFocusFlowWidgetControl.swift— Auto-generated for interactive controls (we'll use this later)FocusFlowWidgetLiveActivity.swift— Auto-generated for Live Activities (we'll use this in Part 2)
Actually, let me be honest here — the generated code is… not great for learning. It’s overly complex for a first widget. We’re going to replace most of it.
📊 Data Layer First
Before we touch any widget code, let’s set up data sharing between the app and widget. This is where most beginners get stuck.
Create App Groups:
- Select your main app target
- Signing & Capabilities → + Capability → App Groups
- Add a new group:
group.com.yourname.focusflow - Repeat for the widget extension target with the same group ID
Now let’s create a simple data manager that both targets can use. For this foundation article, we’ll use UserDefaults with a architecture that easily solves our cause of this article.
Create **FocusData.swift** in your main project (make sure to add it to both targets):
import Foundation
import Observation

@Observable
class FocusData {
    static let shared = FocusData()

    var todaysFocusTime: TimeInterval = 0
    var currentStreak: Int = 0
    var lastSessionDate: Date?

    // Replace "yourname" with your actual name/organization - must match your App Groups setup
    private let userDefaults = UserDefaults(suiteName: "group.com.yourname.focusflow")
    private let focusTimeKey = "todaysFocusTime"
    private let streakKey = "currentStreak"
    private let lastSessionKey = "lastSessionDate"
    private let lastResetDateKey = "lastResetDate"

    private init() {
        loadData()
        checkForNewDay()
    }

    func addFocusSession(duration: TimeInterval) {
        todaysFocusTime += duration
        updateStreak()
        lastSessionDate = Date()
        saveData()
    }

    func resetDay() {
        todaysFocusTime = 0
        saveData()
    }

    private func updateStreak() {
        let calendar = Calendar.current
        let today = Date()

        if let lastSession = lastSessionDate {
            let daysSinceLastSession = calendar.dateComponents([.day], from: lastSession, to: today).day ?? 0

            if daysSinceLastSession == 0 {
                // Same day, keep streak
                return
            } else if daysSinceLastSession == 1 {
                // Yesterday, increment streak
                currentStreak += 1
            } else {
                // Missed days, reset streak
                currentStreak = 1
            }
        } else {
            // First session ever
            currentStreak = 1
        }
    }

    private func checkForNewDay() {
        let calendar = Calendar.current
        let today = Date()

        if let lastReset = userDefaults?.object(forKey: lastResetDateKey) as? Date {
            if !calendar.isDate(lastReset, inSameDayAs: today) {
                resetDay()
                userDefaults?.set(today, forKey: lastResetDateKey)
            }
        } else {
            userDefaults?.set(today, forKey: lastResetDateKey)
        }
    }

    private func loadData() {
        todaysFocusTime = userDefaults?.double(forKey: focusTimeKey) ?? 0
        currentStreak = userDefaults?.integer(forKey: streakKey) ?? 0
        lastSessionDate = userDefaults?.object(forKey: lastSessionKey) as? Date
    }

    private func saveData() {
        userDefaults?.set(todaysFocusTime, forKey: focusTimeKey)
        userDefaults?.set(currentStreak, forKey: streakKey)
        userDefaults?.set(lastSessionDate, forKey: lastSessionKey)
    }
}

// Helper extensions
extension TimeInterval {
    var formattedDuration: String {
        let hours = Int(self) / 3600
        let minutes = Int(self) % 3600 / 60

        if hours > 0 {
            return "\(hours)h \(minutes)m"
        } else {
            return "\(minutes)m"
        }
    }
}
🧠 Understanding FocusData Architecture
Let’s break down this data layer, because it’s doing several important things that are easy to miss:
App Groups Integration:
private let userDefaults = UserDefaults(suiteName: "group.com.yourname.focusflow")This is the magic that enables app-widget data sharing. Regular UserDefaults.standard only works within your main app. With a suite name, you create a shared container that both processes can access.
Automatic Day Reset Logic:
The checkForNewDay() function runs on every app launch and handles the tricky "reset at midnight" logic:
private func checkForNewDay() {
    let calendar = Calendar.current
    let today = Date()

    if let lastReset = userDefaults?.object(forKey: lastResetDateKey) as? Date {
        if !calendar.isDate(lastReset, inSameDayAs: today) {
            resetDay()  // New day detected, reset focus time
            userDefaults?.set(today, forKey: lastResetDateKey)
        }
    }
}
This ensures focus time resets to zero each day, even if the user doesn’t open the app.
Smart Streak Calculation:
The updateStreak() method implements sophisticated streak logic:
- Same day: Keep current streak (multiple sessions allowed)
- Consecutive days: Increment streak by 1
- Missed days: Reset to 1 (starting fresh)
Data Persistence Strategy:
Every change triggers saveData(), which immediately writes to the shared UserDefaults. This ensures the widget always has access to the latest data, even if the app crashes or gets terminated by the system.
Why This Architecture Works:
- Thread Safety:
@Observablehandles SwiftUI updates automatically - Cross-Process: App Groups enable widget data access
- Persistence: UserDefaults survives app termination
- Real-time: Immediate saves mean widgets stay current
- Day Logic: Automatic resets without user intervention
This is your bridge between the app and widget. The UserDefaults(suiteName:) creates a shared container that both processes can access.
Update your main app’s **ContentView.swift**:
import SwiftUI

struct ContentView: View {
    @State private var focusData = FocusData.shared
    @State private var isTimerRunning = false
    @State private var sessionDuration: TimeInterval = 25 * 60 // 25 minutes default
    @State private var startTime: Date?

    var body: some View {
        NavigationView {
            VStack(spacing: 30) {
                // Today's Stats
                VStack(spacing: 16) {
                    Text("Today's Focus Time")
                        .font(.headline)
                        .foregroundColor(.secondary)

                    Text(focusData.todaysFocusTime.formattedDuration)
                        .font(.largeTitle)
                        .fontWeight(.bold)
                        .foregroundColor(.blue)

                    HStack(spacing: 20) {
                        VStack {
                            Text("\(focusData.currentStreak)")
                                .font(.title2)
                                .fontWeight(.bold)
                                .foregroundColor(.orange)
                            Text("Day Streak")
                                .font(.caption)
                                .foregroundColor(.secondary)
                        }

                        Divider()
                            .frame(height: 40)

                        VStack {
                            Text("25m")
                                .font(.title2)
                                .fontWeight(.bold)
                                .foregroundColor(.green)
                            Text("Next Session")
                                .font(.caption)
                                .foregroundColor(.secondary)
                        }
                    }
                }
                .padding()
                .background(Color(.systemGray6))
                .clipShape(RoundedRectangle(cornerRadius: 12))

                Spacer()

                // Quick Start Session (simplified for Part 1)
                VStack(spacing: 16) {
                    Text("Quick Focus Session")
                        .font(.headline)

                    if !isTimerRunning {
                        Button("Start 25 Min Focus") {
                            startFocusSession()
                        }
                        .buttonStyle(.borderedProminent)
                        .controlSize(.large)
                    } else {
                        VStack {
                            Text("Session in Progress")
                                .font(.subheadline)
                                .foregroundColor(.secondary)

                            Button("Complete Session") {
                                completeFocusSession()
                            }
                            .buttonStyle(.bordered)
                        }
                    }
                }

                Spacer()
            }
            .padding()
            .navigationTitle("FocusFlow")
        }
    }

    private func startFocusSession() {
        isTimerRunning = true
        startTime = Date()
        // In Part 2, we'll add Live Activities here
    }

    private func completeFocusSession() {
        if let start = startTime {
            let duration = Date().timeIntervalSince(start)
            focusData.addFocusSession(duration: duration)
        }
        isTimerRunning = false
        startTime = nil
    }
}
🧠 Understanding ContentView Design Patterns
This main app interface demonstrates several important patterns that work well with widgets:
Information Hierarchy in the UI:
The layout prioritizes the same data the widget shows:
- Today’s Focus Time — Primary metric (large, prominent)
- Streak Counter — Secondary motivation metric
- Session Controls — Action items at the bottom
This consistency between app and widget creates a cohesive user experience.
Simplified Session Tracking:
For this first article, we’re keeping session logic minimal:
- Start: Record timestamp, set running flag
- Complete: Calculate duration, add to focus data, reset UI
In Part 2, we’ll replace this with proper Live Activities that track sessions in real-time.
Widget-Friendly Data Updates:
private func completeFocusSession() {
    if let start = startTime {
        let duration = Date().timeIntervalSince(start)
        focusData.addFocusSession(duration: duration)  // This triggers widget updates
    }
    isTimerRunning = false
    startTime = nil
}
When we call focusData.addFocusSession(), several things happen:
- Focus time updates in the shared data
- Streak calculation runs automatically
- Data saves to UserDefaults (App Groups)
- Widget timeline gets refreshed on next cycle
Visual Consistency:
The app’s color scheme and typography match the widget:
- Blue for focus time (
.blue) - Orange for streak (
.orange) - Green for next session (
.green) - Secondary text for labels (
.secondary)
This creates visual continuity when users switch between app and widget.
Future-Proofing Architecture:
Notice the comment // In Part 2, we'll add Live Activities here. The current simple timer will be replaced with Live Activities, but the data flow and UI patterns we've established will remain the same.
Run your app and test the counter. Make sure it persists when you close and reopen the app. If it doesn’t, double-check your App Groups configuration.
🎨 Building the Widget View
Now for the fun part. Let’s replace that generated widget code with something that actually makes sense.
Replace the contents of **FocusFlowWidget.swift**:
import WidgetKit
import SwiftUI

struct FocusFlowWidgetEntryView: View {
    var entry: FocusEntry
    @Environment(\.widgetFamily) var family

    var body: some View {
        switch family {
        case .systemSmall:
            SmallFocusView(entry: entry)
        case .systemMedium:
            MediumFocusView(entry: entry)
        case .systemLarge:
            LargeFocusView(entry: entry)
        default:
            SmallFocusView(entry: entry)
        }
    }
}

struct SmallFocusView: View {
    let entry: FocusEntry

    var body: some View {
        VStack(spacing: 4) {
            Text("Focus Time")
                .font(.caption)
                .foregroundColor(.secondary)

            Text(entry.todaysFocusTime.formattedDuration)
                .font(.title2)
                .fontWeight(.bold)
                .foregroundColor(.blue)

            if entry.currentStreak > 0 {
                Text("\(entry.currentStreak) day streak")
                    .font(.caption2)
                    .foregroundColor(.orange)
            }
        }
        .containerBackground(.fill.tertiary, for: .widget)
    }
}

struct MediumFocusView: View {
    let entry: FocusEntry

    var body: some View {
        HStack {
            VStack(alignment: .leading, spacing: 8) {
                Text("Today's Focus")
                    .font(.headline)
                    .foregroundColor(.secondary)

                Text(entry.todaysFocusTime.formattedDuration)
                    .font(.title)
                    .fontWeight(.bold)
                    .foregroundColor(.blue)

                if entry.currentStreak > 0 {
                    Text("\(entry.currentStreak) day streak 🔥")
                        .font(.subheadline)
                        .foregroundColor(.orange)
                }
            }

            Spacer()

            VStack(spacing: 8) {
                Image(systemName: "brain.head.profile")
                    .font(.title)
                    .foregroundColor(.blue)

                Text("FocusFlow")
                    .font(.caption)
                    .foregroundColor(.secondary)
            }
        }
        .padding()
        .containerBackground(.fill.tertiary, for: .widget)
    }
}

struct LargeFocusView: View {
    let entry: FocusEntry

    var body: some View {
        VStack(spacing: 16) {
            HStack {
                Text("FocusFlow")
                    .font(.headline)
                    .foregroundColor(.secondary)
                Spacer()
                Image(systemName: "brain.head.profile")
                    .foregroundColor(.blue)
            }

            VStack(spacing: 8) {
                Text("Today's Focus Time")
                    .font(.subheadline)
                    .foregroundColor(.secondary)

                Text(entry.todaysFocusTime.formattedDuration)
                    .font(.largeTitle)
                    .fontWeight(.bold)
                    .foregroundColor(.blue)
            }

            Divider()

            HStack(spacing: 40) {
                VStack {
                    Text("\(entry.currentStreak)")
                        .font(.title2)
                        .fontWeight(.bold)
                        .foregroundColor(.orange)
                    Text("Day Streak")
                        .font(.caption)
                        .foregroundColor(.secondary)
                }

                VStack {
                    Text("25m")
                        .font(.title2)
                        .fontWeight(.bold)
                        .foregroundColor(.green)
                    Text("Next Session")
                        .font(.caption)
                        .foregroundColor(.secondary)
                }
            }
        }
        .padding()
        .containerBackground(.fill.tertiary, for: .widget)
    }
}

struct FocusFlowWidget: Widget {
    let kind: String = "FocusFlowWidget"

    var body: some WidgetConfiguration {
        StaticConfiguration(kind: kind, provider: FocusProvider()) { entry in
            FocusFlowWidgetEntryView(entry: entry)
                .widgetURL(URL(string: "focusflow://open"))
        }
        .configurationDisplayName("Focus Tracker")
        .description("Track your daily focus time and streak.")
        .supportedFamilies([.systemSmall, .systemMedium, .systemLarge])
    }
}

// MARK: - Helper Extensions
extension TimeInterval {
    var formattedDuration: String {
        let hours = Int(self) / 3600
        let minutes = Int(self) % 3600 / 60

        if hours > 0 {
            return "\(hours)h \(minutes)m"
        } else {
            return "\(minutes)m"
        }
    }
}

// MARK: - Previews
#Preview(as: .systemSmall) {
    FocusFlowWidget()
} timeline: {
    FocusEntry(date: .now, todaysFocusTime: 3600, currentStreak: 5)
    FocusEntry(date: .now, todaysFocusTime: 7200, currentStreak: 12)
}

#Preview(as: .systemMedium) {
    FocusFlowWidget()
} timeline: {
    FocusEntry(date: .now, todaysFocusTime: 3600, currentStreak: 5)
    FocusEntry(date: .now, todaysFocusTime: 7200, currentStreak: 12)
}

#Preview(as: .systemLarge) {
    FocusFlowWidget()
} timeline: {
    FocusEntry(date: .now, todaysFocusTime: 3600, currentStreak: 5)
    FocusEntry(date: .now, todaysFocusTime: 7200, currentStreak: 12)
}
🧠 Understanding the Widget View Architecture
Let’s break down what we just built, because this pattern is crucial for any widget you’ll create.
The Main Entry Point: **FocusFlowWidgetEntryView**
This is your widget’s root view. It receives a FocusEntry (our data) and uses @Environment(\.widgetFamily) to detect the widget size. Based on that size, it routes to the appropriate layout:
switch family {
case .systemSmall:
    SmallFocusView(entry: entry)    // Compact, essential info only
case .systemMedium:
    MediumFocusView(entry: entry)   // More space, more details
case .systemLarge:
    LargeFocusView(entry: entry)    // Full layout with all features
default:
    SmallFocusView(entry: entry)    // Fallback
}
Why separate views for each size?
Unlike regular SwiftUI views that resize gracefully, widgets have fixed dimensions. A small widget (158x158 points) can’t just be a shrunk version of a large widget (364x382 points) — the text would be unreadable. Each size needs its own thoughtful layout.
The Execution Flow:
- iOS requests widget update → Calls your Provider
- Provider fetches data → Reads from UserDefaults via App Groups
- Provider creates FocusEntry → Wraps data with timestamp
- Widget system calls EntryView → Passes the entry data
- EntryView checks widget size → Routes to appropriate view
- Size-specific view renders → Displays formatted data
Layout Strategy by Size:
- Small (systemSmall): Focus time + streak indicator. Every pixel counts.
- Medium (systemMedium): Horizontal layout with icon and branding space
- Large (systemLarge): Full dashboard with sections, dividers, future session preview
Key Design Principles:
- Information hierarchy: Most important data (focus time) is prominent in all sizes
- Progressive disclosure: Larger widgets reveal more details, not just bigger text
- Consistent branding: Colors and typography remain consistent across sizes
- Future-proofing: Large widget has space for the interactive buttons we’ll add in Part 3
The Widget Configuration:
struct FocusFlowWidget: Widget {
    let kind: String = "FocusFlowWidget"  // Unique identifier

    var body: some WidgetConfiguration {
        StaticConfiguration(kind: kind, provider: FocusProvider()) { entry in
            FocusFlowWidgetEntryView(entry: entry)
        }
        .supportedFamilies([.systemSmall, .systemMedium, .systemLarge])
    }
}
This ties everything together:
- kind: Unique ID for this widget type (important for analytics and debugging)
- provider: Your data source (we’ll build this next)
- entry view: The UI that renders each timeline entry
- supported families: Which widget sizes you support
This creates a widget that adapts its layout based on size, with each view optimized for its specific constraints.
⚡ Entry and Provider Setup
The widget view needs data, and that’s where Entry and Provider come in. Think of Entry as a snapshot of your widget at a specific time.
Create **FocusEntry.swift**:
import WidgetKit

struct FocusEntry: TimelineEntry {
    let date: Date
    let todaysFocusTime: TimeInterval
    let currentStreak: Int
}
That’s it. An entry just holds the data your widget needs to display, plus a timestamp.
Now update the Provider struct in your **FocusFlowWidget.swift**:
import WidgetKit
import SwiftUI

struct FocusProvider: TimelineProvider {
    func placeholder(in context: Context) -> FocusEntry {
        FocusEntry(date: Date(), todaysFocusTime: 90 * 60, currentStreak: 3)
    }

    func getSnapshot(in context: Context, completion: @escaping (FocusEntry) -> ()) {
        let data = getCurrentFocusData()
        let entry = FocusEntry(
            date: Date(),
            todaysFocusTime: data.focusTime,
            currentStreak: data.streak
        )
        completion(entry)
    }

    func getTimeline(in context: Context, completion: @escaping (Timeline<FocusEntry>) -> ()) {
        let currentDate = Date()
        let calendar = Calendar.current

        // Get current data
        let data = getCurrentFocusData()

        var entries: [FocusEntry] = []

        // Current entry
        entries.append(FocusEntry(
            date: currentDate,
            todaysFocusTime: data.focusTime,
            currentStreak: data.streak
        ))

        // Create entries for next few hours (in case user completes sessions)
        for hourOffset in 1..<6 {
            if let entryDate = calendar.date(byAdding: .hour, value: hourOffset, to: currentDate) {
                let updatedData = getCurrentFocusData()
                entries.append(FocusEntry(
                    date: entryDate,
                    todaysFocusTime: updatedData.focusTime,
                    currentStreak: updatedData.streak
                ))
            }
        }

        // Reset entry for tomorrow
        let tomorrow = calendar.startOfDay(for: calendar.date(byAdding: .day, value: 1, to: currentDate)!)
        entries.append(FocusEntry(
            date: tomorrow,
            todaysFocusTime: 0,
            currentStreak: data.streak // Streak calculation will be handled by app logic
        ))

        // Refresh timeline every hour during active hours, then tomorrow at midnight
        let nextRefresh = calendar.date(byAdding: .hour, value: 2, to: currentDate) ?? tomorrow
        let timeline = Timeline(entries: entries, policy: .after(nextRefresh))

        completion(timeline)
    }

    private func getCurrentFocusData() -> (focusTime: TimeInterval, streak: Int) {
        // Must match the group ID from your App Groups and FocusData.swift
        let userDefaults = UserDefaults(suiteName: "group.com.yourname.focusflow")
        let focusTime = userDefaults?.double(forKey: "todaysFocusTime") ?? 0
        let streak = userDefaults?.integer(forKey: "currentStreak") ?? 0
        return (focusTime, streak)
    }
}
Here’s what’s happening:
placeholder: Shows while the widget is loadinggetSnapshot: Used for widget gallery and configurationgetTimeline: The real timeline that determines when your widget updates
The timeline creates entries for the next 6 hours, then schedules a refresh for tomorrow at midnight. This ensures the widget resets daily without burning through your refresh budget.
🎮 Basic Widget URL Handling
Let’s make tapping the widget open your main app. Add this to your main app’s App.swift:
import SwiftUI

@main
struct FocusFlowApp: App {
    var body: some Scene {
        WindowGroup {
            ContentView()
                .onOpenURL { url in
                    // Handle widget deep link
                    if url.scheme == "focusflow" {
                        // Open to main screen
                        print("Opened from widget!")
                    }
                }
        }
    }
}
Don’t forget to add the URL scheme to your Info.plist:
<key>CFBundleURLTypes</key>
<array>
    <dict>
        <key>CFBundleURLName</key>
        <string>focusflow</string>
        <key>CFBundleURLSchemes</key>
        <array>
            <string>focusflow</string>
        </array>
    </dict>
</array>
If you don’t see Info.plist file in your project, you can add the configuration by following the below steps:
- Select the Project File
- Select your Main Target
- Switch to Info Tab
- Now on any property Right Click and Select ‘Raw Types and Values’

Now, you can add the files from the exact code I shared earlier. Make sure each value add is correctly getting added. For e.g. CFBundleURLTypes should be Array. If you are still not clear on this, in a day or two will have uploaded the video. So you can checkout the exact implementation on my Youtube channel step by step.
🧪 Testing and Debugging
Build and run your app. Add the widget to your home screen and test it out.
Common Issues:
Widget shows “No Data”: Check your App Groups configuration. Make sure both targets use the same group ID.
Widget doesn’t update: Remember that refresh budget? Don’t expect instant updates. Complete a focus session in your main app and the widget should update within a few minutes.
Timeline confusion: Use Xcode’s Debug → Attach to Process to debug your widget extension while it’s running.
Actually, let me share something that confused me for hours — your widget extension and main app are separate processes. When you set a breakpoint in your widget code, you need to attach the debugger to the widget extension process, not your main app.
🎯 What We’ve Built So Far
You just built the foundation of FocusFlow! Here’s what you accomplished:
✅ Set up App Groups for data sharing ✅ Created a timeline provider that updates throughout the day ✅ Built responsive layouts for multiple widget families ✅ Implemented deep linking from widget to app ✅ Foundation architecture that we’ll build on in the next three articles
What’s Coming in Part 2:
Live Activities Integration — Real-time focus session tracking with Dynamic Island and Lock Screen Live Activities, plus advanced session state management that creates a complete, production-ready focus tracking app.
📺 Watch the complete build process: Full video tutorials for each part coming soon to Swift Pal: https://youtube.com/@swift-pal
**Swift Pal** _👨💻 Welcome to Swift Pal - Your iOS Dev Companion! Whether you're just starting your journey with Swift and SwiftUI…_youtube.comhttps://youtube.com/@swift-pal
🎯 Series Complete
This foundation you just built supports the complete Live Activities system we’ll add in Part 2:
Part 2 — Live Activities: When users start a focus session, we’ll launch a Live Activity that shows real-time progress in the Dynamic Island and Lock Screen, with robust session state management and automatic persistence.
The beauty of this architecture? It naturally scales from simple widgets to advanced Live Activities, giving you a complete, production-ready focus tracking app that handles edge cases like app termination, background refresh, and state restoration.
🔧 Key Patterns to Remember
Timeline Management: Our provider creates entries for the next few hours, then schedules a refresh for tomorrow. This balances data freshness with refresh budget constraints.
Data Sharing: App Groups enable seamless data flow between your main app and widget extension.
Responsive Design: Using @Environment(\.widgetFamily) lets us create purpose-built layouts for each widget size.
Future-Proofing: The architecture we built today easily supports the Live Activities we’re adding in Part 2, creating a complete focus tracking solution.
Ready for Part 2? The Live Activities integration completes our production-ready FocusFlow app!
🎉 Enjoyed this article? Your support means the world to me!
💬 Drop a comment below! I love hearing about your experiences and answering questions
🎬 Subscribe on Youtube and become early subscribers of my channel: https://www.youtube.com/@swift-pal
💼 Let’s connect on LinkedIn for more professional insights: https://www.linkedin.com/in/karan-pal
Happy coding! 🚀
New articles, straight to your inbox.
No spam, no filler — just new writing on iOS, the web, and AI when it ships. Unsubscribe anytime.
Keep reading
Your CPU Has More Cores Than Your Job Can Use
Some work splits cleanly across hundreds of cores. Other work is a chain of steps where every new step has to wait for the last one to finish.
ReadYour Password Isn’t as Random as You Think
Crack-time calculators measure the size of a theoretical password space—not how people actually choose passwords or how attackers search them.
Read