Build a Bulletproof iOS Networking Layer That Works Across All Environments
Stop hardcoding API endpoints and start building networking code that scales from development to production
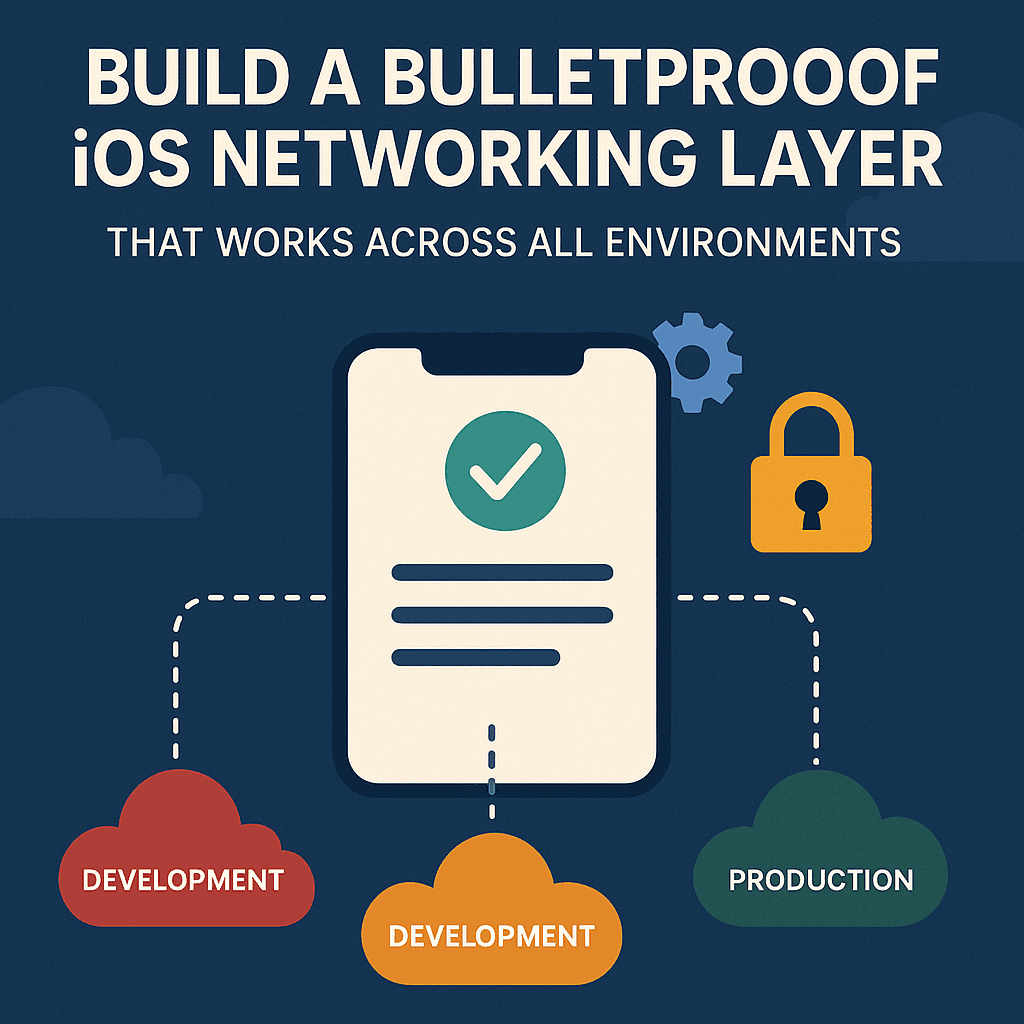

You’re switching between local testing and staging checks when — bam — you realize your “development” build has been quietly hitting the production API all week 😱 Test data is now tangled up with real user info, and worse… your staging tests just triggered real-world push notifications. Cue internal panic.
Sound familiar?
Here’s the brutal truth: Most iOS networking code is environment-blind.
It doesn’t matter how clean your URLSession setup is, how pretty your NetworkManager looks, or how well you’ve structured your build configurations — If your networking layer isn’t environment-aware, you’re just one accidental build away from disaster.
// This is what most networking code looks like
class UserService {
    private let baseURL = "https://api.myapp.com" // Always hits production! 😬
    func fetchUsers() async throws -> [User] {
        // Your dev scheme runs this…
        // Your staging scheme runs this…
        // Your production scheme runs this…
        // They ALL hit the same API endpoint!
    }
}
🧭 The Real Problem: A Blind Networking Layer
The issue? Your networking code has no clue which environment it’s running in.
It’s like having a GPS that only knows one destination — no matter which route you choose, it always takes you to the production server. Every. Single. Time. 😵💫
But today, we’re fixing that.
🔧 What We’re Building
We’re going to upgrade your networking layer into a smart, environment-aware system that:
- ✅ Automatically detects which environment it’s running in
- 🔁 Adapts behavior based on whether it’s dev, staging, or production
- 🌍 Uses different API endpoints without any manual switching
- 🐛 Handles errors differently (verbose in dev, user-friendly in prod)
- 🧪 Supports environment-specific mocking for testing without touching production data
No more accidental calls to live servers. No more wondering “wait… which environment am I in again?” Just clean, reliable network behavior that adjusts itself — the way it should.
Prerequisites: This guide assumes you have multiple environments set up in your iOS project. If you don’t, start with this comprehensive environment setup guide first, then come back here.
**How to Set Up Multiple Environments in Your iOS App (Dev, Staging, Prod the Right Way)** medium.comhttps://medium.com/swift-pal/how-to-set-up-multiple-environments-in-your-ios-app-dev-staging-prod-the-right-way-863601eee6f3
For those who want to dive deeper into URLSession fundamentals, check out this clean URLSession architecture guide— but it’s not required for this tutorial.
Ready to build networking code that actually knows where it’s running? Let’s make your API calls environment-aware! 🚀
🛡️ The Foundation: Environment Detection with Security
Before we start building the networking layer, we need a reliable way for our code to know which environment it’s running in — without exposing sensitive URLs to reverse engineering.
The goal: detect the current environment at runtime, while keeping your API endpoints secure and your build logic clean.
Here’s how to do it: Generate XOR-obfuscated URLs, then use them in a secure environment detector that knows whether it’s running in dev, staging, or production — and adapts accordingly.
Step 1: Generate XOR Obfuscated URLs
First, let’s create a simple script to obfuscate your API URLs (this can be done in your playground):
// XOR Obfuscation Generator (run this in a playground or script)
func generateObfuscatedURL(_ url: String, key: UInt8 = 0x42) -> [UInt8] {
    return url.utf8.map { $0 ^ key }
}

// Generate your obfuscated URLs
let devURL = "https://api-dev.myapp.com"
let stagingURL = "https://api-staging.myapp.com"
let prodURL = "https://api.myapp.com"

let key: UInt8 = 0x42 // Change this to any value you want

print("Development URL obfuscated:")
print(generateObfuscatedURL(devURL, key: key))

print("\nStaging URL obfuscated:")
print(generateObfuscatedURL(stagingURL, key: key))

print("\nProduction URL obfuscated:")
print(generateObfuscatedURL(prodURL, key: key))

// Verify deobfuscation works
func deobfuscate(_ obfuscated: [UInt8], key: UInt8 = 0x42) -> String {
    let deobfuscated = obfuscated.map { $0 ^ key }
    return String(bytes: deobfuscated, encoding: .utf8) ?? ""
}

print("\nVerification:")
print(deobfuscate(generateObfuscatedURL(devURL, key: key), key: key))
Step 2: Implement the Secure Environment Detector
import Foundation

enum AppEnvironment: String, CaseIterable {
    case development = "Development"
    case staging = "Staging"
    case production = "Production"

    static var current: AppEnvironment {
        #if DEV_ENVIRONMENT
        return .development
        #elseif STAGING_ENVIRONMENT
        return .staging
        #else
        return .production
        #endif
    }

    private var obfuscatedBaseURL: [UInt8] {
        switch self {
        case .development:
            // Generated from "https://api-dev.myapp.com" with key 0x42
            return [42, 54, 54, 50, 51, 120, 109, 109, 35, 50, 43, 109, 38, 39, 52, 108, 47, 115, 35, 50, 50, 108, 37, 47, 47]
        case .staging:
            // Generated from "https://api-staging.myapp.com" with key 0x42
            return [42, 54, 54, 50, 51, 120, 109, 109, 35, 50, 43, 109, 51, 54, 35, 41, 43, 46, 41, 108, 47, 115, 35, 50, 50, 108, 37, 47, 47]
        case .production:
            // Generated from "https://api.myapp.com" with key 0x42
            return [42, 54, 54, 50, 51, 120, 109, 109, 35, 50, 43, 108, 47, 115, 35, 50, 50, 108, 37, 47, 47]
        }
    }

    var apiBaseURL: String {
        let key: UInt8 = 0x42 // Same key used for obfuscation
        let deobfuscated = obfuscatedBaseURL.map { $0 ^ key }
        return String(bytes: deobfuscated, encoding: .utf8) ?? ""
    }

    var isLoggingEnabled: Bool {
        switch self {
        case .development, .staging:
            return true
        case .production:
            return false
        }
    }

    var requestTimeout: TimeInterval {
        switch self {
        case .development:
            return 30.0 // Longer timeout for debugging
        case .staging:
            return 20.0
        case .production:
            return 10.0 // Faster timeout for better UX
        }
    }
}
🔐 Pro Tips for Better Security
- Use different XOR keys for each environment
- Rotate the key with every app release
- Add random padding to obfuscate array patterns
- Apply multiple XOR passes for stronger hiding
- Generate keys at runtime based on app bundle metadata
This method uses basic XOR obfuscation to protect API URLs from casual snooping. Sure — a determined attacker can still dig deeper, but it’s a major improvement over exposing raw URLs as plain strings.
And the best part? Environment detection still happens at compile time using Swift’s compilation conditions — which means zero runtime cost and no logic leaks.Building the Environment-Aware Network Manager
Now that we have secure environment detection, let’s build a network manager that automatically adapts to your current environment. This will handle different timeouts, logging levels, and configurations based on where your app is running.
Step 1: Create the Network Manager Protocol
First, let’s define what our network manager should do:
import Foundation

protocol NetworkManagerProtocol {
    func request<T: Codable>(_ endpoint: APIEndpoint, responseType: T.Type) async throws -> T
}

struct APIEndpoint {
    let path: String
    let method: HTTPMethod
    let parameters: [String: Any]?

    init(path: String, method: HTTPMethod = .GET, parameters: [String: Any]? = nil) {
        self.path = path
        self.method = method
        self.parameters = parameters
    }
}

enum HTTPMethod: String {
    case GET = "GET"
    case POST = "POST"
    case PUT = "PUT"
    case DELETE = "DELETE"
}
Step 2: Implement the Environment-Aware Network Manager
import Foundation

class NetworkManager: NetworkManagerProtocol {
    private let session: URLSession
    private let environment: AppEnvironment

    init() {
        self.environment = AppEnvironment.current

        let config = URLSessionConfiguration.default
        config.timeoutIntervalForRequest = environment.requestTimeout

        self.session = URLSession(configuration: config)
    }

    func request<T: Codable>(_ endpoint: APIEndpoint, responseType: T.Type) async throws -> T {
        let request = try buildURLRequest(for: endpoint)

        if environment.isLoggingEnabled {
            print("🚀 \(request.httpMethod ?? "GET") \(request.url?.absoluteString ?? "")")
        }

        let (data, response) = try await session.data(for: request)

        guard let httpResponse = response as? HTTPURLResponse,
              200...299 ~= httpResponse.statusCode else {
            throw NetworkError.requestFailed
        }

        if environment.isLoggingEnabled {
            print("✅ Response: \(httpResponse.statusCode)")
        }

        return try JSONDecoder().decode(responseType, from: data)
    }

    private func buildURLRequest(for endpoint: APIEndpoint) throws -> URLRequest {
        guard let url = URL(string: environment.apiBaseURL + endpoint.path) else {
            throw NetworkError.invalidURL
        }

        var request = URLRequest(url: url)
        request.httpMethod = endpoint.method.rawValue
        request.setValue("application/json", forHTTPHeaderField: "Content-Type")

        if let parameters = endpoint.parameters, endpoint.method == .POST {
            request.httpBody = try JSONSerialization.data(withJSONObject: parameters)
        }

        return request
    }
}

enum NetworkError: Error {
    case invalidURL
    case requestFailed
}
This network manager automatically adapts its behavior based on the current environment:
- Development: Disables caching, enables verbose logging, longer timeouts
- Staging: Balanced settings for testing production-like scenarios
- Production: Enables caching, minimal logging, optimized timeouts
The beauty of this approach is that you write your networking code once, and it automatically behaves differently based on which scheme you’re running. No manual configuration switches needed!
class APIService {
    private let networkManager: NetworkManager
    private let environment: AppEnvironment

    init() {
        self.environment = AppEnvironment.current
        self.networkManager = NetworkManager()
    }

    func fetchUserProfile() async throws -> UserProfile {
        let endpoint = APIEndpoint(path: "/user/profile", method: .GET)
        return try await networkManager.request(endpoint, responseType: UserProfile.self)
    }

    func login(email: String, password: String) async throws -> AuthResponse {
        let endpoint = APIEndpoint(
            path: "/auth/login",
            method: .POST,
            parameters: ["email": email, "password": password]
        )
        return try await networkManager.request(endpoint, responseType: AuthResponse.self)
    }
}

struct UserProfile: Codable {
    let id: String
    let name: String
    let email: String
}

struct AuthResponse: Codable {
    let token: String
    let user: UserProfile
}
That’s it! The magic happens automatically:
- Development: Hits
https://api-dev.myapp.comwith 30-second timeouts and full logging - Staging: Hits
https://api-staging.myapp.comwith 20-second timeouts - Production: Hits
https://api.myapp.comwith 10-second timeouts and no logging
No manual switches needed. The environment configuration we built earlier handles everything automatically based on your build scheme.
🧪 Testing Your Environment-Aware Networking
Now let’s put your shiny new environment-aware networking layer to the test. This is where things click — and you realize just how nice it is to have automatic environment switching baked in.
We’ll test requests, log behavior, and confirm the correct base URL is used for each environment — all without changing a single line of code between builds.
Basic Usage Examples
// This automatically uses the right environment
let apiService = APIService()

// In Development: Hits api-dev.myapp.com with 30s timeout + logging
// In Staging: Hits api-staging.myapp.com with 20s timeout + logging
// In Production: Hits api.myapp.com with 10s timeout, no logging

Task {
    do {
        let user = try await apiService.fetchUserProfile()
        print("User: \(user.name)")
    } catch {
        print("Error: \(error)")
    }
}
Testing Environment Detection
Add this simple test to verify your environment detection works:
func testEnvironmentDetection() {
    let env = AppEnvironment.current
    print("Current Environment: \(env.rawValue)")
    print("API Base URL: \(env.apiBaseURL)")
    print("Request Timeout: \(env.requestTimeout)")
    print("Logging Enabled: \(env.isLoggingEnabled)")
}
Run this in each scheme and you should see different outputs:
Development Scheme:
Current Environment: Development
API Base URL: https://api-dev.myapp.com
Request Timeout: 30.0
Logging Enabled: true
Production Scheme:
Current Environment: Production
API Base URL: https://api.myapp.com
Request Timeout: 10.0
Logging Enabled: false
Quick Verification Steps
- Switch to Development scheme → Run app → Check console for detailed logs
- Switch to Staging scheme → Run app → Check console for moderate logs
- Switch to Production scheme → Run app → Check console for minimal/no logs
The beauty of this setup? You’re testing the exact same code — but it automatically behaves differently based on your build configuration. No manual edits. No last-minute URL swaps. Just clean, automatic environment handling.
This gives you real confidence that your networking layer is working exactly as intended across environments — because you’re testing the actual switching logic as part of development, not as an afterthought.
⚠️ Common Traps to Avoid
Even with a clean, environment-aware networking setup, there are still a few sneaky pitfalls that can trip you up. Here are the most common ones — and how to dodge them like a pro:
1\. Forgetting to Update XOR Keys
Problem: You change your API URLs but forget to regenerate the obfuscated arrays.
// ❌ Wrong - URL changed but obfuscated array is old
case .production:
    // This is obfuscated for "https://api.myapp.com"
    // but you changed to "https://newapi.myapp.com"
    return [42, 54, 54, 50, 51, 120, 109, 109, 35, 50, 43, 108, 47, 115, 35, 50, 50, 108, 37, 47, 47]
Solution: Always regenerate obfuscated arrays when URLs change:
// ✅ Correct - Run the XOR generator script again
let newURL = "https://newapi.myapp.com"
print(generateObfuscatedURL(newURL, key: 0x42))
2\. Environment Mismatch in Schemes
Problem: Your scheme says “Development” but the compilation conditions don’t match
Solution: Double-check your scheme’s build configuration:
- Development scheme → Development configuration →
DEV_ENVIRONMENTflag - Staging scheme → Staging configuration →
STAGING_ENVIRONMENTflag - Production scheme → Release configuration → No environment flags
3\. Hardcoded URLs Sneaking Back In
Problem: Team members accidentally hardcode URLs instead of using the environment system.
// ❌ Wrong - Hardcoded URL bypasses environment system
let url = "https://api-dev.myapp.com/users"

// ✅ Correct - Use the environment-aware system
let endpoint = APIEndpoint(path: "/users", method: .GET)
Solution: Create a code review checklist that catches hardcoded URLs.
4\. Testing Only in One Environment
Problem: You test extensively in development but never verify staging/production configurations.
Solution: Test API calls in all three schemes before releasing.
5\. Environment Leaking in Production
Problem: Development logging or staging endpoints accidentally enabled in production builds.
Solution: The compilation conditions prevent this, but always verify:
// This automatically prevents leaks
var isLoggingEnabled: Bool {
    switch self {
    case .development, .staging:
        return true
    case .production:
        return false  // Never logs in production
    }
}
What’s Next: Taking Your Environment Setup Further
Now that you have bulletproof environment configurations, here are some logical next steps to level up your iOS development workflow:
🌐 Environment-Aware Networking
Your environment setup is only as strong as the code that actually uses it.
Too many developers set up flawless build configurations… and then hardcode their API URLs right into the networking layer. 😬 Or worse — rely on manual switches that are easy to forget and hard to maintain.
The next step? Build a networking layer that:
- Automatically targets the correct base URL
- Uses the right timeout for each environment
- Enables verbose logs in dev, but stays quiet in prod
- Does all of this without needing any manual tweaks
Let’s build something that works smart — not just hard.
Read more: **How to Set Up Multiple Environments in Your iOS App (Dev, Staging, Prod the Right Way)**
**How to Set Up Multiple Environments in Your iOS App (Dev, Staging, Prod the Right Way)** _Stop hardcoding API endpoints and app configurations. Learn the proper way to manage Dev, Staging, and Production…_medium.comhttps://medium.com/swift-pal/how-to-set-up-multiple-environments-in-your-ios-app-dev-staging-prod-the-right-way-863601eee6f3
🎯 Wrapping Up
You now have a bulletproof networking layer that:
- ✅ Automatically adapts to your current environment
- 🔐 Secures API endpoints from casual reverse engineering
- 🪵 Provides appropriate logging per environment
- ⏱ Uses optimized timeouts for dev, staging, and prod
- 🛡 Prevents config mistakes with compile-time checks
And the best part?
You write your networking logic once — and it just works. No manual switches. No messy if branches. No accidental calls to the wrong API.
Your future self (and your team) will thank you when deployments go smoothly and debugging is actually enjoyable — because every environment behaves exactly as it should.
Need help with other iOS development challenges? Check out my guides on _setting up multiple environments_ and building clean URLSession architecture for more advanced techniques.
**How to Set Up Multiple Environments in Your iOS App (Dev, Staging, Prod the Right Way)** _Stop hardcoding API endpoints and app configurations. Learn the proper way to manage Dev, Staging, and Production…_medium.comhttps://medium.com/swift-pal/how-to-set-up-multiple-environments-in-your-ios-app-dev-staging-prod-the-right-way-863601eee6f3
🎉 Enjoyed this article? Your support means the world to me!
💬 Drop a comment below! I love hearing about your experiences and answering questions
🎬 Subscribe on Youtube and become early subscribers of my channel: https://www.youtube.com/@swift-pal
💼 Let’s connect on LinkedIn for more professional insights: https://www.linkedin.com/in/karan-pal
Happy coding! 🚀
New articles, straight to your inbox.
No spam, no filler — just new writing on iOS, the web, and AI when it ships. Unsubscribe anytime.
Keep reading
Your CPU Has More Cores Than Your Job Can Use
Some work splits cleanly across hundreds of cores. Other work is a chain of steps where every new step has to wait for the last one to finish.
ReadYour Password Isn’t as Random as You Think
Crack-time calculators measure the size of a theoretical password space—not how people actually choose passwords or how attackers search them.
Read