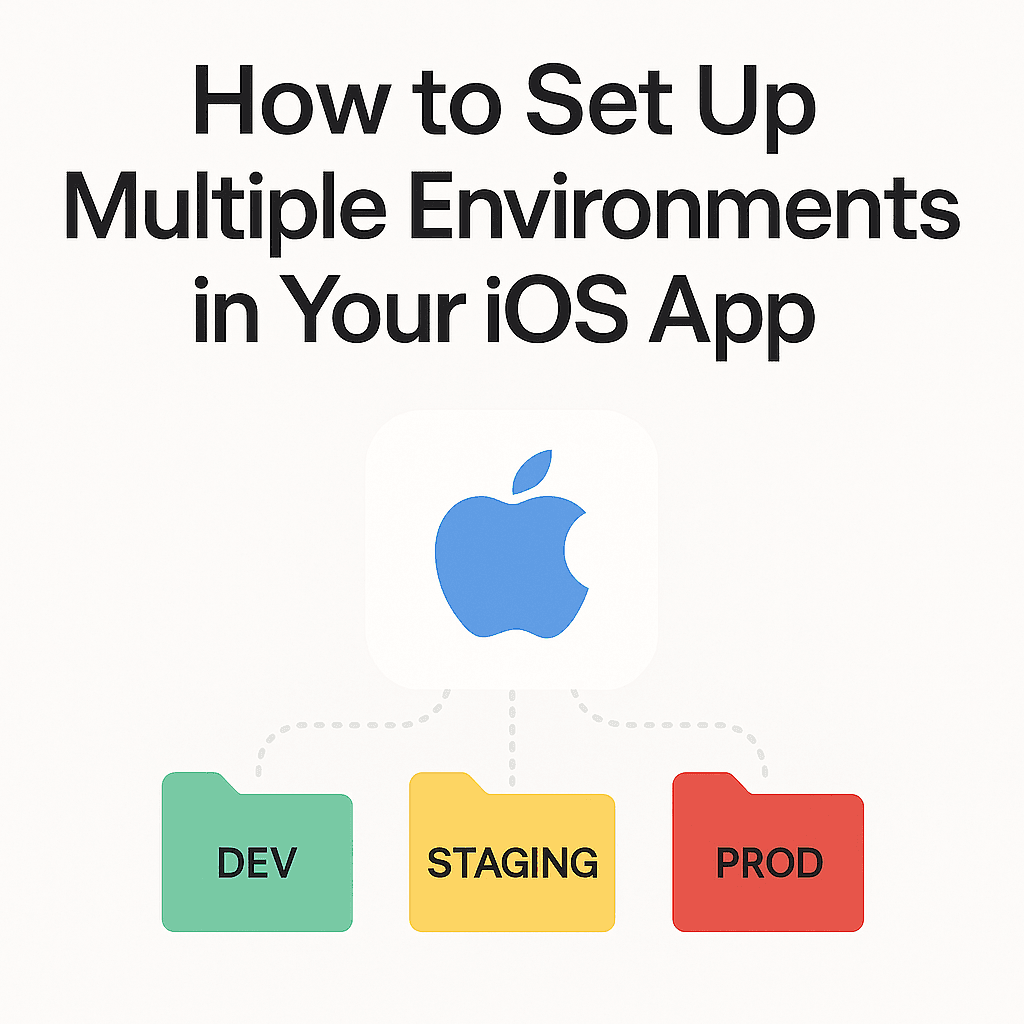
How to Set Up Multiple Environments in Your iOS App (Dev, Staging, Prod the Right Way)
Stop hardcoding API endpoints and app configurations. Learn the proper way to manage Dev, Staging, and Production environments in iOS…

Picture this: it’s 2 AM, you’re finally submitting your app to the App Store… and that’s when you realize — you’ve been testing against the production API all week.
Your staging data is now tangled with live user data. Your QA team is getting push notifications meant for real customers. And your “clean build” just triggered a welcome email to 2,000 users.
Yikes.
If that scenario gives you flashbacks (or cold sweats), you’re not alone. I’ve seen this play out more times than I care to admit during my iOS dev journey.
Why Environment Management Matters
Managing multiple environments might sound like one of those boring engineering chores — but it’s one of the things that separates hobby projects from professional-grade apps.
It’s the difference between:
- “It works on my machine.”
- And: “It works in dev, staging, and production. Every. Time.”
🎯 What You’ll Learn
Today, we’re going to set up a bulletproof environment system using:
- ✅ Xcode Build Configurations
- ✅ Xcode Schemes
- ✅ Zero third-party dependencies
- ✅ Clean, native Swift code
By the end, switching between dev, staging, and prod will be as easy as changing your scheme in Xcode — and your future self (and your teammates) will thank you 🙏
🤔 Why Multiple Environments Matter
Before we roll up our sleeves and start configuring Xcode, let’s talk about why this setup matters. Trust me — once you understand the pain this solves, you’ll be way less tempted to skip steps later 😉
🎰 The Problem Without Proper Environments
Here’s what usually happens when you don’t set up your environments properly:
- The API Roulette Game You’re constantly commenting/uncommenting different base URLs. One day you forget to switch back to dev… and boom — you’ve created test users in your production database. Oops.
- The QA Nightmare Your QA team can’t reproduce bugs because they’re testing against different data than you. Also: your “staging environment” is just… not a thing.
- The App Store Horror Show You ship with debug logs enabled, hardcoded test credentials, and your analytics pointed at staging. Congrats — Apple reviewers are now seeing your internal test data 😬
- The Team Chaos Scenario Different developers are working on different configs, bundle IDs, and API endpoints. Code reviews are a mess of “Wait… which environment is this even for?”
🧱 What We’re Building Today
We’re setting up three distinct, cleanly separated environments — no messy hacks, just rock-solid configuration:
🔧 Development Environment
- Your local playground with debug tools turned on
- Verbose logging for maximum visibility
- Relaxed settings for rapid iteration
- Connects to your dev API server
🧪 Staging Environment
- Mirrors production behavior, but with safe test data
- The go-to spot for QA testing and client demos
- Ideal for catching issues before going live
- Connects to your staging server
🚀 Production Environment
- The real deal: optimized, secure, and stripped of dev cruft
- Debug logging is off
- Analytics are enabled
- Points to your live API servers
Each environment will have:
- Its own bundle ID
- A unique app icon
- Distinct configuration settings
That means you can install all three builds on the same device at once. No more “wait, which build is this?” confusion 📱📱📱
🛠️ Setting Up Build Configurations
Alright, let’s get into the good stuff. The first step to building a rock-solid environment system is setting up Build Configurations in Xcode.
Think of these as blueprints that tell Xcode:
“Hey, when I’m building for development, use these settings. But when I’m prepping for production? Use those.”
By default, Xcode gives you just two configurations: Debug and Release. But we’re pros — and pros need a proper Staging environment too 😎
✅ Step 1: Open Your Project Settings
- Open your project in Xcode (you probably already did, but hey 😄)
- Click your project name in the navigator (the top-most item in the file list)
- Select your project under “PROJECT” (not “TARGETS” — we’ll come back to that)
- Click the Info tab at the top
You’ll see a “Configurations” section with Debug and Release. This is where the magic starts. 🧙♂️
✅ Step 2: Duplicate the Release Configuration
Let’s add our shiny new Staging config:
- Click the “+” button under the Configurations list
- Select “Duplicate ‘Release’ Configuration”
- Name the new one Staging
Boom. You should now see Debug, Release, and Staging listed.
✅ Step 3: Create Configuration Files
Now things get spicy 🌶️ — time to make .xcconfig files. These hold your environment-specific settings, so your actual project stays clean and readable (your teammates will love this part).
Create three new files in Xcode:
- Right-click your project in the navigator
- Select New File
- Under iOS > Other, choose “Configuration Settings File”
- Create one for each environment:
Debug.xcconfigStaging.xcconfigProduction.xcconfig
🗂️ _Pro Tip_: Create a group called Configurations and toss them in there. Future You will high-five you for staying organized.
✅ Step 4: Link Configuration Files
Let’s connect each build config to its matching .xcconfig file:
- Head back to Project Settings > Info > Configurations
- For each configuration (Debug, Staging, Release), click the dropdown
- Select the appropriate file:
Debug → Debug.xcconfigStaging → Staging.xcconfigRelease → Production.xcconfig
⚠️ Don’t see your files in the dropdown? Double-check:
- You created them using the “Configuration Settings File” template
- They’re added to the project and included in the correct target
🎉 And that’s it — you’ve officially laid the foundation of your multi-environment setup!
📝 Configuring Your Environment Settings
Now comes the fun part — actually wiring up those configuration files with meaningful settings! 🎉
Think of these files as the DNA of each environment 🧬 — they define what makes “Debug” different from “Staging” or “Production.”
✅ Step 1: Set Up Your Configuration Files
Let’s start with some essentials. Open each of your .xcconfig files and drop in the appropriate settings:
Debug.xcconfig:
// App Configuration
APP_DISPLAY_NAME = MyApp (Dev)
BUNDLE_ID_SUFFIX = .dev
API_BASE_URL = https://api-dev.myapp.com
LOGGING_ENABLED = YES

// App Icon
ASSETCATALOG_COMPILER_APPICON_NAME = AppIcon-Dev

// Other Settings
SWIFT_ACTIVE_COMPILATION_CONDITIONS = DEBUG DEV_ENVIRONMENT
GCC_PREPROCESSOR_DEFINITIONS = DEBUG=1 DEV_ENVIRONMENT=1
Staging.xcconfig:
// App Configuration
APP_DISPLAY_NAME = MyApp (Staging)
BUNDLE_ID_SUFFIX = .staging

// App Icon
ASSETCATALOG_COMPILER_APPICON_NAME = AppIcon-Staging

// Swift Compilation Conditions
SWIFT_ACTIVE_COMPILATION_CONDITIONS = STAGING_ENVIRONMENT

// Preprocessor Definitions
GCC_PREPROCESSOR_DEFINITIONS = STAGING_ENVIRONMENT=1
Production.xcconfig:
// App Configuration
APP_DISPLAY_NAME = MyApp
BUNDLE_ID_SUFFIX =

// App Icon
ASSETCATALOG_COMPILER_APPICON_NAME = AppIcon

// Swift Compilation Conditions
SWIFT_ACTIVE_COMPILATION_CONDITIONS = PROD_ENVIRONMENT

// Preprocessor Definitions
GCC_PREPROCESSOR_DEFINITIONS = PROD_ENVIRONMENT=1
✅ Step 2: Connect Settings to Your App Target
Time to wire things up so Xcode actually uses the values from your .xcconfig files. Here’s how to connect them to your build:
- Select your app target (under TARGETS in project settings)
- Go to the Build Settings tab
- Search and update the following fields:
Product Bundle Identifier:
- Change from
com.yourcompany.myapptocom.yourcompany.myapp$(BUNDLE_ID_SUFFIX)
Product Name:
- Change to
$(APP_DISPLAY_NAME)
Primary App Icon Set Name:
- Change to
$(ASSETCATALOG_COMPILER_APPICON_NAME)
🧙♂️ Step 3: Create Your Environment Configuration in Swift
This is where the magic happens. Let’s create a Swift file to access your environment config in a type-safe, readable way. It works great in both SwiftUI and UIKit projects, and keeps everything clean and centralized.
Here’s the skeleton to get you started:
import Foundation

struct EnvironmentConfig {

    // MARK: - API Configuration
    static var apiBaseURL: String {
        #if DEV_ENVIRONMENT
        return "https://api-dev.myapp.com"
        #elseif STAGING_ENVIRONMENT
        return "https://api-staging.myapp.com"
        #else
        return "https://api.myapp.com"
        #endif
    }

    // MARK: - Logging Configuration
    static var isLoggingEnabled: Bool {
        #if DEV_ENVIRONMENT || STAGING_ENVIRONMENT
        return true
        #else
        return false
        #endif
    }

    // MARK: - Analytics Configuration
    static var analyticsKey: String {
        #if DEV_ENVIRONMENT
        return "dev-analytics-key"
        #elseif STAGING_ENVIRONMENT
        return "staging-analytics-key"
        #else
        return "prod-analytics-key"
        #endif
    }

    // MARK: - Feature Flags
    static var isDebugMenuEnabled: Bool {
        #if DEV_ENVIRONMENT
        return true
        #else
        return false
        #endif
    }

    // MARK: - Environment Info
    static var environmentName: String {
        #if DEV_ENVIRONMENT
        return "Development"
        #elseif STAGING_ENVIRONMENT
        return "Staging"
        #else
        return "Production"
        #endif
    }
}
Step 4: Create Icon Sets in Xcode
Now let’s get these icons into your project:
- Open your Assets.xcassets folder
- Right-click and hover “iOS”, then select “New iOS App Icon”
- Create three icon sets: •
AppIcon-Dev•AppIcon-Staging•AppIcon(keep your existing production icon)
Step 5: Verify Your Setup
Let’s make sure everything is working correctly:
- Create a simple test in your app (add this to your main view temporarily):
// Quick test - add this to your ContentView or ViewController
print("🌍 Environment: \(EnvironmentConfig.environmentName)")
print("🔗 API URL: \(EnvironmentConfig.apiBaseURL)")
print("📝 Logging: \(EnvironmentConfig.isLoggingEnabled)")- Let’s make sure everything is wired correctly: \- Select your app scheme at the top of Xcode \- Edit the scheme (click on scheme name > “Edit Scheme…”) \- Change the “Build Configuration” under “Run” to “Debug” \- Build your project (⌘+B)

- Build and run with different schemes: \- Debug should show “Development” environment \- Staging should show “Staging” environment \- Release should show “Production” environment
Why This Approach Rocks! 🎸
- Type Safety: Your IDE catches typos at compile time
- No Runtime Overhead: Conditions are resolved at compile time
- Clean & Readable: No string parsing or plist management
- Works Everywhere: Perfect for both SwiftUI and UIKit projects
In the next section, we’ll create those environment-specific app icons so you can visually distinguish your apps! 🎨
🎨 Creating Environment-Specific App Icons
This one’s a game-changer. Having distinct app icons for each environment means no more tapping the wrong build and wondering where your test data went. Or worse — demoing your dev build to a client. Yikes 😅
🎯 Why Different Icons Matter
Picture this: You’re in a client meeting, confidently tapping your app icon… only to launch the debug build, complete with test data and verbose logs flying across the screen. Not ideal.
With unique icons for dev, staging, and prod:
- You’ll always know which build you’re using at a glance
- Your team (especially QA) will thank you for the clarity
- You’ll avoid embarrassing mix-ups in demos and releases
Let’s set it up the smart way so it just works.
Step 1: Design Your Icon Variations
You don’t need to be a design wizard for this! Here are some simple approaches that work great:
Option 1: Color Overlays 🎨
- Development: Add a bright orange or red overlay/badge
- Staging: Add a yellow or blue overlay/badge
- Production: Keep your original design
Option 2: Text Badges 📝
- Add “DEV”, “STAGE”, or “BETA” text to a corner
- Use contrasting colors so they’re clearly visible
Option 3: Border/Frame 🖼️
- Add colored borders around your existing icon
- Different colors for each environment
Pro Tip: Use your existing production icon as the base and just modify it. This maintains brand consistency while making environments obvious!
Step 2: Required Icon Sizes
Make sure you have these sizes for each environment (minimum requirements for iOS):
- iPhone App: 60pt (2x = 120px, 3x = 180px)
- iPad App: 76pt (1x = 76px, 2x = 152px)
- App Store: 1024pt (1x = 1024px)
- Settings: 29pt (2x = 58px, 3x = 87px)
- Spotlight: 40pt (2x = 80px, 3x = 120px)
Feeling overwhelmed by icon sizes? 😵💫 Use online tools like “App Icon Generator” or “Icon Set Creator” — just upload your base design and they’ll generate all the sizes for you!
Step 3: Verify Icon Configuration
Let’s make sure your icons are properly connected:
- Go to your project settings > select your app target
- Build Settings tab > search for “Primary App Icon Set Name”
- Verify it shows:
$(ASSETCATALOG_COMPILER_APPICON_NAME)
Remember, we set this variable in our .xcconfig files:
- Debug:
AppIcon-Dev - Staging:
AppIcon-Staging - Production:
AppIcon
Step 4: Test Your Icons
Time to see your icons in action! 🚀
- Build and install your app using the Debug scheme
- Check your home screen — you should see your development icon
- Switch to Staging scheme and build again
- Install the staging version — now you should have TWO apps on your device!
Cool, right? You can literally have all three versions installed simultaneously. No more “oops, wrong environment” moments!
Step 5: Quick Icon Tips
For Design Tools Users:
- Figma/Sketch: Create components with different overlays
- Photoshop: Use layer styles and smart objects
- Canva: Super beginner-friendly with templates
For Non-Designers:
- Start with your existing icon
- Add a simple colored circle or square in a corner
- Use bold, contrasting colors
- Keep text large and readable
Git Consideration: 📁 Your icon files should be committed to version control so your whole team gets the same visual distinction!
Now your apps will stand out on the home screen like different personalities of the same person! 🎭 In the next section, we’ll set up Xcode schemes to make switching between environments as easy as clicking a dropdown.
⚙️ Setting Up Xcode Schemes
Now we’re getting to the really satisfying part — setting up Xcode schemes! 💪
Think of schemes as your environment-switching superpower. With properly configured schemes, jumping from Development to Staging to Production becomes as easy as picking an option from a dropdown.
No more hunting through config files or changing base URLs manually. Just click and go 🎯
🤔 What Are Schemes Anyway?
Before we dive in, let’s clear up what Xcode schemes actually do.
A scheme is like a preset that tells Xcode:
- ✅ Which build configuration to use (Debug, Staging, Release)
- 🎯 Which target to build
- 🛠 What arguments or environment variables to pass
- 🐞 What debugger and runtime settings to apply
- …and a bunch more behind-the-scenes behavior
By default, Xcode gives you just one scheme — named after your project. But we’re going to level that up and create three schemes, one for each environment:
- Dev
- Staging
- Production
Once that’s set up, switching environments will be as easy as selecting a new scheme from the dropdown in Xcode — zero manual fiddling required.
Step 1: Create Your Environment Schemes
Let’s start by creating dedicated schemes for each environment:
- Click on your scheme dropdown (next to the run button in Xcode toolbar)
- Select “Manage Schemes…”
- You’ll see your default scheme listed — we’ll modify this in a moment
Create Development Scheme:
- Click the “+” button to add a new scheme
- Name it “MyApp (Development)” (or whatever makes sense for your app)
- Click “OK”
- Make sure “Shared” is checked (so your teammates get the same schemes)
Create Staging Scheme:
- Click “+” again
- Name it “MyApp (Staging)”
- Click “OK”
- Check “Shared”
Rename Production Scheme:
- Select your original scheme and click again with a small pause to Rename
- Rename it to “MyApp (Production)”
- Make sure “Shared” is checked
Step 2: Configure Each Scheme
Now comes the important part — telling each scheme which build configuration to use:
For Development Scheme:
- Select “MyApp (Development)” and click “Edit”
- In the left sidebar, click “Run”
- In the “Info” tab, set Build Configuration to “Debug”
- Click “Archive” in the sidebar
- Set Build Configuration to “Debug” (yes, Debug for archives too — this is for internal testing)
For Staging Scheme:
- Select “MyApp (Staging)” and click “Edit”
- Set “Run” Build Configuration to “Staging”
- Set “Archive” Build Configuration to “Staging”
For Production Scheme:
- Select “MyApp (Production)” and click “Edit”
- Set “Run” Build Configuration to “Release”
- Set “Archive” Build Configuration to “Release”
Step 3: Add Environment Arguments (Optional but Awesome!)
Here’s a cool trick that makes debugging even easier — let’s add launch arguments to each scheme:
For Development Scheme:
- Still in scheme editing, click “Run” → “Arguments” tab
- Under “Arguments Passed On Launch”, click “+”
- Add:
-dev-environment YES
For Staging Scheme:
- Add:
-staging-environment YES
For Production Scheme:
- Add:
-production-environment YES
These arguments can be read in your Swift code like this:
// You can use these for extra debugging or feature flags
let isDevelopment = UserDefaults.standard.bool(forKey: "dev-environment")
Step 4: Test Your Schemes
Time to see your hard work in action! 🎬
- Select “MyApp (Development)” from the scheme dropdown
- Build and run (⌘+R)
- Check the console output — you should see your development environment settings
- Switch to “MyApp (Staging)” and build again
- Notice the different app icon and bundle ID!
Pro Testing Tip: Install all three versions on your device by building each scheme. You’ll have three distinct apps that you can use simultaneously! 📱📱📱
Step 5: Make Your Life Even Easier
Here are some bonus configurations that’ll make you super productive:
Add Custom Build Pre-actions (Advanced):
- In scheme editing, expand “Build” in the sidebar
- Click “Pre-actions” → “+” → “New Run Script Action”
- Add a script that prints which environment you’re building:
echo "🚀 Building for ${CONFIGURATION} environment"Set Custom Working Directories: If your app reads local files differently per environment, you can set custom working directories in the “Run” → “Options” tab.
Step 6: Share With Your Team
Don’t forget to commit your scheme files! 📝
Your schemes are stored in .xcodeproj/xcshareddata/xcschemes/ and should be added to version control so your entire team benefits from this setup.
Quick Git Check:
git add YourProject.xcodeproj/xcshareddata/xcschemes/
git commit -m "Add environment-specific Xcode schemes"
Why This Setup Rocks! 🎸
- One-Click Environment Switching: No more manual configuration changes
- Visual Confirmation: Different icons make it obvious which environment you’re using
- Team Consistency: Everyone uses the same configurations
- Mistake Prevention: Hard to accidentally deploy wrong environment
- Debugging Paradise: Clear separation makes troubleshooting easier
In the next section, we’ll create a clean Configuration Manager that ties everything together and makes accessing your environment settings a breeze! 🌟
🧩 Creating a Configuration Manager
Now that your schemes and build configurations are locked in, it’s time to tie everything together into a clean, centralized system.
This is where all your environment settings — API URLs, flags, feature toggles, you name it — come together in one easy-to-use place.
A properly built Configuration Manager does three things:
- Keeps your codebase clean (no scattered
#if DEBUGchecks) - Makes onboarding teammates smoother
- Helps you sleep better knowing your production build isn’t hitting staging servers 😴
Let’s build a reusable system that’s as elegant as it is practical — and one your team will actually enjoy using.
Why We Need a Configuration Manager
Right now, our EnvironmentConfig is good, but we can make it even better. A proper Configuration Manager gives us:
- Centralized settings — one place for all environment logic
- Easy testing — mockable configurations for unit tests
- Runtime flexibility — ability to override settings when needed
- Better organization — logical grouping of related settings
Let’s build something that would make any iOS architect proud! 😎
Step 1: Create the Configuration Protocol
First, let’s define what any configuration should be able to do:
import Foundation

protocol ConfigurationProtocol {
    var apiBaseURL: String { get }
    var isLoggingEnabled: Bool { get }
    var analyticsKey: String { get }
    var isDebugMenuEnabled: Bool { get }
    var environmentName: String { get }

    // Network settings
    var apiTimeout: TimeInterval { get }
    var maxRetryAttempts: Int { get }

    // Feature flags
    var isFeatureXEnabled: Bool { get }
    var isBetaFeaturesEnabled: Bool { get }
}
Step 2: Create Environment-Specific Configurations
Now let’s create concrete implementations for each environment:
import Foundation

// MARK: - Development Configuration
struct DevelopmentConfiguration: ConfigurationProtocol {
    let apiBaseURL = "https://api-dev.myapp.com"
    let isLoggingEnabled = true
    let analyticsKey = "dev-analytics-key"
    let isDebugMenuEnabled = true
    let environmentName = "Development"

    // Network settings - more lenient for dev
    let apiTimeout: TimeInterval = 30.0
    let maxRetryAttempts = 3

    // Feature flags - enable experimental features
    let isFeatureXEnabled = true
    let isBetaFeaturesEnabled = true
}

// MARK: - Staging Configuration
struct StagingConfiguration: ConfigurationProtocol {
    let apiBaseURL = "https://api-staging.myapp.com"
    let isLoggingEnabled = true
    let analyticsKey = "staging-analytics-key"
    let isDebugMenuEnabled = false
    let environmentName = "Staging"

    // Network settings - production-like
    let apiTimeout: TimeInterval = 15.0
    let maxRetryAttempts = 2

    // Feature flags - only stable features
    let isFeatureXEnabled = true
    let isBetaFeaturesEnabled = false
}

// MARK: - Production Configuration
struct ProductionConfiguration: ConfigurationProtocol {
    let apiBaseURL = "https://api.myapp.com"
    let isLoggingEnabled = false
    let analyticsKey = "prod-analytics-key"
    let isDebugMenuEnabled = false
    let environmentName = "Production"

    // Network settings - optimized for performance
    let apiTimeout: TimeInterval = 10.0
    let maxRetryAttempts = 1

    // Feature flags - only proven features
    let isFeatureXEnabled = true
    let isBetaFeaturesEnabled = false
}
Step 3: Create the Configuration Manager
Here’s the star of the show — our Configuration Manager that intelligently picks the right configuration:
import Foundation

final class ConfigurationManager {

    // MARK: - Singleton
    static let shared = ConfigurationManager()
    private init() {}

    // MARK: - Current Configuration
    private(set) lazy var current: ConfigurationProtocol = {
        #if DEV_ENVIRONMENT
        return DevelopmentConfiguration()
        #elseif STAGING_ENVIRONMENT
        return StagingConfiguration()
        #else
        return ProductionConfiguration()
        #endif
    }()

    // MARK: - Override for Testing
    func setConfiguration(_ configuration: ConfigurationProtocol) {
        current = configuration
    }

    // MARK: - Reset to Default
    func resetToDefault() {
        #if DEV_ENVIRONMENT
        current = DevelopmentConfiguration()
        #elseif STAGING_ENVIRONMENT
        current = StagingConfiguration()
        #else
        current = ProductionConfiguration()
        #endif
    }

    // MARK: - Convenience Methods
    var isDebugEnvironment: Bool {
        #if DEV_ENVIRONMENT
        return true
        #else
        return false
        #endif
    }

    var isProductionEnvironment: Bool {
        #if PROD_ENVIRONMENT
        return true
        #else
        return false
        #endif
    }
}
Step 4: Create Convenience Extensions
Let’s make accessing configurations even easier:
import Foundation

// MARK: - Easy Access Extensions
extension ConfigurationManager {

    // Quick access to common settings
    var apiURL: String { current.apiBaseURL }
    var shouldLog: Bool { current.isLoggingEnabled }
    var environment: String { current.environmentName }

    // URL creation helper
    func apiURL(for endpoint: String) -> URL? {
        URL(string: current.apiBaseURL + endpoint)
    }

    // Logging helper
    func log(_ message: String, file: String = #file, function: String = #function, line: Int = #line) {
        guard current.isLoggingEnabled else { return }
        let fileName = (file as NSString).lastPathComponent
        print("🐛 [\(fileName):\(line)] \(function): \(message)")
    }
}

// MARK: - SwiftUI Preview Helper
#if DEBUG
extension ConfigurationManager {
    static var preview: ConfigurationManager {
        let manager = ConfigurationManager()
        manager.setConfiguration(DevelopmentConfiguration())
        return manager
    }
}
#endif
Step 5: Using Your Configuration Manager
Now you can use your configuration throughout your app like this:
// In your networking layer
let baseURL = ConfigurationManager.shared.apiURL

// For logging
ConfigurationManager.shared.log("User tapped login button")

// For feature flags
if ConfigurationManager.shared.current.isDebugMenuEnabled {
    // Show debug menu
}

// In SwiftUI previews
struct ContentView_Previews: PreviewProvider {
    static var previews: some View {
        ContentView()
            .environmentObject(ConfigurationManager.preview)
    }
}
This setup gives you incredible flexibility! You can easily test different configurations, and if you want to dive deeper into structuring scalable iOS apps, check out this comprehensive guide on modular architecture that shows how configuration management fits into larger app organization.
**How to Structure a Scalable iOS App with Modular Architecture** _Struggling with messy codebases and slow builds? Learn how modular architecture can make your iOS app scalable…_medium.comhttps://medium.com/swift-pal/how-to-structure-a-scalable-ios-app-with-modular-architecture-b0130da83bca
⚡ Advanced Tips & Tricks
Alright, you’ve got the basics down and your environment setup is looking professional! Now let’s talk about some advanced techniques that’ll make you look like the iOS configuration wizard on your team. These are the tips that separate the pros from the weekend warriors! 🧙♂️
Git & Team Collaboration Best Practices
What to Commit (and What NOT to!) 📝
Here’s what should go into version control:
- ✅ Your
.xcconfigfiles - ✅ Shared schemes (
.xcodeproj/xcshareddata/xcschemes/) - ✅ Asset catalogs with environment icons
- ✅ Configuration Swift files
Never commit these:
- ❌ Actual API keys or secrets (use placeholder values)
- ❌ Personal schemes (
.xcodeproj/xcuserdata/) - ❌ Environment-specific local overrides
Pro Team Setup: Create a Secrets.xcconfig file that's git-ignored and include it in your main configs:
#include "Secrets.xcconfig"

// Your regular settings here...
APP_DISPLAY_NAME = MyApp (Dev)
// API keys come from the included Secrets.xcconfig
CI/CD Integration Magic
GitHub Actions Example: Your environment setup plays beautifully with CI/CD! Here’s how to automatically build different environments:
# This is just a preview - your DevOps team will love this setup!
- name: Build Staging
  run: xcodebuild -scheme "MyApp (Staging)" -configuration Staging

- name: Build Production
  run: xcodebuild -scheme "MyApp (Production)" -configuration Release
Automatic Archive Naming: Add this to your schemes’ archive post-actions to get perfectly named builds:
# Automatically names your archives with environment and date
mv "${ARCHIVE_PATH}" "${ARCHIVE_PATH%.*}_${CONFIGURATION}_$(date +%Y%m%d).xcarchive"
Environment Detection at Runtime
Sometimes you need to know your environment at runtime (maybe for support tickets). Add this handy extension:
import Foundation

extension Bundle {
    var environmentName: String {
        return ConfigurationManager.shared.environment
    }

    var isDebugBuild: Bool {
        #if DEBUG
        return true
        #else
        return false
        #endif
    }

    var buildInfo: String {
        let version = infoDictionary?["CFBundleShortVersionString"] as? String ?? "Unknown"
        let build = infoDictionary?["CFBundleVersion"] as? String ?? "Unknown"
        return "\(environmentName) v\(version) (\(build))"
    }
}
Perfect for adding to your app’s About screen or crash reports! 📱
Feature Flag Integration
Your environment setup pairs perfectly with feature flags:
struct FeatureFlags {
    static var isNewUIEnabled: Bool {
        // Enable new UI in dev and staging for testing
        #if DEV_ENVIRONMENT || STAGING_ENVIRONMENT
        return true
        #else
        return UserDefaults.standard.bool(forKey: "new_ui_enabled")
        #endif
    }
}
Debug Menu for Internal Builds
Here’s a killer feature — add a debug menu that only shows in non-production builds:
// Only compile this in debug builds
#if DEV_ENVIRONMENT || STAGING_ENVIRONMENT
struct DebugMenuView: View {
    var body: some View {
        List {
            Section("Environment Info") {
                Text("Environment: \(ConfigurationManager.shared.environment)")
                Text("API URL: \(ConfigurationManager.shared.apiURL)")
                Text("Logging: \(ConfigurationManager.shared.shouldLog ? "Enabled" : "Disabled")")
            }

            Section("Actions") {
                Button("Clear User Defaults") { /* ... */ }
                Button("Reset Onboarding") { /* ... */ }
                Button("Simulate Network Error") { /* ... */ }
            }
        }
    }
}
#endif
Your QA team will absolutely love this! 🧪
If you’re interested in taking your iOS app architecture to the next level, this environment setup pairs beautifully with dependency injection patterns for even cleaner, more testable code.
**Dependency Injection in Swift: A Beginner-to-Advanced Guide** _🧪 Feeling tangled in singletons and tightly-coupled code? Learn how Dependency Injection in Swift can help you write…_medium.comhttps://medium.com/swift-pal/dependency-injection-in-swift-a-beginner-to-advanced-guide-b85378c6f8d2
Ready to learn about the common pitfalls that can trip you up? Let’s make sure you avoid the mistakes I’ve seen countless developers make! 🚨
🚨 Common Pitfalls & How to Avoid Them
Let’s be honest — even with a beautiful setup, it’s still shockingly easy to shoot yourself in the foot 🔫👣
These mistakes happen to everyone (yes, even the seasoned pros). So don’t stress — just learn from them and avoid the repeat. Here are the biggest environment gotchas I’ve seen in the wild, and how to steer clear 😅
Security Landmines 💣
The API Key Disaster This is the big one that keeps security teams awake at night:
// ❌ NEVER DO THIS - API keys visible in your repo!
API_KEY = sk_live_1234567890abcdef

// ✅ DO THIS INSTEAD - use placeholder values
API_KEY = REPLACE_WITH_ACTUAL_KEY
The Right Way to Handle Secrets:
- Use placeholder values in committed
.xcconfigfiles - Create a
**Secrets.xcconfig**file locally (git-ignored) - Include it in your main configs with
#include "Secrets.xcconfig" - Use CI/CD environment variables for automated builds
Production Bundle ID Leak: I’ve seen apps accidentally submitted with .dev or .staging bundle IDs. Your production .xcconfig should have an empty suffix:
// ❌ This will create com.yourapp.myapp.
BUNDLE_ID_SUFFIX = .

// ✅ This creates com.yourapp.myapp
BUNDLE_ID_SUFFIX =
Build Configuration Confusion 🤯
The “Wrong Scheme” Submission: Picture this: You’re rushing to submit your app, you build with the wrong scheme, and suddenly your production app is pointing to staging servers. Been there!
Prevention:
- Double-check your scheme before archiving
- Add a build phase script that validates your configuration:
if [ "${CONFIGURATION}" = "Release" ] && [[ "${PRODUCT_BUNDLE_IDENTIFIER}" == *".dev"* ]]; then
    echo "❌ ERROR: Production build with dev bundle ID!"
    exit 1
fi
The Case-Sensitive Trap: Xcode configurations are case-sensitive. Make sure your scheme configurations match exactly:
// Your .xcconfig filename: "Staging.xcconfig"
// Your build configuration name: "Staging" (not "staging" or "STAGING")
Team Synchronization Issues 👥
The “It Works on My Machine” Problem: When team members have different local configurations:
Solution:
- Always use shared schemes (check that “Shared” box!)
- Document your setup in your README
- Include setup scripts for new team members
Merge Conflict Nightmares: .xcconfig files can have tricky merge conflicts. Avoid this by:
- Keeping configs simple and well-commented
- Using consistent formatting
- Having one person own configuration changes when possible
Testing & Debugging Gotchas 🐛
SwiftUI Preview Issues: (Speaking of which, we should check your previews later! 😉)
Common preview problems with custom configurations:
- Previews default to Debug configuration — make sure your
#ifconditions handle this - Missing environment objects in preview code
- Configuration Manager not initialized in previews
Fix with a preview-safe configuration:
#if DEBUG
extension ConfigurationManager {
    static var preview: ConfigurationManager {
        let manager = ConfigurationManager()
        // Ensure preview always works
        manager.setConfiguration(DevelopmentConfiguration())
        return manager
    }
}
#endif
The Testing Database Disaster: Never point staging to production databases, even temporarily:
// ✅ Add safeguards in your configuration
struct StagingConfiguration: ConfigurationProtocol {
    let apiBaseURL = "https://api-staging.myapp.com"

    init() {
        // Compile-time safety check
        assert(!apiBaseURL.contains("api.myapp.com"),
               "Staging should never point to production!")
    }
}
Performance & Maintenance Traps ⚡
Over-Engineering the Configuration: Don’t go crazy with your setup. I’ve seen teams create 10+ environments. Start simple:
- Development (for daily coding)
- Staging (for QA and demos)
- Production (for real users)
Add more only when you have a clear need!
The Configuration Creep: Your .xcconfig files can become massive over time. Keep them organized:
// Group related settings with comments
// =================================
// App Identity
// =================================
APP_DISPLAY_NAME = MyApp (Dev)
BUNDLE_ID_SUFFIX = .dev

// =================================
// API Configuration
// =================================
API_BASE_URL = https://api-dev.myapp.com
API_TIMEOUT = 30
App Store & Distribution Issues 📱
TestFlight Confusion: Your testers might get confused with multiple builds. Use clear naming:
- Internal testing: “MyApp Dev Build”
- External testing: “MyApp Beta”
- Production: “MyApp”
Icon Approval Issues: App Store reviewers sometimes flag apps with “DEV” or “BETA” text on production icons. Make sure your production icon is clean!
Crash Report Chaos: Without proper environment tagging, production crashes get mixed with staging crashes. Always include environment info in your crash reporting:
// Add to your crash reporting setup
crashReporter.setCustomKey("environment", value: ConfigurationManager.shared.environment)
The Nuclear Reset Option 🚨
When everything goes wrong and your configurations are completely messed up:
- Clean build folder (⌘+Shift+K)
- Delete derived data (
~/Library/Developer/Xcode/DerivedData/) - Reset your schemes to default and start over
- Check your git history — revert configuration changes if needed
Remember, if you’re dealing with sensitive data in your configurations, this comprehensive security guide covers exactly how to handle API keys, certificates, and other secrets safely in iOS apps.
**Secure Coding in Swift: How to Protect iOS Apps with SSL Pinning, Keychain, and Obfuscation** _Learn how to secure your Swift code with proven practices like SSL pinning, Keychain storage, and obfuscation — no…_medium.comhttps://medium.com/swift-pal/secure-coding-in-swift-how-to-protect-ios-apps-with-ssl-pinning-keychain-and-obfuscation-28eb1c6a2d3a
Pro Tip: Always test your configuration setup with a fresh clone of your repo. If a new team member can’t get it running easily, your setup needs work!
🎯 Conclusion
Congratulations! 🎉 You’ve just built an environment management system so clean it would make even the pickiest senior iOS dev crack a smile. 😎
Take a second to appreciate what you’ve pulled off — this setup is more than just a dev convenience. It’s a sign your app is operating at a professional level.
🏗️ What You’ve Built
- ✅ Three distinct environments — dev, staging, and production — working seamlessly
- 🎨 Visual distinction with custom app icons (no more “oops, wrong app” moments!)
- 🧼 Type-safe configuration management using Swift compilation conditions
- 📈 Scalable architecture that grows with your project and team
- 🚀 A workflow that actually prevents those 2 AM production disasters
💼 The Real-World Impact
This isn’t just about cleaner code (though… that’s a pretty sweet bonus).
It’s about solving real problems that teams run into all the time:
- ⚡ Faster QA cycles — your testers don’t need to ask, “which API is this hitting?”
- 🛡 Safer deployments — no more “oh no… I was testing on production”
- 📊 Better client demos — staging builds that are stable and predictable
- 👋 Smoother onboarding — new devs get up and running fast
- 🐞 Fewer support tickets — no more mystery bugs caused by the wrong config
You’ve built a system your future self (and your entire team) will thank you for. 👏
Your Next Steps 🚀
Immediate Actions:
- Test your setup with all three schemes
- Install all environments on your device simultaneously
- Share with your team and get them set up
- Document any team-specific customizations
Level Up Your Skills: Want to take your iOS development even further? Here are natural next steps:
- Master networking patterns with this guide on building a clean and testable networking layer that pairs perfectly with your new environment setup
**URLSession in Swift: Build a Clean and Testable Networking Layer** _Tired of tangled networking code in your iOS apps? Learn how to build a clean, testable, and scalable networking layer…_medium.comhttps://medium.com/swift-pal/urlsession-in-swift-build-a-clean-and-testable-networking-layer-261f96a3df63
- Add comprehensive testing using unit testing best practices to ensure your configurations work correctly
**Unit Testing in Swift Made Easy: A Beginner’s Guide With Real Examples** _A beginner’s guide to Swift unit testing — learn the basics, write your first tests, and improve your code quality._medium.comhttps://medium.com/swift-pal/unit-testing-in-swift-made-easy-a-beginners-guide-with-real-examples-0409f65e84f6
- Scale your architecture with modular app organization techniques that build on these configuration fundamentals
**How to Structure a Scalable iOS App with Modular Architecture** _Struggling with messy codebases and slow builds? Learn how modular architecture can make your iOS app scalable…_medium.comhttps://medium.com/swift-pal/how-to-structure-a-scalable-ios-app-with-modular-architecture-b0130da83bca
🌟 The Bigger Picture
Environment management might not be flashy — but it’s essential. It’s one of those behind-the-scenes skills that quietly separates weekend projects from production-ready apps.
By setting this up, you didn’t just organize your code — you invested in your future self, your team, and your users.
Every time you switch environments with a dropdown instead of chasing down hardcoded URLs, you’ll remember: this was worth it. Every time your QA team catches a bug in staging (instead of production 😬), you’ll sleep a little easier.
🎉 Enjoyed this article? Your support means the world to me!
💬 Drop a comment below! I love hearing about your experiences and answering questions
🎬 Subscribe on Youtube and become early subscribers of my channel: https://www.youtube.com/@swift-pal
💼 Let’s connect on LinkedIn for more professional insights: https://www.linkedin.com/in/karan-pal
Happy coding! 🚀
New articles, straight to your inbox.
No spam, no filler — just new writing on iOS, the web, and AI when it ships. Unsubscribe anytime.
Keep reading
Your CPU Has More Cores Than Your Job Can Use
Some work splits cleanly across hundreds of cores. Other work is a chain of steps where every new step has to wait for the last one to finish.
ReadYour Password Isn’t as Random as You Think
Crack-time calculators measure the size of a theoretical password space—not how people actually choose passwords or how attackers search them.
Read