How Much SwiftUI Navigation Architecture Do You Actually Need? Build It Three Ways and Find Out
One app, three navigation architectures, one UI test suite. Fifteen out of fifteen requirements pass without a router, so what does architecture actually buy you?
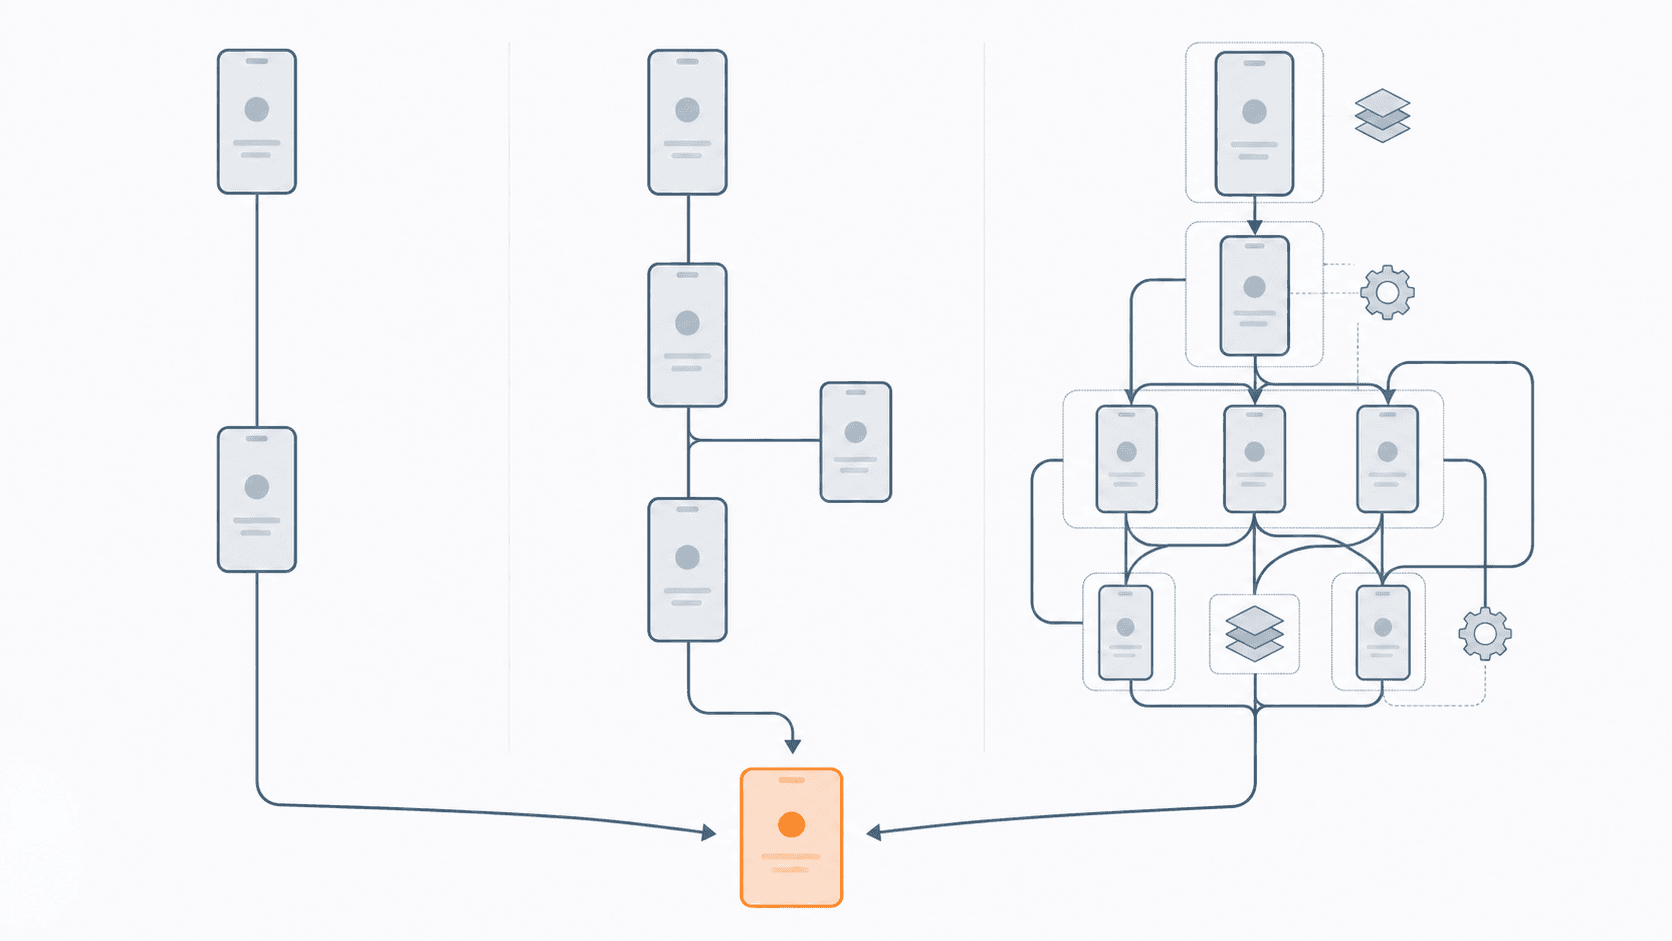
Every SwiftUI navigation article eventually sells you a Router. Or a Coordinator, or a NavigationManager, or some enum-plus-observable-object arrangement that promises to save you once your app "gets big". I have written one of those myself.
What none of them do is test the claim.
So this is a build-along. You will create one small app in Xcode and implement its navigation three times: once with no architecture at all, once with route enums, once with a shared observable manager. Then you will write a single UI test suite that describes what the app must do, point it at all three, and read the results.
The suite covers five things: push to a detail, get back to the root, open a deep link from a cold start, open a deep link into a screen that requires login and resume afterwards, and open a deep link that targets a different tab.
Here is the result, so you know where this is going:
requirement                                   tier1  tier2  tier3
R1  tap a row, land on detail                 PASS   PASS   PASS
R2  from detail, back to root of stack        PASS   PASS   PASS
R3  cold-start deep link to nested screen     PASS   PASS   PASS
R4  deep link into a gated screen, resume     PASS   PASS   PASS
R5  deep link targeting the other tab         PASS   PASS   PASS
Fifteen out of fifteen. The version with no router passes everything, including the two cases the literature uses to justify routers in the first place.
That does not mean architecture is worthless, and I will show you what it does buy. It does mean the usual argument for it is wrong, and by the end you will have a project on disk that proves it on your machine rather than mine.
What You'll Build
A small app with two tabs. The Feed tab lists articles, an article pushes a detail, the detail pushes an author screen that requires login. The Settings tab has an account screen. Deep links can land on any of them.
What You'll Learn
- How to register a
navlab://URL scheme, and why the generatedInfo.plistcannot express one on its own - How to handle a cold-start deep link with nothing but
@State - How to resume an interrupted flow after a login gate, in one property
- How to write UI tests that describe requirements instead of implementations, so the same suite runs against three different architectures
- Which requirement, if any, actually forces you to add a router
- Three traps that will cost you an afternoon: a silently corrupted navigation path, a name collision with SwiftUI itself, and a build error caused by adding a file to the wrong folder
Everything here was run on Xcode 26.6 and Swift 6.3.3, against the iOS 26.5 and iOS 18.3.1 simulators.
🛠 Step 1: Create the project
In Xcode: File ▸ New ▸ Project, then the iOS tab, then App.
The template chooser opens on Multiplatform, so switch to iOS first or you will get a multiplatform target you did not want.
On the options screen:
Product Name:              NavLab
Organization Identifier:   com.yourname
Interface:                 SwiftUI
Language:                  Swift
Storage:                   None
Host in CloudKit:          unchecked
Testing System:            XCTest for Unit and UI Tests
Testing System is the one that matters. It defaults to None, and if you leave it there you get no test targets at all. Pick XCTest, not Swift Testing: Swift Testing cannot drive UI tests. Xcode compiles UI test bundles with -module-alias Testing=_Testing_Unavailable, so @Test and #expect simply are not available there. XCUITest is XCTest-only.
Choosing XCTest gives you NavLabTests and NavLabUITests up front, which means there is no "add a test target" step later.
Before writing any code, look at what the template actually configured. Select the project, then the NavLab target, then Build Settings:
SWIFT_VERSION                   5.0
SWIFT_DEFAULT_ACTOR_ISOLATION   MainActor
SWIFT_APPROACHABLE_CONCURRENCY  YES
IPHONEOS_DEPLOYMENT_TARGET      26.5
Two of those are worth pausing on.
A brand new project in Xcode 26.6 is still on Swift 5 language mode, not Swift 6. And SWIFT_DEFAULT_ACTOR_ISOLATION is already set to MainActor, which means every type in your app is main-actor isolated unless you say otherwise. If you have done a Swift 6 migration you will recognise that setting as the one that removes most of the errors. New projects now start with it on.
The deployment target is pinned to the current SDK, so out of the box your app will not run on an iOS 18 simulator. Change it to 18.0. Real apps support older versions, and later you will want to run the same code on two OS versions to check whether something is a regression.
Delete ContentView.swift. We will not use it.
📦 Step 2: The screens you'll navigate between
Here is every file you will create, so you can see where each piece lands before you start typing:
NavLab/
  NavLabApp.swift      already exists, you will edit it
  Model.swift          domain types, deep link parsing, and the leaf screens
  Tier1.swift          navigation with no architecture
  Tier2.swift          navigation with route enums
  Tier3.swift          navigation with a shared manager
  Harness.swift        launch-argument reading and the onOpenURL hook
NavLabUITests/
  RequirementTests.swift
Step 4 adds one more file, an Info.plist, but you will not create that one by hand. Xcode writes it when you register the URL scheme.
Everything in this step goes in one new file, Model.swift, inside the NavLab folder.
One thing to know about modern Xcode projects before you add it: since Xcode 16, project folders are filesystem synchronized. Look in the project file and you will see PBXFileSystemSynchronizedRootGroup for each folder. Any file you drop into NavLab/ is automatically a member of the NavLab target. No dragging into the navigator, no target-membership checkbox.
// Model.swift
import SwiftUI

struct Article: Identifiable, Hashable {
    let id: Int
    let title: String
    let authorID: Int
}

struct Author: Identifiable, Hashable {
    let id: Int
    let name: String
}

enum Store {
    static let articles: [Article] = (1...10).map {
        Article(id: $0, title: "Article \($0)", authorID: 100 + ($0 % 3))
    }

    static func article(_ id: Int) -> Article? {
        articles.first { $0.id == id }
    }

    static func author(_ id: Int) -> Author {
        Author(id: id, name: "Author \(id)")
    }
}

@MainActor
@Observable
final class Session {
    var isLoggedIn = false
}
Article and Author are Hashable because that is what NavigationStack requires of anything you push.
Next, the tab enum. Same file.
// Model.swift (continued)
enum AppTab: Int, Hashable {
    case feed, settings
}
The name is deliberate. Tab itself is taken: since iOS 18 it is the SwiftUI view type you put inside a TabView. Shadow it with your own enum Tab and the file compiles on its own, then the TabView builder fails with errors that point at the TabView rather than at your enum:
Generic parameter 'Value' could not be inferred
Type 'Tab<Value, Content, Label>' has no member 'feed'
Worth knowing before you name the type, because the diagnostics send you to the wrong file.
Now the leaf screens, still in Model.swift. They take no navigation dependency at all, which is what keeps the three implementations comparable later.
// Model.swift (continued)
struct ArticleListScreen<Row: View>: View {
    let row: (Article) -> Row

    var body: some View {
        List(Store.articles) { article in
            row(article)
        }
        .navigationTitle("Feed")
        .accessibilityIdentifier("screen.feed")
    }
}

struct ArticleScreen<Link: View>: View {
    let article: Article
    let authorLink: () -> Link

    var body: some View {
        VStack(spacing: 16) {
            Text(article.title)
            authorLink()
        }
        .navigationTitle("Article")
        .accessibilityIdentifier("screen.article.\(article.id)")
    }
}

struct AuthorScreen: View {
    let author: Author

    var body: some View {
        Text(author.name)
            .navigationTitle("Author")
            .accessibilityIdentifier("screen.author.\(author.id)")
    }
}

struct AccountScreen: View {
    var body: some View {
        Text("Account")
            .navigationTitle("Account")
            .accessibilityIdentifier("screen.account")
    }
}
The accessibility identifiers are how the tests will find screens later. Add them now.
The login screen is the last piece of Model.swift, and it needs care because of two accessibility rules that will cost you time in Step 6 if you get them wrong:
// Model.swift (continued)
struct LoginScreen: View {
    let onLogin: () -> Void

    var body: some View {
        VStack {
            Text("Log in to continue")
                .accessibilityIdentifier("screen.login")
            Button("Log in", action: onLogin)
                .accessibilityIdentifier("button.login")
        }
        .navigationTitle("Log in")
    }
}
Two rules govern that layout, and both are silent when you break them.
Two .accessibilityIdentifier modifiers on the same element keep only the last one. And a container with a single child collapses, so an identifier on the container lands on that child and replaces the child's own. Label a lone button's enclosing VStack with screen.login and the element tree comes back as:
Button, identifier: 'screen.login', label: 'Log in'button.login no longer exists, and the test that looks for it fails with nothing in the build output to explain why. Give each identifier its own view, and make sure any container you label has more than one child.
🧭 Step 3: Navigation with no architecture at all
Create Tier1.swift. This is the version with nothing: no router, no route enum, no shared object.
// Tier1.swift
import SwiftUI

private struct LoginRoute: Hashable {}
struct AccountRoute: Hashable {}

struct Tier1Root: View {
    @State private var tab: AppTab = .feed
    @State private var feedPath = NavigationPath()
    @State private var settingsPath = NavigationPath()
    @State private var session = Session()
    @State private var pendingAuthor: Author?

    var body: some View {
        TabView(selection: $tab) {
            Tab("Feed", systemImage: "list.bullet", value: AppTab.feed) {
                NavigationStack(path: $feedPath) {
                    ArticleListScreen { article in
                        NavigationLink(value: article) {
                            Text(article.title)
                                .accessibilityIdentifier("row.article.\(article.id)")
                        }
                    }
                    .navigationDestination(for: Article.self) { article in
                        ArticleScreen(article: article) {
                            authorLink(for: article)
                        }
                    }
                    .navigationDestination(for: Author.self) { author in
                        AuthorScreen(author: author)
                    }
                    .navigationDestination(for: LoginRoute.self) { _ in
                        LoginScreen {
                            session.isLoggedIn = true
                            feedPath.removeLast()
                            if let pendingAuthor {
                                feedPath.append(pendingAuthor)
                                self.pendingAuthor = nil
                            }
                        }
                    }
                }
            }
            Tab("Settings", systemImage: "gear", value: AppTab.settings) {
                NavigationStack(path: $settingsPath) {
                    List {
                        NavigationLink("Account", value: AccountRoute())
                    }
                    .navigationTitle("Settings")
                    .accessibilityIdentifier("screen.settings")
                    .navigationDestination(for: AccountRoute.self) { _ in
                        AccountScreen()
                    }
                }
            }
        }
        .environment(session)
    }

    @ViewBuilder
    private func authorLink(for article: Article) -> some View {
        let author = Store.author(article.authorID)
        Button("See author") {
            if session.isLoggedIn {
                feedPath.append(author)
            } else {
                pendingAuthor = author
                feedPath.append(LoginRoute())
            }
        }
        .accessibilityIdentifier("button.author")
    }
}
The important bits:
One path per tab. Each NavigationStack gets its own NavigationPath in @State. Tabs that share a path fight each other, and every deep link you write later depends on being able to address a specific tab's stack.
Destinations are registered per concrete type. .navigationDestination(for: Article.self) says "whenever an Article lands in this path, build this screen". Push an Article value, get an article screen. This is what Apple's own documentation shows, and it is worth noticing that no enum is involved at all.
`Tab` carries its own `value:`. That is what TabView(selection:) binds against, and it is what lets a deep link switch tabs by assigning to tab later in Step 4.
`LoginRoute` and `AccountRoute` are empty structs whose only job is to be a distinct Hashable type you can push. When your destination carries no data, an empty type is enough.
Point NavLabApp.swift at it and run:
// NavLabApp.swift
@main
struct NavLabApp: App {
    var body: some Scene {
        WindowGroup {
            Tier1Root()
        }
    }
}
Tap a row, land on an article, hit back. That is R1 and R2 done, with zero architecture.
🔗 Step 4: Deep links and the URL scheme
Now the part everyone says needs a router.
First, parsing. Add this to Model.swift:
// Model.swift (continued)
enum DeepLink: Equatable {
    case article(Int)
    case author(articleID: Int)
    case account

    static func parse(_ url: URL) -> DeepLink? {
        guard url.scheme == "navlab" else { return nil }
        let parts = ([url.host()] + url.pathComponents.filter { $0 != "/" }).compactMap { $0 }

        if parts == ["account"] { return .account }

        guard parts.count >= 2, parts[0] == "article", let id = Int(parts[1]) else {
            return nil
        }
        if parts.count == 2 { return .article(id) }
        if parts.count == 3, parts[2] == "author" { return .author(articleID: id) }
        return nil
    }
}
Note url.host() with parentheses. That is the current method; the old url.host property is deprecated. And in navlab://article/7, "article" is the host, not a path component, which trips people up constantly.
Now register the scheme, which is where the generated Info.plist stops being enough.
Since Xcode 13, app templates ship with GENERATE_INFOPLIST_FILE = YES and no plist in the source tree. Xcode builds one from INFOPLIST_KEY_* build settings, and a fresh NavLab has five of them: scene manifest, launch screen, indirect input events, and the two orientation lists.
That covers scalars and string lists. CFBundleURLTypes is an array of dictionaries, and there is no INFOPLIST_KEY_ shape for it, so a URL scheme is the point at which you need a real file again.
You do not have to write that file by hand. Select the project, the NavLab target, then the Info tab.
The top of that tab, Custom iOS Target Properties, is the generated set rendered as a table: Bundle name, Bundle identifier, Application Scene Manifest, Launch Screen, the orientation arrays. You are not editing a file there, you are editing the settings Xcode builds the plist from.
Scroll to URL Types and click +. Fill in two fields:
Identifier:    com.yourname.NavLab
URL Schemes:   navlab
Role:          Editor
An Info.plist appears in NavLab/ in the navigator, and INFOPLIST_FILE = NavLab/Info.plist appears in Build Settings. Xcode keeps merging the generated keys on top of it, so the file only ever contains what the build settings cannot express.
There is a detail in how it does that which is worth knowing, because it explains an error you will hit if you ever add a plist by hand. NavLab/ is a synchronized folder, so everything in it is a target member, which for a plist means "copy me into the bundle as a resource". That would collide with INFOPLIST_FILE, which writes to the same path in the bundle:
error: Multiple commands produce '.../NavLab.app/Info.plist'Xcode avoids that by writing an exception into the project file:
PBXFileSystemSynchronizedBuildFileExceptionSet
    membershipExceptions = ( Info.plist )
    target = NavLab
That is the synchronized folder being told to exclude one file from membership. Create the plist through the Info tab and you get this for free. Create it by hand inside NavLab/ and you do not, and the build fails with an error that names the output rather than the cause.
For reference, all the URL Type entry amounts to is this:
<key>CFBundleURLTypes</key>
<array>
	<dict>
		<key>CFBundleURLName</key>
		<string>com.yourname.NavLab</string>
		<key>CFBundleURLSchemes</key>
		<array>
			<string>navlab</string>
		</array>
	</dict>
</array>
Now handle the URL. Add a modifier in a new Harness.swift:
// Harness.swift
import SwiftUI

extension View {
    func navLabHarness(_ open: @escaping (DeepLink) -> Void) -> some View {
        onOpenURL { url in
            guard let link = DeepLink.parse(url) else { return }
            open(link)
        }
    }
}
And the handler in Tier1Root:
// Tier1.swift (continued)
private func open(_ link: DeepLink) {
    switch link {
    case .article(let id):
        guard let article = Store.article(id) else { return }
        tab = .feed
        feedPath = NavigationPath()
        feedPath.append(article)

    case .author(let articleID):
        guard let article = Store.article(articleID) else { return }
        tab = .feed
        feedPath = NavigationPath()
        feedPath.append(article)
        let author = Store.author(article.authorID)
        if session.isLoggedIn {
            feedPath.append(author)
        } else {
            pendingAuthor = author
            feedPath.append(LoginRoute())
        }

    case .account:
        tab = .settings
        settingsPath = NavigationPath()
        settingsPath.append(AccountRoute())
    }
}
Writing open(_:) does nothing on its own. You have to attach the modifier, and it goes on the TabView itself, next to .environment(session) at the end of body:
// Tier1.swift (the end of body, from Step 3)
        }
        .environment(session)
        .navLabHarness { open($0) }
    }
Look at what a deep link turns out to be here. Set the tab, reset the path, append what you want on it. That is the whole mechanism. There is no coordination problem because there is nothing to coordinate with, and the same three lines handle the cross-tab case.
Run it, then from Terminal:
xcrun simctl openurl booted "navlab://article/7"The first time, iOS puts up an "Open in "NavLab"?" alert with Cancel and Open. Custom URL schemes are unverified, so the system asks before handing the URL over.

Tap Open and you land on Article 7.

Then it stops asking, and the way it stops is worth knowing. The decision is remembered per device, not per install: uninstall the app, reinstall it, fire the same URL, and it opens straight through with no prompt. Install the same build on a simulator that has never been asked and the alert is back.
That has two practical consequences. Your own testing will stop showing you the prompt after the first confirmation, so it is easy to forget it exists and ship a flow that assumes a clean jump. And every one of your users meets it once, on the link that matters most, which is usually the first one you ever send them.
If you want a link that opens your app with no interstitial at all, that is what Universal Links are for, and it is worth deciding before you build an onboarding flow on a custom scheme.
If the app comes to the front but stays on the list, the scheme is registered and the URL is reaching iOS, so the problem is on the SwiftUI side. In order of likelihood:
.navLabHarness { open($0) }is not attached, or is attached to a view that is not on screen at launch. It has to be on theTabView, not inside aNavigationStack.DeepLink.parsereturnednil. Innavlab://article/7, "article" is the host and "7" is the single path component. Put aprint(url)at the top of theonOpenURLclosure: if nothing prints, the modifier is not installed; if it prints and nothing happens, the parse is failing.- The destination is not registered. A value only pushes if some
.navigationDestination(for:)in that stack handles its type.
🔐 Step 5: The auth gate
This is the case people reach for when they argue for a coordinator, because it involves memory. A link points at the author screen, the user is logged out, so you have to divert them to login and then continue to the original destination once they authenticate.
You already wrote it. It is this:
// Tier1.swift (this property was added in Step 3)
@State private var pendingAuthor: Author?
Park the destination, push login, and on success pop the login screen and push what you parked. Look back at the .navigationDestination(for: LoginRoute.self) block in Step 3 and at the .author case above: between them that is the entire interrupted-flow mechanism.
One property. Not a coordinator.
🧪 Step 6: Tests that describe requirements, not implementations
Here is the trick that makes the rest of this article possible. The tests must not know which architecture they are driving.
So the app picks its implementation from a launch argument. Add to Harness.swift:
// Harness.swift (continued)
enum Harness {
    static var tier: Int {
        if let raw = value(for: "-tier"), let n = Int(raw) { return n }
        return 1
    }

    static var deepLink: DeepLink? {
        guard let raw = value(for: "-deeplink"), let url = URL(string: raw) else { return nil }
        return DeepLink.parse(url)
    }

    private static func value(for flag: String) -> String? {
        let args = ProcessInfo.processInfo.arguments
        guard let i = args.firstIndex(of: flag), i + 1 < args.count else { return nil }
        return args[i + 1]
    }
}
Extend the modifier so a launch-argument link is applied after first layout:
// Harness.swift (replaces the version earlier created)
extension View {
    func navLabHarness(_ open: @escaping (DeepLink) -> Void) -> some View {
        self
            .task {
                guard let link = Harness.deepLink else { return }
                try? await Task.sleep(for: .milliseconds(300))
                open(link)
            }
            .onOpenURL { url in
                guard let link = DeepLink.parse(url) else { return }
                open(link)
            }
    }
}
onOpenURL is the real path, the one simctl openurl exercises. The launch argument exists because a UI test needs to drive a cold start deterministically, and simctl openurl cannot do that: it needs the app already installed and running, and it puts up that confirmation alert.
Now the suite, in NavLabUITests/RequirementTests.swift:
// NavLabUITests/RequirementTests.swift
import XCTest

final class RequirementTests: XCTestCase {

    override func setUp() {
        continueAfterFailure = true
    }

    private func launch(tier: Int, deepLink: String? = nil) -> XCUIApplication {
        let app = XCUIApplication()
        app.launchArguments = ["-tier", String(tier)]
        if let deepLink {
            app.launchArguments += ["-deeplink", deepLink]
        }
        app.launch()
        return app
    }

    private func visible(_ app: XCUIApplication, _ id: String, timeout: TimeInterval = 5) -> Bool {
        app.descendants(matching: .any).matching(identifier: id).firstMatch
            .waitForExistence(timeout: timeout)
    }

    private func tap(_ app: XCUIApplication, _ id: String) -> Bool {
        let element = app.descendants(matching: .any).matching(identifier: id).firstMatch
        guard element.waitForExistence(timeout: 5) else { return false }
        element.tap()
        return true
    }

    private func acrossTiers(_ requirement: String, _ body: (Int) -> Bool) {
        var failures: [Int] = []
        for tier in 1...3 {
            let ok = body(tier)
            print("NAVLAB MATRIX \(requirement) tier\(tier) \(ok ? "PASS" : "FAIL")")
            if !ok { failures.append(tier) }
        }
        XCTAssertTrue(failures.isEmpty, "\(requirement) failed on tiers \(failures)")
    }

    func testR3_deepLinkToDetail() {
        acrossTiers("R3_deepLink") { tier in
            let app = launch(tier: tier, deepLink: "navlab://article/7")
            return visible(app, "screen.article.7")
        }
    }

    func testR4_deepLinkThroughAuthGate() {
        acrossTiers("R4_authGate") { tier in
            let app = launch(tier: tier, deepLink: "navlab://article/7/author")
            guard visible(app, "button.login") else { return false }
            guard tap(app, "button.login") else { return false }
            return visible(app, "screen.author.101")
        }
    }
}
Two decisions in there earned their place.
`continueAfterFailure = true`, and results collected rather than thrown. If tier 1 fails and the run stops, you learn nothing, because a red cell on tier 1 only means something if you can see tiers 2 and 3. Collecting the whole matrix is what makes the comparison readable.
Every requirement runs on all three tiers inside one test method. This gives you a free invariant: the tiers differ only in navigation architecture, so anything failing on all three is a bug in your shared code or your test, never a finding about architecture. That rule caught three of my own mistakes while building this.
Write R1, R2 and R5 the same way: tap a row and check the detail, tap back and check the feed, deep link to navlab://account and check the account screen.
That is the finished suite. You will not touch it again: it already loops all three tiers, so Steps 7 and 8 add implementations without changing a single test. That is the whole point of describing requirements rather than implementations.
Do not run it yet, though. Harness.tier reads the launch argument, but NavLabApp still returns Tier1Root() unconditionally until the end of Step 8. Run the suite now and you get fifteen green cells that all say "tier 1", three times over. Wire the switch first, then run.
🔁 Step 7: The same app with route enums
Create Tier2.swift. Each stack now gets one enum covering its destinations, so there is a single .navigationDestination per stack instead of one per type.
Here is the whole file:
// Tier2.swift
import SwiftUI

enum FeedRoute: Hashable {
    case article(Article)
    case author(Author)
    case login
}

enum SettingsRoute: Hashable {
    case account
}

struct Tier2Root: View {
    @State private var tab: AppTab = .feed
    @State private var feedPath: [FeedRoute] = []
    @State private var settingsPath: [SettingsRoute] = []
    @State private var session = Session()
    @State private var pendingAuthor: Author?

    var body: some View {
        TabView(selection: $tab) {
            Tab("Feed", systemImage: "list.bullet", value: AppTab.feed) {
                NavigationStack(path: $feedPath) {
                    ArticleListScreen { article in
                        NavigationLink(value: FeedRoute.article(article)) {
                            Text(article.title)
                                .accessibilityIdentifier("row.article.\(article.id)")
                        }
                    }
                    .navigationDestination(for: FeedRoute.self) { route in
                        destination(route)
                    }
                }
            }
            Tab("Settings", systemImage: "gear", value: AppTab.settings) {
                NavigationStack(path: $settingsPath) {
                    List {
                        NavigationLink("Account", value: SettingsRoute.account)
                    }
                    .navigationTitle("Settings")
                    .accessibilityIdentifier("screen.settings")
                    .navigationDestination(for: SettingsRoute.self) { _ in
                        AccountScreen()
                    }
                }
            }
        }
        .environment(session)
        .navLabHarness { open($0) }
    }

    @ViewBuilder
    private func destination(_ route: FeedRoute) -> some View {
        switch route {
        case .article(let article):
            ArticleScreen(article: article) {
                Button("See author") { showAuthor(of: article) }
                    .accessibilityIdentifier("button.author")
            }
        case .author(let author):
            AuthorScreen(author: author)
        case .login:
            LoginScreen {
                session.isLoggedIn = true
                feedPath.removeLast()
                if let pendingAuthor {
                    feedPath.append(.author(pendingAuthor))
                    self.pendingAuthor = nil
                }
            }
        }
    }

    private func showAuthor(of article: Article) {
        let author = Store.author(article.authorID)
        if session.isLoggedIn {
            feedPath.append(.author(author))
        } else {
            pendingAuthor = author
            feedPath.append(.login)
        }
    }

    private func open(_ link: DeepLink) {
        switch link {
        case .article(let id):
            guard let article = Store.article(id) else { return }
            tab = .feed
            feedPath = [.article(article)]

        case .author(let articleID):
            guard let article = Store.article(articleID) else { return }
            tab = .feed
            let author = Store.author(article.authorID)
            if session.isLoggedIn {
                feedPath = [.article(article), .author(author)]
            } else {
                pendingAuthor = author
                feedPath = [.article(article), .login]
            }

        case .account:
            tab = .settings
            settingsPath = [.account]
        }
    }
}
Three things changed from tier 1, and nothing else did.
One `.navigationDestination` per stack instead of one per type, with a @ViewBuilder switching on the route.
The login completion appends `.author(pendingAuthor)` rather than the bare Author value, because the path is now typed as [FeedRoute].
Deep links assign whole stacks. Compare feedPath = [.article(article), .login] here against tier 1, where the same thing took a reset plus two appends. That is the payoff below.
[FeedRoute] instead of NavigationPath is a real upgrade and it costs nothing. A typed array is inspectable: you can read feedPath.last, pattern match on it, or write feedPath = [.article(a), .login] to construct a whole stack in one statement. NavigationPath is type-erased and you cannot look inside it.
Use NavigationPath when a stack genuinely holds mixed types. Use a typed array the rest of the time.
🏗 Step 8: The same app with a shared manager
Create Tier3.swift. Now navigation state moves into one observable object.
// Tier3.swift
@MainActor
@Observable
final class NavigationManager {
    var tab: AppTab = .feed
    var feedPath: [FeedRoute] = []
    var settingsPath: [SettingsRoute] = []

    private var pendingAuthor: Author?

    func push(_ route: FeedRoute) {
        feedPath.append(route)
    }

    func pop() {
        guard !feedPath.isEmpty else { return }
        feedPath.removeLast()
    }

    func showAuthor(of article: Article, session: Session) {
        let author = Store.author(article.authorID)
        if session.isLoggedIn {
            push(.author(author))
        } else {
            pendingAuthor = author
            push(.login)
        }
    }

    func completeLogin(session: Session) {
        session.isLoggedIn = true
        pop()
        if let pendingAuthor {
            push(.author(pendingAuthor))
            self.pendingAuthor = nil
        }
    }

    func open(_ link: DeepLink, session: Session) {
        switch link {
        case .article(let id):
            guard let article = Store.article(id) else { return }
            tab = .feed
            feedPath = [.article(article)]

        case .author(let articleID):
            guard let article = Store.article(articleID) else { return }
            tab = .feed
            feedPath = [.article(article)]
            showAuthor(of: article, session: session)

        case .account:
            tab = .settings
            settingsPath = [.account]
        }
    }
}
And the view, in the same file, holding the manager instead of five separate pieces of state:
// Tier3.swift (continued)
struct Tier3Root: View {
    @State private var nav = NavigationManager()
    @State private var session = Session()

    var body: some View {
        TabView(selection: $nav.tab) {
            Tab("Feed", systemImage: "list.bullet", value: AppTab.feed) {
                NavigationStack(path: $nav.feedPath) {
                    ArticleListScreen { article in
                        Button {
                            nav.push(.article(article))
                        } label: {
                            Text(article.title)
                                .accessibilityIdentifier("row.article.\(article.id)")
                        }
                    }
                    .navigationDestination(for: FeedRoute.self) { route in
                        destination(route)
                    }
                }
            }
            Tab("Settings", systemImage: "gear", value: AppTab.settings) {
                NavigationStack(path: $nav.settingsPath) {
                    List {
                        NavigationLink("Account", value: SettingsRoute.account)
                    }
                    .navigationTitle("Settings")
                    .accessibilityIdentifier("screen.settings")
                    .navigationDestination(for: SettingsRoute.self) { _ in
                        AccountScreen()
                    }
                }
            }
        }
        .environment(session)
        .environment(nav)
        .navLabHarness { nav.open($0, session: session) }
    }

    @ViewBuilder
    private func destination(_ route: FeedRoute) -> some View {
        switch route {
        case .article(let article):
            ArticleScreen(article: article) {
                Button("See author") { nav.showAuthor(of: article, session: session) }
                    .accessibilityIdentifier("button.author")
            }
        case .author(let author):
            AuthorScreen(author: author)
        case .login:
            LoginScreen { nav.completeLogin(session: session) }
        }
    }
}
$nav.tab and $nav.feedPath give you bindings straight to properties on the object, which is what lets TabView and NavigationStack write back into it.
Notice the feed rows changed from NavigationLink(value:) to a plain Button calling nav.push. Once the manager owns the path, pushes go through it rather than around it, which is the point of having it. The FeedRoute and SettingsRoute enums are reused from Tier2.swift, so do not redeclare them.
Now wire the app entry point to switch on the launch argument. Until you do this, the tests have no way to reach tiers 2 and 3, and the whole comparison is measuring tier 1 three times.
// NavLabApp.swift (replaces the version from Step 3)
@main
struct NavLabApp: App {
    var body: some Scene {
        WindowGroup {
            switch Harness.tier {
            case 2: Tier2Root()
            case 3: Tier3Root()
            default: Tier1Root()
            }
        }
    }
}
📊 Step 9: Run it
Press ⌘U.
NAVLAB MATRIX R1_push        tier1 PASS  tier2 PASS  tier3 PASS
NAVLAB MATRIX R2_backToRoot  tier1 PASS  tier2 PASS  tier3 PASS
NAVLAB MATRIX R3_deepLink    tier1 PASS  tier2 PASS  tier3 PASS
NAVLAB MATRIX R4_authGate    tier1 PASS  tier2 PASS  tier3 PASS
NAVLAB MATRIX R5_crossTab    tier1 PASS  tier2 PASS  tier3 PASS
Quick sanity check before you trust that grid: break one tier on purpose. Comment out the .navLabHarness line in Tier2Root, run again, and R3 through R5 should go red for tier 2 only. If all three columns move together, the switch in NavLabApp is not wired and you are testing the same implementation three times.
For R4 the harness logs both halves separately, so a lucky pass cannot hide a broken one:
NAVLAB R4 tier1 detouredToLogin=true
NAVLAB R4 tier1 resumedToTarget=true
Fifteen out of fifteen. The two arguments you have read a hundred times, that deep linking needs a router and that cross-tab navigation needs a router, do not survive contact with a test.
Now count what each version cost. Navigation code only, comments and blanks excluded:
tier   what it is                                              sloc
1      no architecture: @State paths, per-type destinations      94
2      enum routes per stack, still @State paths                 98
3      shared @Observable NavigationManager                     117
Twenty-three lines. That is the entire price of the manager over having nothing, which was not the result I expected. "It is too much code" turns out to be the wrong objection.
The right objection shows up when you ask a duller question: which parts of the manager does the app ever call?
When I first wrote tier 3 I gave it everything the usual article gives it, including popToRoot, a history array, a breadcrumb string and a canGoBack flag. Then I grepped for call sites. Exactly one of the seven public members was ever called from a view. The breadcrumb is the one that stings: it builds a tidy Feed › Article 3 › Author 101 string, it was satisfying to write, and no screen in the app has ever displayed a breadcrumb.
So delete them, and run the suite again without touching a single test:
Tier3 before   117 sloc     15/15 PASS
Tier3 after    101 sloc     15/15 PASS
Sixteen lines gone and the app cannot tell.
⚖️ What the manager does buy
I am not going to tell you never to use one, because that is not what the tests say. They say none of these five requirements forces the upgrade, which is a narrower claim and the honest one.
Tier 3 buys something real, and you can see it in the diff rather than the results. showAuthor(of:session:) is a method on a plain object. You can call it from a unit test with no simulator and no view hierarchy. In tier 1 the same logic lives in a closure inside a Button inside a @ViewBuilder, and the only way to reach it is to drive the interface.
If your navigation involves real decisions, entitlement checks, onboarding stages that depend on server state, A/B routing, then having those decisions in something you can call directly is worth more than sixteen lines.
"It scales" is not a reason. It is a prediction, and mine was wrong by five members out of seven.
⚠️ Three traps
Mixing link styles silently corrupts your path. If a stack has a bound path, every push in it must go through that path. This one is worth reproducing rather than taking on trust, so add a scratch file, MixedLinks.swift, and point NavLabApp at it with -tier 4:
// MixedLinks.swift
import SwiftUI

struct MixedLinksRoot: View {
    @State private var path: [String] = []

    var body: some View {
        NavigationStack(path: $path) {
            VStack {
                Text("Root").accessibilityIdentifier("screen.mixedRoot")
                NavigationLink("Go to A", value: "A")
                    .accessibilityIdentifier("link.A")
                Text("path=\(path.count)")
            }
            .navigationTitle("Root")
            .navigationDestination(for: String.self) { _ in screenA }
        }
    }

    private var screenA: some View {
        VStack {
            Text("A").accessibilityIdentifier("screen.A")
            // Deliberately the old style: this pushes a view directly and
            // never touches the bound path.
            NavigationLink("Go to B") { screenB }
                .accessibilityIdentifier("link.B")
            Text("path=\(path.count)")
        }
        .navigationTitle("A")
    }

    private var screenB: some View {
        VStack {
            Text("B").accessibilityIdentifier("screen.B")
            Text("path=\(path.count)")
                .accessibilityIdentifier("label.bPath")
            Button("removeLast") {
                if !path.isEmpty { path.removeLast() }
            }
            .accessibilityIdentifier("button.removeLast")
        }
        .navigationTitle("B")
    }
}
Walk Root to A to B, and the label on B reads path=1 while you are three screens deep. Tap removeLast and you land on Root, not on A:
path while on the third screen : 1
after removeLast()             : landed on root, not the second screen
The destination-based link pushes a screen without putting anything in the path, so the path undercounts what is on screen, and removing its single element unwinds past the screen you meant to keep. Every removeLast and pop-to-root built on that path is wrong by however many old-style links are in the stack. Nothing warns you.
`enum Tab` shadows SwiftUI's `Tab`. Covered in Step 2. The errors point at the wrong file.
Check your OS version before rearchitecting. There is a report on the Apple developer forums that on iOS 26.1 a NavigationStack(path:) inside a secondary Tab ignores programmatic pushes, which would break the one-path-per-tab pattern and every deep link that relies on it. A DTS engineer asked for a test project and no fix was posted in the thread.
I built a harness for it that uses the destination view's onAppear as the signal, so the answer is machine-checkable rather than something I squint at, and ran the three interesting cases:
case                       what it does                                       26.5    18.3.1
A_push_in_selected_tab     append to the on-screen tab's path                 PASS    PASS
B_select_then_push         switch to tab 2, then append to its path           PASS    PASS
C_push_then_select         append to tab 2's path while tab 1 is on screen,
                           then switch to tab 2  (the reported failure)       PASS    PASS
I do not have the 26.1 runtime installed, so I am not going to claim Apple fixed it in a specific release. It does not reproduce on 26.5 or on 18.3.1. If you are hitting it, test on a current OS before you redesign anything.
🧯 Why you cannot trust a UI test that agrees with you
A comparison like this is only worth reading if the measurements are sound, so it is worth saying how this suite is built to catch itself lying.
The dangerous failure in UI testing is not a red cell. It is a green one, or a red one that confirms what you already believed.
Take the pop test from the previous section. It reported that removeLast() popped two screens, which is exactly the expected answer. It was also meaningless: every tap in that run had failed, the app never left the root screen, and "we ended up on the root" is indistinguishable from "we were unwound all the way back" if you never confirm you left it in the first place. The assertion was reading a state the app had never moved out of.
The fix is a rule worth applying to any UI test that asserts a destination: prove you departed before you assert where you arrived.
guard tap(app, "link.A"), visible(app, "screen.A"),
      tap(app, "link.B"), visible(app, "screen.B") else {
    XCTFail("setup failed: never reached B, so no pop can be measured")
    return
}
The tier matrix gives you a second safety net for free. The three implementations differ only in navigation architecture, so any requirement that fails on all three is measuring your harness, not the architecture. That is why the suite collects every cell instead of stopping at the first failure: a red cell on tier 1 tells you nothing until you can see tiers 2 and 3 beside it.
One tooling note, since it will waste your afternoon otherwise. Dumping app.debugDescription on failure can crash AccessibilityControlsExtension with EXC_BREAKPOINT. Xcode surfaces that as "Restarting after unexpected exit, crash, or test timeout" and attributes it to your test, while the app itself is running perfectly. Launch the app by hand under simctl before you go hunting for a crash you do not have.
🎯 What to actually do
Start with @State and .navigationDestination. It is not a stepping stone, it is a real answer that passes every requirement in this article.
Move to a typed route array when a stack has enough destinations that the per-type modifiers get noisy. I did not test where that point is, so I am not going to hand you a number and pretend I measured it.
Move navigation into an object when you have navigation decisions worth testing without the UI. Not when the app gets big. Size is not the trigger.
And whatever you build, grep it for its own method names and count the call sites. Mine had one.
Run it yourself
xcrun simctl openurl booted "navlab://article/7"⌘U runs all five requirements against all three implementations. Change one tier, run the suite, and the matrix tells you immediately whether the change mattered to anything a user can see.
New articles, straight to your inbox.
No spam, no filler — just new writing on iOS, the web, and AI when it ships. Unsubscribe anytime.
Keep reading
Your CPU Has More Cores Than Your Job Can Use
Some work splits cleanly across hundreds of cores. Other work is a chain of steps where every new step has to wait for the last one to finish.
ReadYour Password Isn’t as Random as You Think
Crack-time calculators measure the size of a theoretical password space—not how people actually choose passwords or how attackers search them.
Read